


85
Installing the Heat Sink(s)
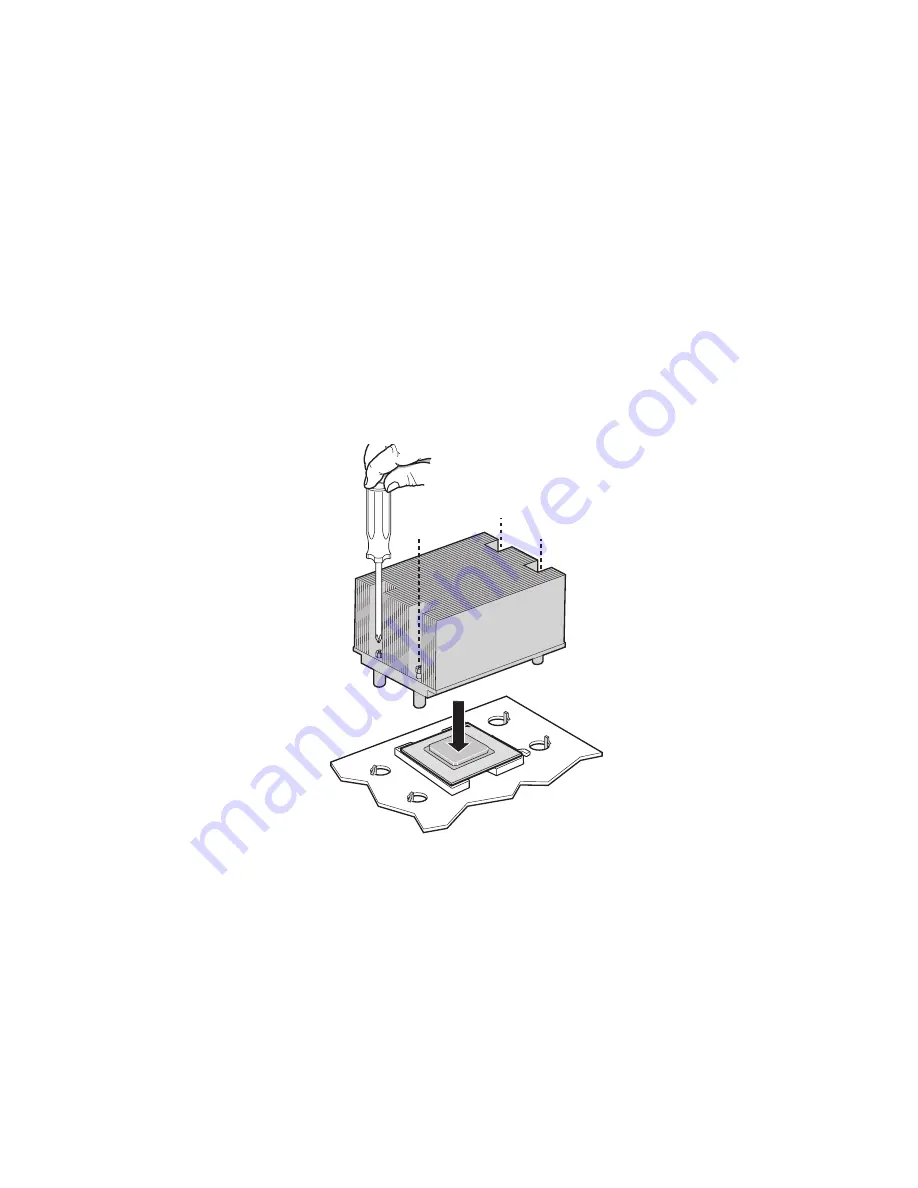
1
The heat sink has Thermal Interface Material (TIM) located on the
bottom of it. Use caution when you unpack the heat sink so you do
not damage the TIM.
2
Set the heat sink over the processor, lining up the four captive
screws with the four posts surrounding the processor.
3
Loosely screw in the captive screws on the heat sink corners in a
diagonal manner (screw in one screw, then the screw located
diagonally to the first screw). Do not fully tighten one screw
before tightening another.
4
Gradually and equally tighten each captive screw until each is
firmly tightened. Do not over-tighten the screws.
5
Reinstall and reconnect any parts you removed or disconnected to
reach the processor sockets.
6
Replace the server’s cover and reconnect the AC power cord. See
the documentation that accompanied your server chassis for
instructions on installing the server’s cover.
Summary of Contents for Altos R510
Page 1: ...Acer Altos R510 User s Guide ...
Page 12: ......
Page 13: ...1 System information ...
Page 19: ...2 System tour ...
Page 35: ...3 Getting Started ...
Page 36: ...This chapter gives information on setting up and starting to use your system ...
Page 40: ...3 Getting Started 28 ...
Page 41: ...4 Configuring the system ...
Page 104: ...4 Configuring the system 92 ...
Page 105: ...5 BIOS setup ...
Page 154: ...5 BIOS setup 142 ...
Page 155: ...6 Troubleshooting ...
Page 168: ...6 Troubleshooting 156 ...
Page 169: ...Appendix A Management software installation ...
Page 170: ...This appendix shows you how to install the ASM software packages ...
Page 174: ...Appendix A Management software installation 162 ...
Page 175: ...Appendix B Tool less rail kit installation ...
Page 187: ...Appendix C Sensor Table ...
Page 188: ...This appendix shows you the Altos R510 sensor table details ...
Page 191: ...Appendix D SATA RAID Configuration ...
Page 192: ...This appendix shows you how to create SATA RAID ...
Page 196: ...Appendix D SATA RAID Configuration 184 ...
Page 198: ...186 ...


