


4 Working Inside Your Server
52
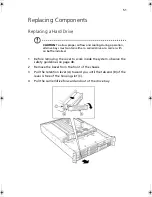
5
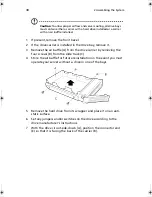
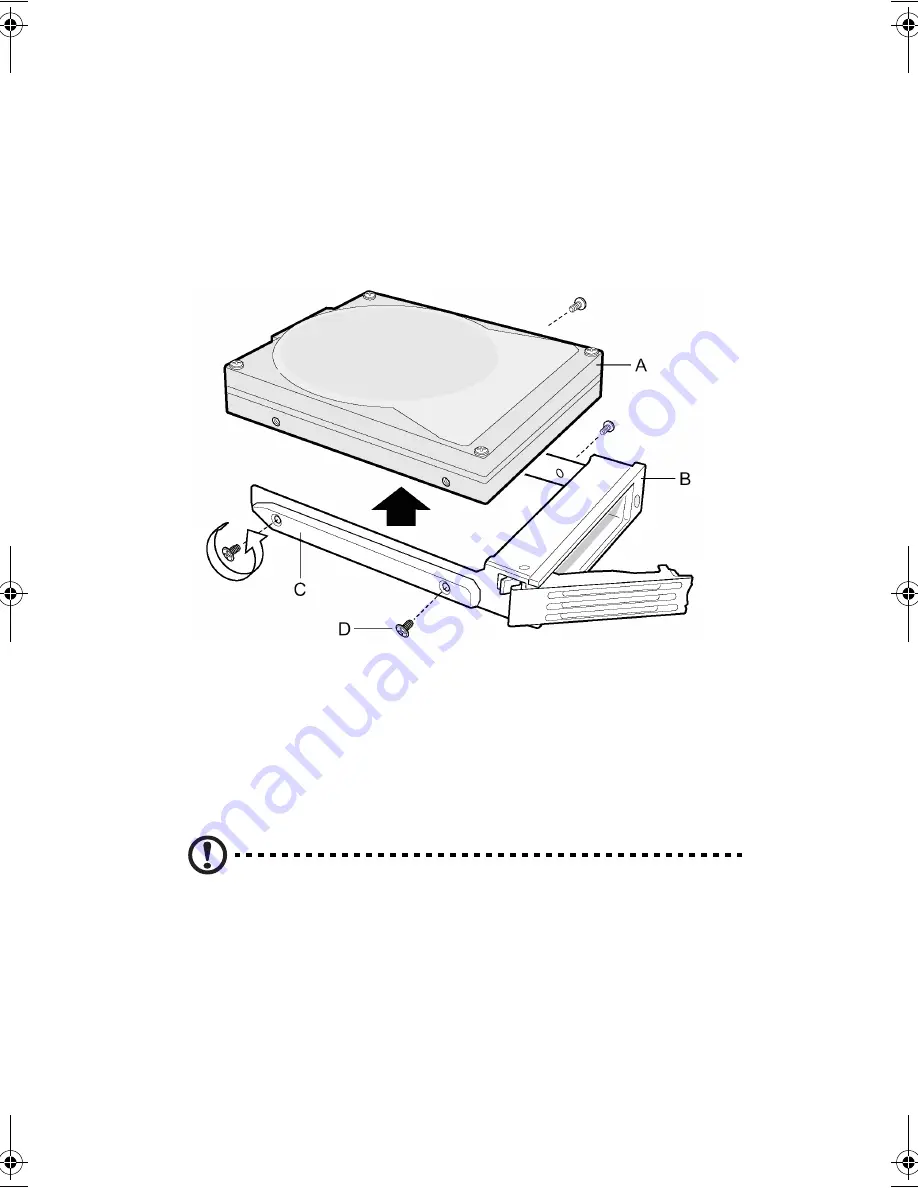
Remove the hard drive from the carrier (A) by removing the four
screws (D) from the slide track (C). Lift the drive out of the carrier
(B).
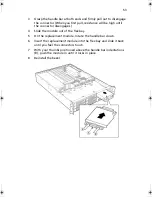
6
Remove the new hard drive from its wrapper and place it on an
anti-static surface.
7
Set any jumpers and/or switches on the drive according to the
drive manufacturer’s instructions.
8
Install the new drive in the carrier and the carrier/drive into the
drive bay (see “Installing a Hard Drive” on page 37).
9
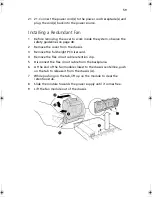
Reinstall a carrier/air baffle in any bays where you are not
reinstalling a carrier/drive.
Replacing a DVD/CD-ROM drive/FDD Module
CAUTION:
A DVD/CD-ROM drive/FDD module is NOT hot
swappable. Before replacing it, you must first take the server out
of service, turn off all peripheral devices connected to the system,
turn off the system by pressing the power button, and unplug the
AC power cord from the system or wall outlet.
1
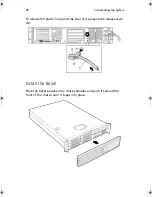
Remove the bezel from the front of the chassis.
2
Rotate the handle bar (A) up about ¼-inch (6-mm) to unlatch the
module from the bay.
AR700-e.book Page 52 Tuesday, September 10, 2002 2:31 PM
Summary of Contents for Altos R700 Series
Page 1: ...Altos R700 Chassis Subassembly Product guide...
Page 9: ...1 Chassis Description...
Page 22: ...1 Chassis Description 14...
Page 23: ...2 Assembling the System...
Page 51: ...3 Installing the System in a Rack...
Page 54: ...3 Installing the System in a Rack 46...
Page 55: ...4 Working Inside Your Server...
Page 75: ...Appendix A Equipment Log and Worksheets...
Page 77: ...69 DAT TApe Drive Item Manufacturer Name and Model Name Serial Number Date Installed...


