


1 Description
20
•
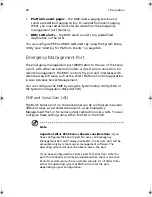
Platform event pages
-- the BMC dials a paging service and
sends a predefined paging string. To use platform event paging
(PEP), you must attach an external modem to the emergency
management port (Serial 2).
•
BMC LAN alerts
-- the BMC sends an alert to a predefined
destination on the LAN.
You can configure PEP and BMC LAN alerts by using the System Setup
Utility (see “Alerting for Platform Events” on page 68).
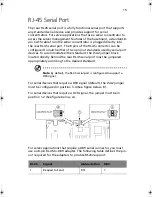
Emergency Management Port
The emergency management port (EMP) refers to the use of the Serial
2 port, with either an external modem or direct serial connection, for
remote management. The BMC controls the port and interfaces with
remote access software, such as the Direct Platform Control application
in Acer Advance Server Management.
You can configure the EMP by using the System Setup Utility (SSU) or
the System Configuration Wizard (SCW).
EMP and Serial Over LAN
The RJ-45 Serial 2 port on the back panel can be configured in several
different ways: as a standard serial port, as an Emergency
Management Port, or for serial output redirection over a LAN. You can
configure these settings using either the SSU or the SCW.
Note
:
Important Altos R700 Server Chassis considerations
: If you
have configured the Serial 2 port for use as an Emergency
Management Port and “always available”, the Serial 2 port will be
accessible only by remote server management software. The
operating system will never be able to access the port.
If you have configured the Serial 2 port for Serial Over LAN, the
port’s functionality will only be impacted when there is an active
Serial Over LAN session from a remote console. At all other times
either the operating system or EMP will control the port,
depending on your configuration.
BS811.f/cppl!!Qbhf!31!!Uvftebz-!Opwfncfs!37-!3113!!21;19!BN
Summary of Contents for Altos R700 Series
Page 1: ...Altos R700 Series User s guide ...
Page 10: ...x ...
Page 11: ...1 Description ...
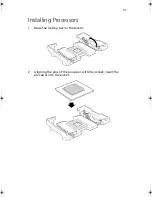
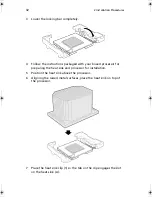
Page 37: ...2 Installation Procedures ...
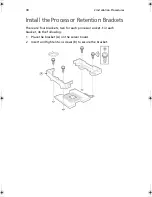
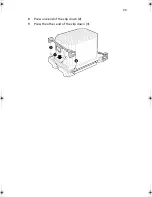
Page 43: ...33 8 Press one end of the clip down 2 9 Press the other end of the clip down 3 ...
Page 48: ...2 Installation Procedures 38 ...
Page 49: ...3 Upgrading ...
Page 54: ...3 Upgrading 44 ...
Page 55: ...4 Configuration Software and Utilities ...
Page 56: ...4 Configuration Software and Utilities 46 ...
Page 63: ...53 4 Press Enter 5 The boot process continues When finished a system prompt displays ...
Page 90: ...4 Configuration Software and Utilities 80 ...
Page 91: ...5 Solving Problems ...
Page 94: ...5 Solving Problems 84 hardware and operating system list on the Acer Customer Support website ...
Page 105: ...6 Technical Reference ...
Page 106: ...6 Technical Reference 96 ...
Page 124: ...6 Technical Reference 114 ...
Page 125: ...Appendix A Equipment Log and Power Consumption Worksheets ...
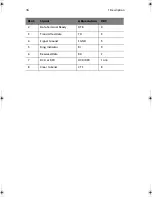
Page 127: ...117 Hard Disk Drive 5 Item Manufacturer Name and Model Name Serial Number Date Installed ...
Page 132: ...Appendix A Equipment Log and Power Consumption Worksheets 122 ...


