


4 Configuration Software and Utilities
52
BIOS Setup
You can run BIOS Setup with or without an operating system being
present. BIOS Setup stores most of the configuration values in battery-
backed CMOS; the rest of the values are stored in flash memory. The
values take effect when the system is booted. POST uses these values to
configure the hardware. If the values and the actual hardware do not
agree, POST generates an error message.
Record BIOS Setup Settings
Record your BIOS Setup settings. If default values ever need restoring
(after a CMOS clear, for example), you must run BIOS Setup again. Your
record will make this much easier.
If BIOS Setup Is Inaccessible
If you have a misconfigured diskette drive, and you cannot use BIOS
Setup to correct the problem, you might need to clear CMOS memory.
To clear CMOS, either of two methods can be used.
1
Press the reset button and hold it down for four seconds or more,
and then, while holding the reset button down, press the power
button. Release both buttons at the same time.
2
Move the Clear CMOS jumper found on the configuration jumper
block on the baseboard.
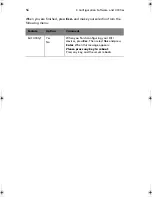
Temporarily Changing the Boot Device Priority
During POST, you can change the boot device priority for the current
boot process. The changes are not saved for the next boot process.
1
Boot the server.
2
At any time during POST, press <Esc>. When POST completes, a
popup Boot menu displays.
3
Use the arrow keys to highlight the device you want the server
system to boot from first. For example, if you want the server
system to boot from the CD-ROM first, you select “ATAPI CD-ROM
Drive.”
Note
: One of the selections on the popup Boot menu is “Enter
Setup.” Selecting this option brings you into the BIOS Setup.
BS811.f/cppl!!Qbhf!63!!Uvftebz-!Opwfncfs!37-!3113!!21;19!BN
Summary of Contents for Altos R700 Series
Page 1: ...Altos R700 Series User s guide ...
Page 10: ...x ...
Page 11: ...1 Description ...
Page 37: ...2 Installation Procedures ...
Page 43: ...33 8 Press one end of the clip down 2 9 Press the other end of the clip down 3 ...
Page 48: ...2 Installation Procedures 38 ...
Page 49: ...3 Upgrading ...
Page 54: ...3 Upgrading 44 ...
Page 55: ...4 Configuration Software and Utilities ...
Page 56: ...4 Configuration Software and Utilities 46 ...
Page 63: ...53 4 Press Enter 5 The boot process continues When finished a system prompt displays ...
Page 90: ...4 Configuration Software and Utilities 80 ...
Page 91: ...5 Solving Problems ...
Page 94: ...5 Solving Problems 84 hardware and operating system list on the Acer Customer Support website ...
Page 105: ...6 Technical Reference ...
Page 106: ...6 Technical Reference 96 ...
Page 124: ...6 Technical Reference 114 ...
Page 125: ...Appendix A Equipment Log and Power Consumption Worksheets ...
Page 127: ...117 Hard Disk Drive 5 Item Manufacturer Name and Model Name Serial Number Date Installed ...
Page 132: ...Appendix A Equipment Log and Power Consumption Worksheets 122 ...


