


71
11 Click
Save
to save the changes.
12 Click
Close
to return to the BMC LAN Configuration window.
13 To send a test alert to verify that you have correctly configured
BMC LAN alerts, from the Options menu, choose
Send Alert
.
14 Click
Save
to save the changes.
15 Click
Close
to return to the PEM window.
Managing the Server Remotely
You can set up the server so that you can connect to it from a remote
client system to perform management tasks. You can make the
connection over a LAN or by using a modem or direct serial cable to
the Emergency Management Port (EMP). Instructions for setting up the
server for remote LAN and serial/modem access are given below.
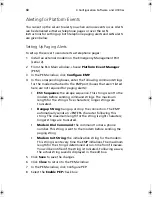
Setting Up Remote LAN Access
To configure remote LAN access:
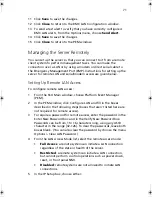
1
From the SSU Main window, choose Platform Event Manager
(PEM).
2
In the PEM window, click Configure LAN and fill in the boxes
described in the following steps (boxes that aren’t listed here are
not required for remote access).
3
To require a password for remote access, enter the password in the
Enter New Password box and in the Verify New Password box.
Passwords can be from 1 to 16 characters long, using any ASCII
character in the range [32-126]. To clear the passwords, leave both
boxes blank. (You can also clear the password by choose the menu
Options > Clear LAN Password.)
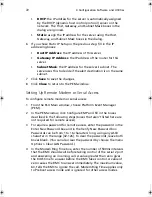
4
From the LAN Access Mode list, select the remote access mode:
•
Full Access
: a remote system can initiate a LAN connection
regardless of the state or health of the server.
•
Restricted
: a remote system can initiate a LAN connection,
but cannot perform control operations such as power down,
reset, or front panel NMI.
•
Disabled
: remote systems are not allowed to initiate LAN
connections.
5
In the IP Setup box, choose either:
BS811.f/cppl!!Qbhf!82!!Uvftebz-!Opwfncfs!37-!3113!!21;19!BN
Summary of Contents for Altos R700 Series
Page 1: ...Altos R700 Series User s guide ...
Page 10: ...x ...
Page 11: ...1 Description ...
Page 37: ...2 Installation Procedures ...
Page 43: ...33 8 Press one end of the clip down 2 9 Press the other end of the clip down 3 ...
Page 48: ...2 Installation Procedures 38 ...
Page 49: ...3 Upgrading ...
Page 54: ...3 Upgrading 44 ...
Page 55: ...4 Configuration Software and Utilities ...
Page 56: ...4 Configuration Software and Utilities 46 ...
Page 63: ...53 4 Press Enter 5 The boot process continues When finished a system prompt displays ...
Page 90: ...4 Configuration Software and Utilities 80 ...
Page 91: ...5 Solving Problems ...
Page 94: ...5 Solving Problems 84 hardware and operating system list on the Acer Customer Support website ...
Page 105: ...6 Technical Reference ...
Page 106: ...6 Technical Reference 96 ...
Page 124: ...6 Technical Reference 114 ...
Page 125: ...Appendix A Equipment Log and Power Consumption Worksheets ...
Page 127: ...117 Hard Disk Drive 5 Item Manufacturer Name and Model Name Serial Number Date Installed ...
Page 132: ...Appendix A Equipment Log and Power Consumption Worksheets 122 ...


