


75
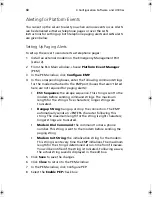
Recovering the BIOS
It is unlikely that anything will interrupt the BIOS upgrade; however,
an interruption could damage the BIOS. The following steps explain
how to recover the BIOS if an upgrade fails. The following procedure
uses recovery mode for the Setup program.
Note
: Because of the small amount of code available in the non-
erasable boot block area, there is no video support. You will not
see anything on the screen during the procedure. Monitor the
procedure by listening to the speaker and looking at the floppy
drive LED.
1
Turn off all connected peripherals, turn off system power, and
disconnect the AC power cord.
2
Remove the access cover and expose the server board. For
instructions, see the product guide accompanying your chassis.
3
Move the Recovery Boot (RCVRY BOOT) jumper from its normal
position to the BIOS recovery position (see “Server Board Jumpers”
on page 97).
4
Reinstall the access cover and connect the power cord.
5
Insert the diskette holding the BIOS upgrade and recovery files
into drive A.
6
Turn on system power and listen to the speaker:
•
Two beeps indicate successful BIOS recovery-Go to the next
step.
•
A series of continuous beeps indicates failed BIOS recovery-
Return to Step 1 and repeat the recovery process.
7
Turn off system power and disconnect all AC power cords.
8
Remove the access cover.
9
Move the Recovery Boot jumper back to its normal position.
10 Reinstall the access cover.
11 Connect all AC power cords and turn on system power.
BS811.f/cppl!!Qbhf!86!!Uvftebz-!Opwfncfs!37-!3113!!21;19!BN
Summary of Contents for Altos R700 Series
Page 1: ...Altos R700 Series User s guide ...
Page 10: ...x ...
Page 11: ...1 Description ...
Page 37: ...2 Installation Procedures ...
Page 43: ...33 8 Press one end of the clip down 2 9 Press the other end of the clip down 3 ...
Page 48: ...2 Installation Procedures 38 ...
Page 49: ...3 Upgrading ...
Page 54: ...3 Upgrading 44 ...
Page 55: ...4 Configuration Software and Utilities ...
Page 56: ...4 Configuration Software and Utilities 46 ...
Page 63: ...53 4 Press Enter 5 The boot process continues When finished a system prompt displays ...
Page 90: ...4 Configuration Software and Utilities 80 ...
Page 91: ...5 Solving Problems ...
Page 94: ...5 Solving Problems 84 hardware and operating system list on the Acer Customer Support website ...
Page 105: ...6 Technical Reference ...
Page 106: ...6 Technical Reference 96 ...
Page 124: ...6 Technical Reference 114 ...
Page 125: ...Appendix A Equipment Log and Power Consumption Worksheets ...
Page 127: ...117 Hard Disk Drive 5 Item Manufacturer Name and Model Name Serial Number Date Installed ...
Page 132: ...Appendix A Equipment Log and Power Consumption Worksheets 122 ...


