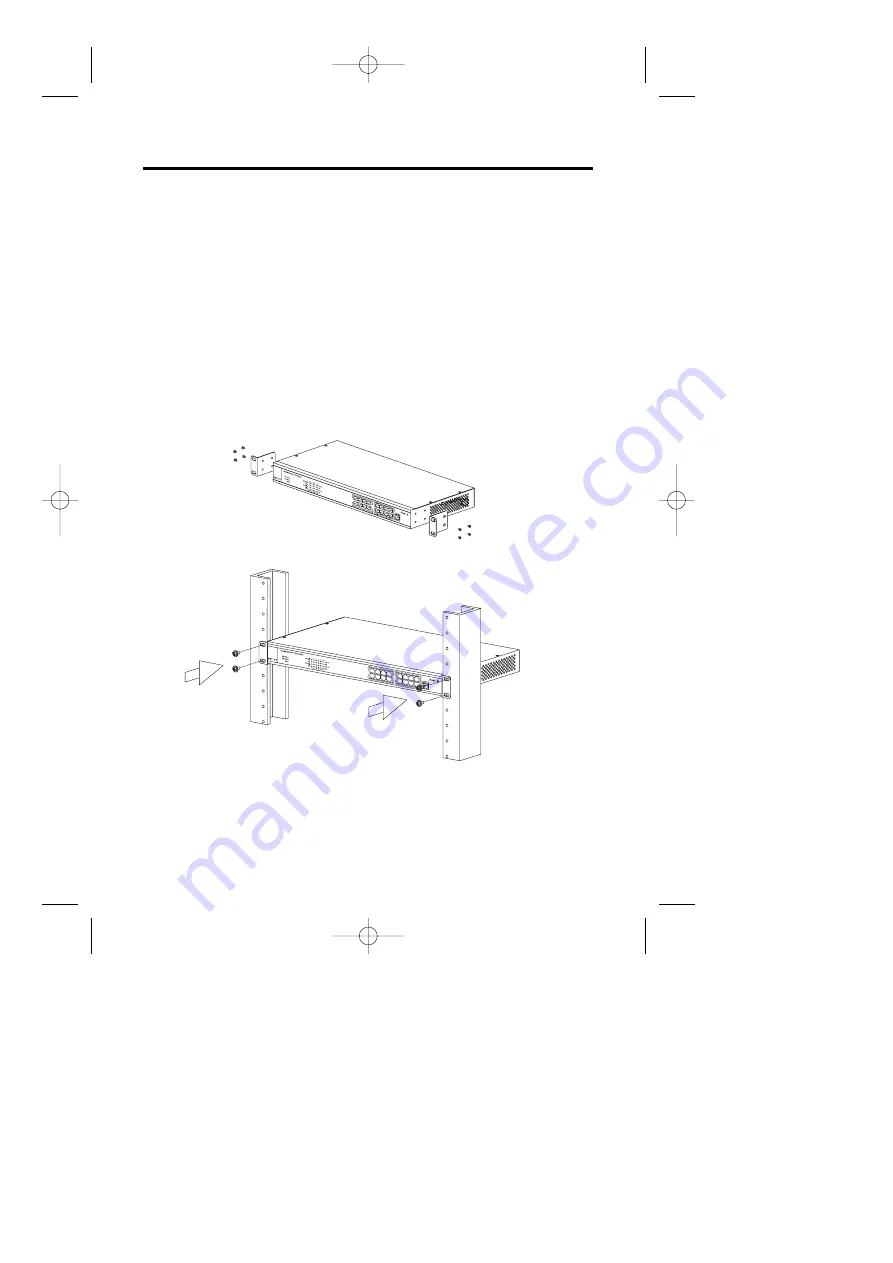
2.3 Rack mounting
To install the ALW-3016 switch in a 19-inch rack, please follow these steps:
1. If the switch has rubber footpads on the bottom of the unit, please
remove them.
2. Locate the rack mounting holes on both sides of the switch (see Figure
2- 3).
3. Using a cross-head screwdriver, attach the two mounting brackets to
both sides of the switch with the four screws supplied with the unit (see
Figure 2- 3).
4. Place the switch in the rack and align the holes in the mounting bracket
with the holes in the rack chassis (see Figure 2- 4).
5. Insert two mounting screws (the rack-mount equipment should provide
these screws), into each of the mounting brackets and tighten with a
suitable screwdriver.
Figure 2-3: Attaching mounting brackets (8 screws: M3x5)
Figure 2-4: Attaching mounting brackets for a rack mount (4 screws: M5x10)
Note: The pannel wall should be able to bear three times of the system's
weight
4
User's Manual
new ALW-3016-UM 10/13/99 11:27 AM ›¶›– 4


