8
Chapter 1
TouchPad Basics
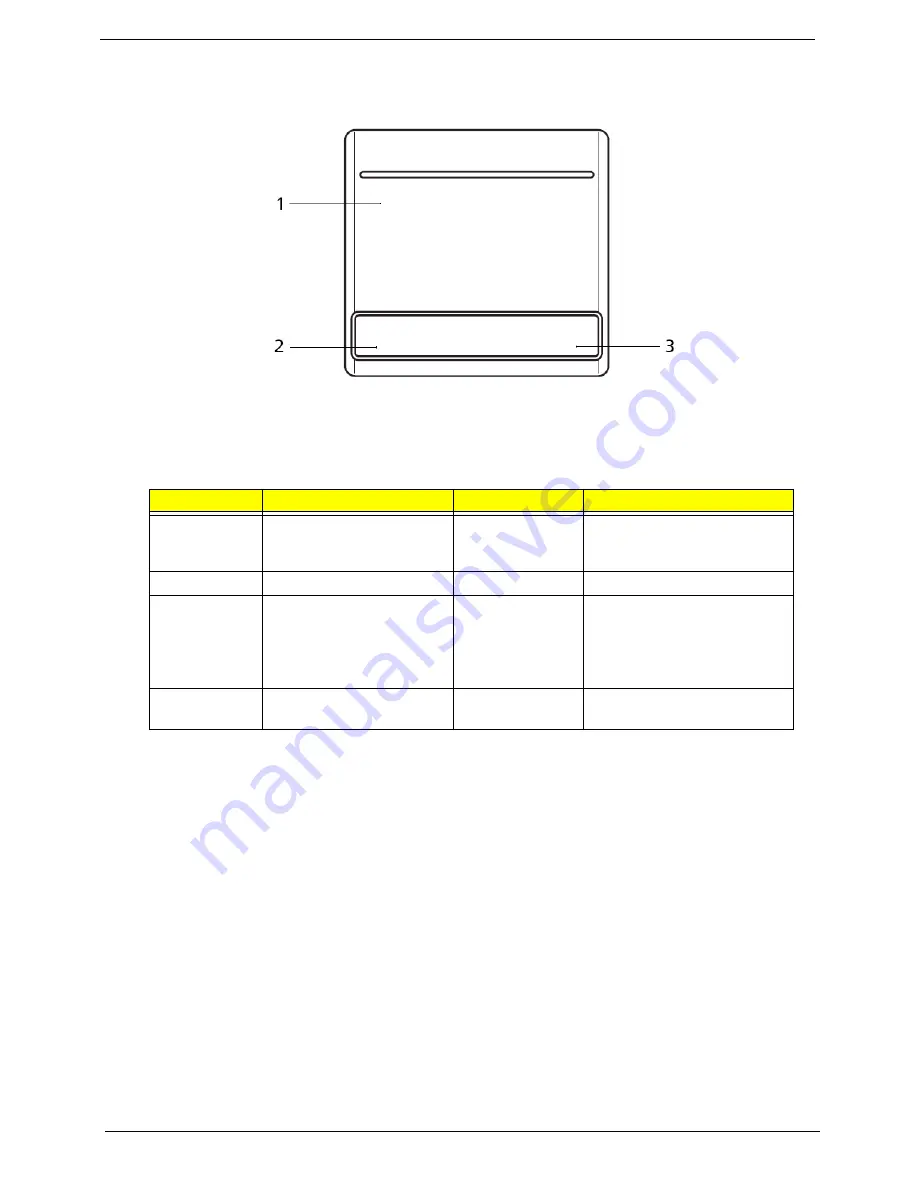
The following items show you how to use the TouchPad:
•
Move your finger across the TouchPad (1) to move the cursor.
•
Press the left (2) and right (3) buttons located beneath the TouchPad to perform selection and
execution functions. These two buttons are similar to the left and right buttons on a mouse.
Tapping on the TouchPad is the same as clicking the left button.
NOTE:
When using the TouchPad, keep it - and your fingers - dry and clean. The TouchPad is sensitive to
finger movement; hence, the lighter the touch, the better the response. Tapping too hard will not
increase the TouchPad’s responsiveness.
Function
Left Button (2)
Right Button (3)
Main TouchPad (1)
Execute
Quickly click twice.
Tap twice (at the same speed
as double-clicking a mouse
button).
Select
Click once.
Tap once.
Drag
Click and hold, then use
finger on the TouchPad to
drag the cursor.
Tap twice (at the same speed
as double-clicking a mouse
button); rest your finger on
the TouchPad on the second
tap and drag the cursor.
Access
context menu
Click once.
Summary of Contents for AOD250
Page 6: ...VI ...
Page 10: ...X Table of Contents ...
Page 28: ...18 Chapter 1 ...
Page 45: ...Chapter 2 35 3 Execute MAC BAT to write MAC information to eeprom ...
Page 46: ...36 Chapter 2 ...
Page 52: ...42 Chapter 3 4 Lift the Memory cover up to remove 5 Lift the 3G cover up to remove ...
Page 60: ...50 Chapter 3 6 Disconnect the FFC and remove the Keyboard ...
Page 70: ...60 Chapter 3 4 Remove the WLAN Board from the Mainboard ...
Page 78: ...68 Chapter 3 4 Lift the Thermal Module clear of the Mainboard ...
Page 104: ...94 Chapter 3 3 Connect the Camera cable as shown ...
Page 126: ...116 Chapter 3 4 Replace the single screw to secure the HDD in place ...
Page 155: ...Chapter 5 145 Power board Item Description SW1 Power button LED1 Power LED ...
Page 208: ...Appendix A 198 ...
Page 216: ...206 Appendix B ...
Page 218: ...208 Appendix C ...
Page 222: ...212 ...


