137
a
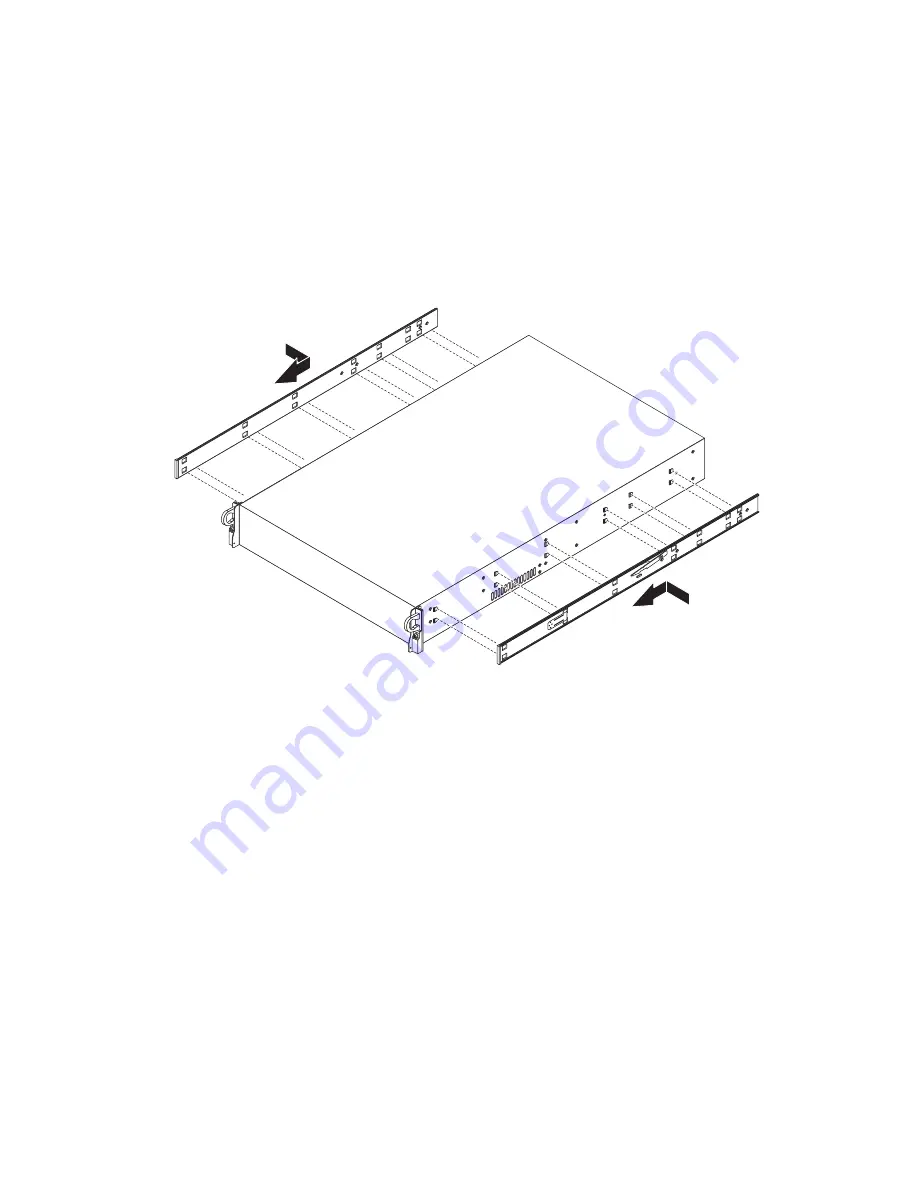
Align the holes on the left and right front inner rails (1) to the hooks
on the left and right sides of the server.
b
Slide the rails to the front until the rails lock into place with an
audible click.
4
Attach the rear inner rails to both sides of the server.
a
Align the holes on the left and right rear inner rails (2) to the hooks
on the left and right sides of the server.
b
Secure the chassis with six screws (3) as illustrated.
5
Install the mounting rails to the rack posts.
a
Align and insert the tabs on the left and right mounting rails to the
front rack post mounting holes (1). Make certain the proper
mounting holes on rack post are selected.
Summary of Contents for AR360 F1 Series
Page 1: ...AR360 F1 Series User Guide ...
Page 16: ...xvi ...
Page 17: ...1 System tour ...
Page 32: ...1 System tour 16 ...
Page 33: ...2 System setup ...
Page 40: ...2 System setup 24 ...
Page 41: ...3 System upgrades ...
Page 42: ...3 System upgrades 26 ...
Page 80: ...3 System upgrades 64 2 Insert the riser into the mainboard 1 and fasten the two 2 screws 2 ...
Page 84: ...3 System upgrades 68 The figure below shows the server in a rack mount position ...
Page 92: ...3 System upgrades 76 ...
Page 93: ...4 System BIOS ...
Page 130: ...4 System BIOS 114 ...
Page 131: ...5 System troubleshooting ...
Page 141: ...Appendix A Server management tools ...
Page 146: ...Appendix A Server management tools 130 ...
Page 147: ...Appendix B Rack mount configuration ...
Page 157: ...Appendix C Acer Smart Console ...
Page 186: ...Appendix C Acer Smart Console 170 ...


