49
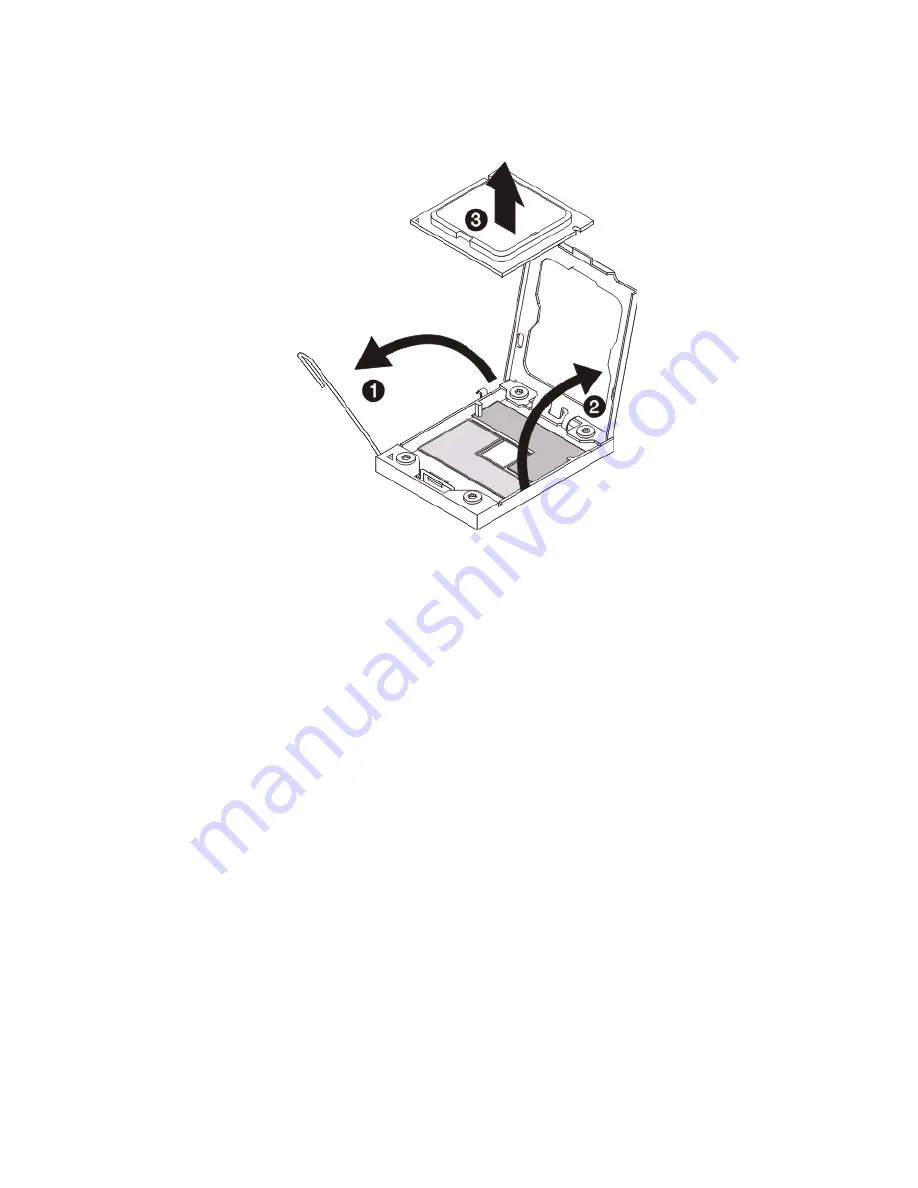
(4) Grasp the installed processor by its edges and lift it out of
its socket.
(5) Store the old processor inside an anti-static bag.
7
Remove the new processor from its protective packaging.
8
Install the new processor.
(1) Hold the processor by its edges. Make sure the alignment
tabs on the socket fit the two notch located on the edge
of the processor. The pins are keyed in such a way that
you cannot install the processor in the wrong orientation
without bending the pins.
(2) Insert the new processor in the socket.
(3) Close the retention plate.
Summary of Contents for AR360 F1 Series
Page 1: ...AR360 F1 Series User Guide ...
Page 16: ...xvi ...
Page 17: ...1 System tour ...
Page 32: ...1 System tour 16 ...
Page 33: ...2 System setup ...
Page 40: ...2 System setup 24 ...
Page 41: ...3 System upgrades ...
Page 42: ...3 System upgrades 26 ...
Page 80: ...3 System upgrades 64 2 Insert the riser into the mainboard 1 and fasten the two 2 screws 2 ...
Page 84: ...3 System upgrades 68 The figure below shows the server in a rack mount position ...
Page 92: ...3 System upgrades 76 ...
Page 93: ...4 System BIOS ...
Page 130: ...4 System BIOS 114 ...
Page 131: ...5 System troubleshooting ...
Page 141: ...Appendix A Server management tools ...
Page 146: ...Appendix A Server management tools 130 ...
Page 147: ...Appendix B Rack mount configuration ...
Page 157: ...Appendix C Acer Smart Console ...
Page 186: ...Appendix C Acer Smart Console 170 ...


