98
Chapter 5
Steps for Clearing BIOS Password Check
If the user sets the BIOS Password (Supervisor Password and/or User Password) for a security reason, the
BIOS will ask for the password during system POST or when the system enters into the BIOS Setup menu. If
it is necessary to bypass the password check, the user needs to short the hardware gap to clear the password
by following these steps:
•
Power off the system, and remove the HDD, AC adapter and battery from the computer.
•
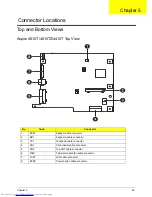
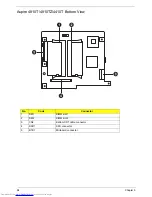
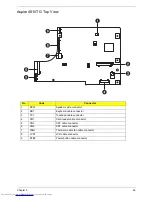
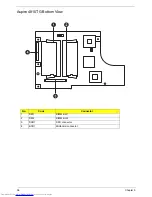
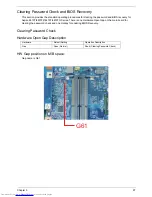
Open the back cover of the computer and look for the hardware gap on the main board as shown
in the picture(s) above.
•
Use an electric conductivity tool to short the two points of the hardware gap.
•
Plug in the AC adapter while retaining the short condition on the hardware gap. Press the power
button to turn on the computer until the BIOS POST routine is finished. Finally, remove the tool
from the hardware gap.
•
Restart the system. Press the F2 key to enter BIOS Setup menu.
•
If there is no password request, the BIOS Password is cleared. Otherwise, repeat the steps above
and try again.
NOTE:
The steps are only for clearing the BIOS password (Supervisor Password and User Password).
BIOS Recovery by Crisis Disk
BIOS Recovery Boot Block
BIOS Recovery Boot Block is a special block of the BIOS. It is used to boot up the system with minimum BIOS
initialization. Users can enable this feature to restore the BIOS firmware to a successful one once the previous
BIOS flashing process failed.
BIOS Recovery Hotkey
The system provides a function hotkey:
Fn+Esc
, for enabling the BIOS Recovery process at system power-on
during BIOS POST. To use this function, the AC adapter and the battery must be connected. If this function is
enabled, the system will force the BIOS to enter a special BIOS block called Boot Block.
Steps for BIOS Recovery by Crisis Disk
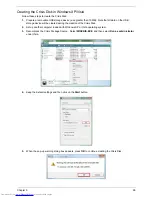
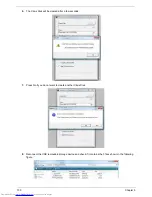
Before doing this, prepare a Crisis Disk (refer to the “Steps for Creating the Crisis Disk in Windows XP/Vista”
section below) and keep it ready in hand.
Follow these steps for BIOS recovery:
1.
Power off the system.
2.
Connect a removable USB storage device containing the Crisis Disk to a USB port connected to the BIOS
flash failed system.
3.
Under power-off state, press and hold
Fn+Esc
and then press the power button. The system should be
powered on with the Crisis BIOS Recovery process.
4.
BIOS Boot Block starts to restore the BIOS code from the Crisis Disk to BIOS ROM on the failed system.
5.
After the crisis flashing process is finished, the system will restart.
After the Crisis Recovery process is finished, the system should have a successful and workable BIOS after
power on. The user can then update the latest BIOS version for this system using the regular BIOS flashing
process.
Downloaded from
www.Manualslib.com
manuals search engine
Summary of Contents for AS4810TG-354G50Mn LX.PE10X.047
Page 6: ...VI Downloaded from www Manualslib com manuals search engine ...
Page 34: ...26 Chapter 1 Downloaded from www Manualslib com manuals search engine ...
Page 48: ...40 Chapter 2 Downloaded from www Manualslib com manuals search engine ...
Page 86: ...78 Chapter 3 Downloaded from www Manualslib com manuals search engine ...
Page 144: ...136 Appendix B Downloaded from www Manualslib com manuals search engine ...
Page 146: ...138 Appendix C Downloaded from www Manualslib com manuals search engine ...

