background image

CHAPTER 

4

Troubleshooting

Summary of Contents for Aspire 4560

Page 1: ... Aspire 4560 4560G SERVICEGUIDE ...

Page 2: ...tness for any particular purpose The software described in this manual is sold or licensed as is Should the programs prove defective following their purchase the buyer not the manufacturer distributor or its dealer assumes the entire cost of all necessary servicing repair and any incidental or consequential damages resulting from any defect in the software Copyright 2011 by Acer Incorporated All r...

Page 3: ...rocess names are shown in italics Example the DRS5 User s Guide usr local bin fd the TPH15spool_M program Computer output text that represents information displayed on a computer screen such as menus prompts responses to input and error messages are shown in constant width Example 01 The server has been stopped User input text that represents information entered by a computer user such as command ...

Page 4: ...These localized features are not covered in this generic service guide In such cases contact your regional office or the responsible personnel channel to provide you with further technical details When ordering FRU parts Check the most up to date information available on your regional Web or channel If for whatever reason a part number change is made it may not be noted in this printed service gui...

Page 5: ...vice 1 8 I O Ports 1 8 Software and Tools 1 8 Optional Items 1 10 Warranty 1 10 Dimensions and Weight 1 10 Environment 1 10 Notebook Tour 1 11 Open Front View 1 11 Close Front View 1 13 Left View 1 14 Right View 1 15 Base View 1 16 Indicators 1 17 Touchpad Basics 1 18 Keyboard 1 18 Hotkeys 1 21 Special Keys 1 22 Specification Tables 1 25 CHAPTER 2 System Utilities BIOS Setup Utility 2 3 Navigating...

Page 6: ...al Modules Disassembly Flowchart 3 8 Removing the Battery Pack 3 9 Remove the Dummy Card 3 10 Removing the ODD Module 3 11 Removing the Base Door 3 13 Removing the HDD Module 3 14 Removing the WLAN Module 3 16 Removing the Memory Modules 3 17 Main Unit Disassembly Process 3 19 Main Unit Disassembly Flowchart 3 19 Removing the Keyboard 3 20 Removing the Palmrest Module Upper Cover 3 23 Removing the...

Page 7: ...3 63 Replacing the CPU 3 66 Replacing the Thermal Module 3 68 Replacing the Mainboard 3 70 Replacing the Bluetooth Module 3 72 Replacing the USB Board 3 73 Replacing the Touchpad Board 3 75 Replacing the Power Button Board 3 77 Replacing the Speakers 3 79 Replacing the Palmrest Module Upper Cover 3 81 Replacing the Keyboard 3 84 External Module Reassembly Process 3 86 Replacing the Memory Modules ...

Page 8: ...her Functions Failure 4 18 Intermittent Problems 4 19 Undetermined Problems 4 19 Error Codes 4 20 BIOS Beep Codes 4 21 POST Codes 4 26 Component Codes 4 26 Progress Codes 4 30 CHAPTER 5 Jumper and Connector Locations Mainboard Layout 5 3 Clearing Password Check and BIOS Recovery 5 5 Clearing the BIOS Passwords 5 5 Performing a BIOS Recovery 5 6 CHAPTER 6 FRU List Aspire 4560 4560G Exploded Diagram...

Page 9: ...ix CHAPTER 7 Model Definition and Configuration Aspire 4560 4560G 7 3 CHAPTER 8 Test Compatible Components Microsoft Windows 7 Environment Test 8 4 CHAPTER 9 Online Support Information ...

Page 10: ...x ...

Page 11: ...CHAPTER 1 Hardware Specifications ...

Page 12: ...arranty 1 10 Dimensions and Weight 1 10 Environment 1 10 Notebook Tour 1 11 Open Front View 1 11 Close Front View 1 13 Left View 1 14 Right View 1 15 Base View 1 16 Indicators 1 17 Touchpad Basics 1 18 Keyboard 1 18 Hotkeys 1 21 Special Keys 1 22 Specification Tables 1 25 Computer Specifications 1 25 Processor 1 26 Processor Specifications 1 27 System Memory 1 27 Graphics Controller 1 28 VRAM Disc...

Page 13: ... 32 Audio Codec 1 33 Audio Interface 1 33 Webcam 1 33 LAN 1 34 Wireless LAN 1 34 Bluetooth 1 34 USB Interface 1 35 HDMI Port 1 35 Expansion Card 1 35 System LED Indicators 1 35 Battery Pack 1 36 AC Adapter 1 36 System Power Management 1 37 System DMA Specification 1 37 ...

Page 14: ...1 4 ...

Page 15: ...apacities are listed on the FRU list on page 6 7 Chipset Hudson M2 A60M System Memory 0 Two DIMM slots supports DDR3 1066 1333 1600 SO DIMM 8 GB maximum memory capacity using two 4 GB modules Display 0 14 inch High Definition WXGA TFT LCD 1366 768 resolution 16 9 aspect ratio 16 7 million colors 220 nit brightness LED backlight mercury free environment friendly Graphics 0 Graphics controller UMA U...

Page 16: ...ve HDD HDD models and capacities are listed on the FRU list on page 6 7 Optical disc drive 0 Slim type SATA optical disc drive ODD Odd models and capacities are listed on the FRU list on page 6 7 Detailed read write specifications on page 1 31 Card reader 0 Multi in 1 card reader slot Supports MultiMediaCard MMC MultiMediaCard Plus MMCplus Secure Digital SD xD Picture Card xD Memory Stick MS and M...

Page 17: ...s Acer SignalUp technology WPAN Bluetooth 3 0 HS LAN Gigabit Ethernet Wake on LAN ready Broadcom NetLink BCM57785 controller Privacy Control 0 BIOS supervisor user and HDD passwords Kensington lock slot Power Adapter and Battery 0 19 V 3 pin AC adapter 65 W for UMA models 90 W 120W for Discrete models 6 cell 2200 mAh and 4 cell 2800 mAh Li ion battery pack Battery life 4 hours Charging period 1 5 ...

Page 18: ...chpad pointing device supporting two finger scroll pinch rotate and flip Touchpad lock hotkey Adjustable touchpad sensitivity function I O Ports 0 Two USB 2 0 and one USB 2 0 3 0 ports HDMI port External display VGA port Headphone in jack Microphone in jack Ethernet RJ 45 port DC in jack for the AC adapter Software and Tools 0 Productivity 0 Acer Backup Manager Acer ePower Management Acer eRecover...

Page 19: ...on GameZone except US Canada Hong Kong Korea WildTangent US Canada only Communication and ISP 0 Acer Crystal Eye Acer Video Conference Manager Adobe AIR eSobi v2 Microsoft Silverlight Skype Windows Live Essentials Web links and utilities 0 Acer Accessory Store Belgium France Germany Italy Netherlands Spain Sweden UK only Acer Identity Card Acer Registration Acer Updater eBay shortcut Canada France...

Page 20: ...loppy disk drive External USB modem Warranty 0 One year International Travelers Warranty ITW Dimensions and Weight 0 Dimensions 0 Width Depth Height 342 245 25 5 33 9 mm 13 46 9 65 1 003 1 33 in Weight 0 UMA 2 2277 kg 4 90 lb Discrete 2 3 kg 5 06 lb Environment 0 Temperature Operating 5 to 35 C Non operating 20 to 65 C Humidity non condensing Operating 20 to 80 Non operating 20 to 80 ...

Page 21: ...View No Icon Item Description 1 Integrated webcam Web camera for video communication only for certain model 2 Display screen Also called Liquid Crystal Display LCD displays computer output Configuration may vary by models 3 Power button Turns the computer on and off 4 Keyboard For entering data into your computer 5 Touchpad Touch sensitive pointing device which functions like a computer mouse 1 3 ...

Page 22: ...cates the computer s power status Battery indicator Indicates the computer s battery status 1 Charging The light shows amber when the battery is charging 2 Fully charged The light shows blue when in AC mode 7 Click buttons left and right The left and right buttons function like the left and right mouse buttons 8 Microphone Internal microphone for sound recording Table 1 1 Open Front View No Icon I...

Page 23: ...e Card xD Note Push to remove install the card Only one card can operate at any given time 2 HDD indicator Indicates when the hard disk drive is active Communication indicator Indicates the computer s wireless connectivity device status Power indicator Indicates the computer s power status Battery indicator Indicates the computer s battery status 1 Charging The light shows amber when the battery i...

Page 24: ... jack Connects to the AC adapter 2 Ethernet RJ 45 port Connects to an 10 100 1000 based Ethernet network 3 External display VGA port Connects to a display device e g external monitor LCD projector 4 HDMI port Supports high definition digital video connections 5 USB 2 0 ports Connects to USB devices e g USB mouse USB camera 2 1 3 4 5 ...

Page 25: ...le 3 Optical disc drive Internal optical disc drive accepts CDs or DVDs 4 ODD access indicator Lights up when the optical drive is active 5 ODD eject button Ejects the optical disc from the drive 6 ODD emergency eject hole Ejects the optical drive tray when the computer is turned off Note Insert a paper clip to the emergency eject hole to eject the optical drive tray when the computer is off 7 Ken...

Page 26: ...Table 1 5 Base View No Icon Item Description 1 Battery pack Provides power to the computer when the power cord is unplugged 2 Battery release latch Releases the battery for removal 3 HDD memory WLAN module compartment Houses the computer s hard disk memory and WLAN optional modules ...

Page 27: ... Indicator off The computer is turned off 2 Battery indicator When the AC adapter is connected Solid blue The battery charge is at full capacity Solid amber Battery charging Blinking amber Battery is in abnormal stop charge or battery is in low power state When the AC adapter is disconnected Blinking amber Battery charge is in critically low state Indicator off Discharging state 3 HDD indicator Fl...

Page 28: ...erform selection and execution functions These two buttons are the equivalent of the left and right buttons on a mouse Keyboard 0 The keyboard contains an overlay numeric keys inverted T cursor key Windows key Application key function lock keys and hotkeys controlling various computer features Figure 1 8 Keyboard Table 1 7 Touchpad Function Touchpad 1 Left Button 2 Right Button 3 Execute Rapidly t...

Page 29: ...ave the following definitions When On the system boots with external keyboard keypad Num Lock status On Internal keyboard overlay numeric keys are disabled The key can be turned on off via the internal keyboard Fn F11 or the external keyboard keypad Num Lock affects the external keyboard keypad only Shift state is NOT required for the cursor movement by the numeric keys The state of the Num Lock i...

Page 30: ...to the desktop F1 Show the Help window E Open Windows Explorer F Search for a file or folder D Display the desktop Ctrl F Search for computers if you are on a network Ctrl L Lock your computer if you are connected to a network domain or switch users if you re not connected to a network domain Ctrl Tab Moves focus from Start menu to the Quick Launch toolbar to the system tray use or to move focus t...

Page 31: ...p mode Fn F5 Display toggle Switches the display output between the display screen external monitor if connected or both Fn F6 Display off Turns off the LCD back light Fn F7 Touchpad toggle Turns the touchpad On or Off Fn F8 Speaker toggle Turns the speakers On or Off Fn Home Play Pause Play or pause a selected media file Fn Pg Up Stop Stop playback of the selected media file Fn Pg Dn Previous Ret...

Page 32: ...d Alt Gr and then press the key NOTE NOTE Some fonts and software do not support the Euro symbol See www microsoft com typography faq faq12 htm for more information The US dollar sign 0 1 Open a text editor or word processor 2 Hold Alt Gr and then press the key NOTE NOTE This function varies according to the language settings ...

Page 33: ...POST press F1 to access the BIOS Setup screen 3 Press to select the Main menu 4 Press to select the D2D Recovery field and make sure it is set to Enabled 5 Press F10 to save settings and close the BIOS Setup screen 6 During POST press Alt F10 to enter the system recovery partition This will display the eRecovery Management window 7 Follow the onscreen instructions to return your computer to factor...

Page 34: ...1 24 Hardware Specifications and Configurations System Block Diagram Figure 1 12 System Block Diagram ...

Page 35: ...iscrete models Temperature Operating not writing to optical disc 0 to 40 C 32 to 104 F Operating writing to optical disc 0 to 40 C 32 to 104 F Nonoperating 20 to 60 C 4 to 140 F Relative humidity Operating 20 to 80 Nonoperating 20 to 80 Maximum altitude unpressurized Operating Nonoperating Shock Operating 105 g 2 ms half sine TBD Nonoperating 220 g 2 ms half sine TBD Random vibration Operating 0 6...

Page 36: ...rated in Hudson M3 USB 2 0 Integrated in Hudson M2 Bluetooth 3 0 HS Atheros AR3011 Broadcom BCM2070 Bluetooth 2 0 EDR Atheros BU12 Broadcom BCM2046 Wireless LAN Broadcom BCM43227 Foxconn Atheros HB95 Foxconn Atheros HB97 2 2 BGN HM PCMCIA n a Audio codec Realtek ALC271X Card reader Broadcom NetLink BCM57785X Item Specification CPU type AMD Fusion Core logic Two execution cores L1 cache size L2 cac...

Page 37: ... GHz 32 nm 4 MB 35 W 1 1 V E2 3000M 1 80 GHz 2C 4T 3 30 GHz 32 nm 1 MB 35 W 1 1 V CPU Temperature Fan Speed RPM SPL Spec dBA 42 2100 28 44 2700 31 55 3000 34 62 3800 37 89 4100 40 Throttling 50 On 94 C Off 93 C OS shuts down at 98 C Hardware shuts down at 85 C Item Specification Memory controller Integrated in the processor Memory size 1 2 or 4 GB Number of DIMM socket 2 Maximum memory size per so...

Page 38: ...roller VRAM Discrete models only Slot 1 MB Slot 2 MB Total Memory MB 1024 0 1024 1024 1024 2048 1024 2048 3072 2048 0 2048 2048 2048 4096 4096 0 4096 4096 4096 8192 Item Specification Chipset UMA UMA Discrete ATI Seymour XT 512MB 1GB and Whistler XT 1GB 2GB Item Specification Models Hynix H5TQ1G63DFR 11CF H5TQ2G63BFR 11C Samsung K4W1G1646G BC11 K4W2G1646C HC11 VRAM type 1 GB 900 MHz DDR3 2 GB 900 ...

Page 39: ...cification revision 2 1 BIOS Boot specification v1 01 Simple boot flag specification v2 1 System management bus specification v2 0 AHCI support Microsoft XP Vista Windows 7 logo program Microsoft SLP 1 0 support Microsoft OA 2 0 and 2 1 support Item Specification Type AC4T flat keyboard Total number of keys 88 keys Windows logo key Yes Internal and external USB keyboard work simultaneously Yes Fea...

Page 40: ...1 WD6400BPV T 22HZXT3 Hitachi HTS547575A 9E384 Seagate ST9750423A Toshiba MK7559GSX P Western Digital WD7500BPV T 22HXZT1 WD750BPVT 22HZXT3 Product series Hitachi Panther Eagle Jet B Seagate Sapta Wyatt Cameron Desaru5 Toshiba Capricorn Western Digital Configuration Interface SATA Third Generation Capacity GB 250 320 500 640 750 Bytes per sector 512 512 512 n a 512 4096 n a n a Data heads 2 3 2 2 ...

Page 41: ...type SATA Transfer rates DVD RAM DVD R DVD R DL DVD RW DVD R DVD R DL DVD RW DVD ROM Single Layer DVD ROM Dual Layer CD R CD RW CD ROM Read 5x 8x 6x 6x 8x 6x 8x 24x 16x Write 5x 8x 8x 8x 8x 8x 8x 8x 8x 24x 24x 24x Buffer memory 2 MB Loading mechanism Slot loading Release mechanism Electrical release by eject button Release by ATAPI command Emergency release by emergency eject hole Power requiremen...

Page 42: ... Pixel pitch 0 226 mm Viewing angle H V 90 50 Brightness 200 or 220 nit Contrast ratio 400 1 or 500 1 Response time Typical Maximum 8 ms 16 ms Typical power consumption watt 3 8 or 4 4 W Electrical interface 1 channel LVDS Backlight White LED WLED Weight 350 g Physical size 323 324 192 5 5 2 mm Specification UMA Discrete 800 600 60 Hz 16 9 Yes Yes 1024 600 60 Hz 16 9 Yes Yes 1024 768 60 Hz 16 9 Ye...

Page 43: ... 5 0 V power stage voltage Acoustic Echo Cancellation AEC Noise Suppression NS and Beam Forming BF technologies for voice application 48 pin green QFN package Item Specification Controller Realtek ALC271X Audio onboard Yes Audio channel Stereo Resolution 18 bit stereo full duplex Compatibility High Definition Audio Specification Sampling rate 1 Hz resolution VSR Variable Sampling Rate Internal mic...

Page 44: ...iant Wake on LAN support Item Specification Module Atheros AR9287 HB97 Broadcom 43225 or 43227 Frequency band 2 4 GHz Protocols and data rates supported 802 11b 1 11 Mbps 802 11g 6 54 Mbps 802 11n 6 5 300 Mbps Interface PCI Express Form factor Compact Half Mini Card Antennae Yes two routed in the display assembly Item Specifications Module Atheros BU12 Broadcom BCM2070 Broadcom BCM2070 Version Blu...

Page 45: ...r PCI Express Mini Card Number of slot 1 Supported card WLAN or WiMAX module Item Specification Power status Solid blue The computer is turned on Blinking amber The computer is in power saving mode Indicator off The computer is turned off Battery status AC adapter connected Solid blue The battery charge is at full capacity Solid amber Battery charging Blinking amber Battery is in abnormal stop cha...

Page 46: ...AS10D Main Common ID AS10D31 Simplo AS10D Main Common ID AS10D Simplo AS10D Main Common ID AS10D71 Simplo AS10D Main Common ID AS10D73 Sony AS10D Main COMMON ID AS10D41 Battery type Lithium ion Pack capacity 4400 mAh Number of battery cell 6 Package configuration 3S2P Item Specification Input rating UMA 65 W Discrete 90 W 120 W Input AC current max 100 240 V 1 5 A 50 60 Hz Output 19 V 2 pin ...

Page 47: ...s run It is not safe to disassemble the machine in this state G1 Sleeping The computer consumes a small amount of power user mode threads are not being executed and the system appears to be off It is not safe to disassemble the machine in this state G0 Working The computer dispatches user mode application threads and they execute It is not safe to disassemble the machine in this state S4 Non Volat...

Page 48: ... Standard PS 2 keyboard IRQ2 Not in use IRQ3 Not in use IRQ5 Not in use IRQ6 Not in use IRQ7 Not in use IRQ8 System CMOS real time clock IRQ9 Broadcom NetLink BCM57785 xD Picture Card host controller IRQ10 Not in use IRQ11 Not in use IRQ12 Synaptics PS 2 port touchpad IRQ13 Numeric data processor IRQ14 Not in use IRQ15 Not in use ...

Page 49: ...8 006F Motherboard resources 0070 0071 System CMOS real time clock 0072 0073 Motherboard resources 0080 0080 Motherboard resources 0081 008F Direct memory access controller 0092 0092 Motherboard resources 00A0 00A1 Programmable Interrupt Controller 00B0 00B1 Motherboard resources 00B2 00B2 Motherboard resources 00B8 00B8 Motherboard resources 00BC 00BC Motherboard resources 00C0 00DE Direct memory...

Page 50: ... resources 0CD6 0CD7 Motherboard resources 0CD8 0CDF Motherboard resources 0CF9 0CF9 Motherboard resources 0D00 FFFF PCI bus 0F50 0F51 Motherboard resources 1200 120F Motherboard resources 2000 2FFF PCI Express standard Root Port 2F00 2FFF AMD Radeon HD 6650M 3000 30FF AMD Radeon HD 6620G 3100 310F AMD SATA Controller 3110 3117 AMD SATA Controller 3118 311F AMD SATA Controller 3120 3123 AMD SATA C...

Page 51: ...CHAPTER 2 System Utilities ...

Page 52: ...IOS Utility 2 3 BIOS Flash Utilities 2 11 WinFlash Utility 2 12 Remove HDD BIOS Password Utilities 2 13 Removing the HDD Password 2 13 Removing the BIOS Passwords 2 14 Clearing the BIOS Passwords 2 15 Using DMI Tools 2 16 LAN EEPROM Utility 2 16 ...

Page 53: ...During the next POST press F12 to enter the multi boot menu Navigating the BIOS Utility 0 The BIOS Setup Utility has five menu options namely Information Main Security Boot Exit Perform the following actions to navigate through the BIOS Setup Utility Press the to select items in the menu bar Press to select an item in the menu screen or in an option box Press F5 or F6 to change the parameter value...

Page 54: ... Table 2 1 Hardware Information Parameter Description CPU Type Model name and core frequency of the installed processor CPU Speed Core frequency of the installed processor HDD Model Name Model name of the installed hard drive HDD Serial Number Serial number of the installed hard drive ATAPI Model Name Model name of the installed optical device System BIOS Version Current system BIOS version VGA BI...

Page 55: ...acturer Name Computer manufacturer UUID The universally unique identifier tag assigned to the computer Table 2 2 BIOS Main Parameter Description Format Option System Time System time expressed in 24 hour format Format HH MM SS hour minute second System Date System date Format MM DD YYYY month day year Total Memory Total system memory available Video Memory System memory allocated for graphics proc...

Page 56: ... to enter the Boot menu during POST Option Enabled or Disabled D2D Recovery Option to use the D2D Recovery function Option Enabled or Disabled SATA Mode Option to set the SATA controller mode Option AHCI or IDE Table 2 3 BIOS Security Parameter Description Option Supervisor Password Is Supervisor password setting Clear or Set User Password Is User password setting Clear or Set HDD Password State H...

Page 57: ...rds are not case sensitive and the length must not exceed eight alphanumeric characters A Z a z 0 9 3 Retype the password in the Confirm New Password field and press Enter IMPORTANT Use care when typing a password Characters do not appear on the screen 4 Press Enter NOTE NOTE Users can choose to enable the Password on Boot parameter 5 Press F10 to save changes and exit from the BIOS Setup Utility ...

Page 58: ...from the BIOS Setup Utility Changing a Password 0 1 Press to highlight a Set _______ Password parameter and press Enter The Set _______ Password dialog box appears Figure 2 6 Set Supervisor Password 2 Type the current password in the Enter Current Password field and press Enter 3 Type the new password in the Enter New Password field 4 Retype the password in the Confirm New Password field Figure 2 ...

Page 59: ... 0 Use this tab to set the preferred drive sequence in which the Setup Utility attempts to boot the operating system By default the computer searches for boot devices in the following order 1 Hard disk drive 2 Optical disc drive 3 Network boot 4 External USB hard drive 5 External USB optical drive 6 External USB bootable device Press to select a device and press F5 or F6 to move it up or down the ...

Page 60: ...eters Parameter Description Exit Saving Changes Close the BIOS Setup Utility and save the setup changes Exit Discarding Changes Close the BIOS Setup Utility without saving the setup changes Load Setup Default Load the default values for all setup items Discard Changes Load the previous values for all setup items Save Changes Save the setup changes ...

Page 61: ...used NOTE NOTE Use AC adaptor power supply when running Flash utility If battery pack does not contain power to finish loading BIOS Flash do not boot system Perform the following to run Flash 1 Rename the BIOS file as XXXXXXX FD 2 Copy the XXXXXXX FD file to a bootable USB device containing the Crisis Recovery disk files 3 Turn off the computer 4 Insert the USB device containing the renamed BIOS f...

Page 62: ...Boot Menu to modify boot priority order Example If using USB HDD to Update BIOS move USB HDD to position 1 Figure 2 10 BIOS Boot 3 Insert the USB HDD and reboot computer 4 Execute BIOS BAT to update BIOS WinFlash Utility 0 Perform the following to use the WinFlash Utility 1 Double click the WinFlash executable file 2 Click OK to begin the update ...

Page 63: ...DD password is entered three times in succession an error is generated Figure 2 11 Figure 2 11 Password Error Status To reset the HDD password 1 Open the computer in a DOS environment 2 Type the following command A unlock6 XXXXX 00 Figure 2 12 Unlock Key Code 3 Press Enter to display the command options Figure 2 13 Password Encoding Password Error Status HDD password error code ...

Page 64: ...sword prompt type the master password generated in step 5 then press Enter Removing the BIOS Passwords 0 To clear a lost BIOS password user or supervisor password you need to short the clear password hardware gap G1901 located on the mainboard Refer to the Clearing the BIOS Passwords on page 5 5 section for detailed instructions Figure 2 14 G1901 Hardware Gap ...

Page 65: ...s plug one end of the AC adapter into the DC in jack and plug one end to an electrical outlet 6 Press the button to turn on the computer 7 After the BIOS POST remove the tool from the hardware gap 8 Reinstall the battery pack and the lower case cover 9 Turn on the computer and press F2 during bootup to access the Setup Utility If no password prompt appears the BIOS passwords have been cleared If t...

Page 66: ...AN EEPROM Utility 1 Create a DOS bootable USB HDD 2 Copy the contents of the MAC folder to the HDD and remove the HDD form the computer 3 Reboot the computer and press F2 during the boot sequence to enter the setup menu 4 Select the Boot menu item and move the entry USB HDD to the first position Figure 2 15 BIOS Boot 5 Connect the USB HDD and reboot the computer 6 At the command prompt navigate to...

Page 67: ...CHAPTER 3 Machine Maintenance ...

Page 68: ...wchart 3 19 Removing the Keyboard 3 20 Removing the Palmrest Module Upper Cover 3 23 Removing the Speakers 3 27 Removing the Power Button Board 3 29 Removing the Touchpad Board 3 31 Removing the USB Board 3 33 Removing the Bluetooth Module 3 35 Removing the Mainboard 3 36 Removing the Thermal Module 3 38 Removing the CPU 3 40 Removing the LCD Module 3 41 LCD Module Disassembly Process 3 44 LCD Mod...

Page 69: ...cing the USB Board 3 73 Replacing the Touchpad Board 3 75 Replacing the Power Button Board 3 77 Replacing the Speakers 3 79 Replacing the Palmrest Module Upper Cover 3 81 Replacing the Keyboard 3 84 External Module Reassembly Process 3 86 Replacing the Memory Modules 3 86 Replacing the WLAN Module 3 87 Replacing the HDD Module 3 89 Replacing the Base Door 3 91 Replacing the ODD Module 3 92 Replaci...

Page 70: ...3 4 ...

Page 71: ...n size During the disassembly process group the screws with the corresponding components to avoid mismatch when putting back the components The product previews seen in the disassembly procedures may not represent the final product color or configuration Recommended Equipment 0 To disassemble the computer the following tools are suggested Wrist grounding strap and conductive mat for preventing ele...

Page 72: ...ceeding with the disassembly procedure make sure that you do the following 1 Turn off the power to the system and all peripherals 2 Unplug the AC adapter and all power and signal cables from the system Figure 3 1 AC Adapter 3 Place the system on a flat stable surface ...

Page 73: ...ons illustrate the entire disassembly sequence Observe the order of the sequence to avoid damage to any of the hardware components For example if you want to remove the main board you must first remove the keyboard then disassemble the inside assembly frame in that order Table 3 1 Main Screw List Screw Quantity Acer Part Number M2 5 L6 17 86 00E12 536 M3 L4 2 86 9A524 4R0 M2 L3 8 86 00F80 723 M2 5...

Page 74: ...ly Flowchart Table 3 2 Screw List Step Screw Quantity Acer Part Number Base Door Disassembly M2 5 L6 3 86 00E12 536 HDD Module Disassembly M2 x L3 1 86 00F80 723 HDD Bracket Disassembly M3 L4 2 86 9A524 4R0 WLAN Module Disassembly M2 L3 1 86 00F80 723 ODD Module Disassembly M2 5 L6 1 86 00E12 536 ODD Bracket Disassembly M2 L3 1 86 00F80 723 ...

Page 75: ...move the battery from the battery bay a Use a pen to slide the battery release latch to release the battery from the battery bay b Remove the battery pack from its bay Figure 3 3 Battery Pack NOTE NOTE The battery has been highlighted with the yellow oval in Figure 3 3 Disconnect the battery and follow local regulations for disposal ...

Page 76: ...3 10 Machine Maintenance Remove the Dummy Card 0 1 Push against the card as if you were pushing it further into the slot a 2 Pull the dummy card out b Figure 3 4 Dummy Card ...

Page 77: ...ure described on page 3 9 2 Remove the screw securing the ODD module Figure 3 5 ODD Module Screw 3 Slowly pull out the ODD module from the ODD drive bay Figure 3 6 ODD Module 4 Remove the screw securing the ODD bracket Table 3 3 Screw Step Screw Quantity Screw Type ODD Module Disassembly M2 5 L6 1 ...

Page 78: ...e Figure 3 7 ODD Bracket Screw 5 Detach the bracket from the module Figure 3 8 ODD Bracket 6 Pry the ODD bezel off the module Figure 3 9 ODD Bezel Table 3 4 Screw Step Screw Quantity Screw Type ODD Bracket Disassembly M2 L3 1 ...

Page 79: ...age 3 9 2 Remove the screws securing the base door Figure 3 10 Base Door Screws 3 Insert a non marring plastic scribe on the base door s notch to release the base door a and then remove the door from the computer b Figure 3 11 Base Door Table 3 5 Screws Step Screw Quantity Screw Type Base Door Disassembly M2 5 L6 3 ...

Page 80: ... described on page 3 13 2 Remove the HDD screw Figure 3 12 HDD Module Screw 3 Lift the tab and use it to disengage the HDD from its connector and then remove the HDD assembly from its compartment Figure 3 13 HDD Module Table 3 6 Screw Step Screw Quantity Screw Type HDD Module Disassembly M2 x L3 1 ...

Page 81: ...15 4 Remove the screws securing the HDD bracket Figure 3 14 HDD Bracket Screws 5 Detach the bracket from the HDD module Figure 3 15 HDD Bracket Table 3 7 Screws Step Screw Quantity Screw Type HDD Bracket Disassembly M3 L4 2 ...

Page 82: ...the white cable from connector 2 on the WLAN card IMPORTANT For reference during machine reassembly note which cable color corresponds to the main black and auxiliary white connectors Figure 3 16 WLAN Module Antennas 3 Remove the screw securing the WLAN module Figure 3 17 WLAN Module Screw Table 3 8 Screw Step Screw Quantity Screw Type WLAN Module Disassembly M2 L3 1 ...

Page 83: ...Figure 3 18 WLAN Module Removing the Memory Modules 0 1 Perform the Removing the Base Door procedure described on page 3 13 2 Push out the latches on both sides of the memory slot until the module tilts upward Remove the ADM1 slot module Figure 3 19 ADM1 Slot Module ...

Page 84: ...3 18 Machine Maintenance 3 Remove the DM1 slot module Figure 3 20 DM1 Slot Module 4 Repeat steps 2 and 3 to remove the DM2 slot module ...

Page 85: ...r Cover Disassembly M2 L3 3 86 00F80 723 M2 5 L6 7 86 00E12 536 Speakers Disassembly M2 L3 4 86 00F80 723 Power Button Board Disassembly M2 L3 1 86 00F80 723 Mainboard Disassembly M2 5 L6 1 86 00E12 536 Thermal Module Disassembly 5 LCD Module Disassembly M2 5 L6 4 86 00E12 536 KEYBOARD BLUETOOTH MODULE THERMAL MODULE RTC BATTERY EXTERNAL MODULES PALMREST MODULE UPPER COVER POWER BUTTON BOARD SPEAK...

Page 86: ...cess Take care not to use excessive force when removing 1 Perform the Removing the Base Door procedure described on page 3 13 2 Remove the screws securing the keyboard Figure 3 22 Keyboard Screws 3 Turn the computer over and open the LCD panel Table 3 10 Screws Step Screw Quantity Screw Type Keyboard Disassembly M2 5 L6 2 ...

Page 87: ...plastic flat blade screwdriver to push the latches on the top side of the keyboard Figure 3 23 Keyboard Latches 5 Flip the keyboard over to access the keyboard cable a Open the connector latch b and then disconnect the cable c Figure 3 24 Keyboard ...

Page 88: ... 22 Machine Maintenance NOTE NOTE When replacing the keyboard make sure that you install the keyboard standoff before installing the new keyboard Remember to peel off the paper from the keyboard standoff ...

Page 89: ...ely 2 Perform the Removing the Keyboard procedure described on the preceding section 3 Remove the base side screws securing the upper cover Figure 3 25 Upper Cover Screws Base Side 4 Turn the computer over and open the LCD panel 5 Remove the single top side screw securing the upper cover Table 3 11 Screw Step Screw Quantity Screw Type Upper Cover Disassembly M2 L3 3 10 12 M2 5 L6 9 1 9 ...

Page 90: ... 3 26 Upper Cover Screw Top Side 6 Open the connector latch for the power button board a and then disconnect the cable b Figure 3 27 Power Button Cable Table 3 12 Screw Step Screw Quantity Screw Type Upper Cover Disassembly M2 5 L6 1 ...

Page 91: ...d cable a and then disconnect the cable b Figure 3 28 Touchpad Cable 8 Locate the small gaps between the upper cover and lower case and insert a small flat blade screwdriver or non marring scribe into each gap to separate the one from the other Figure 3 29 Upper Cover ...

Page 92: ...3 26 Machine Maintenance 9 Once the upper cover is separated lift it from the lower case Figure 3 30 Upper Cover ...

Page 93: ...orm the Removing the Palmrest Module Upper Cover procedure described on the preceding section 2 Detach the tapes covering the speaker cable Figure 3 31 Speaker Cable Tapes 3 Disconnect the speaker cable from the power button board Figure 3 32 Speaker Cable ...

Page 94: ...ntenance 4 Remove the screws securing the speakers Figure 3 33 Speaker Screws 5 Lift the speakers from the upper cover Figure 3 34 Speakers Table 3 13 Screws Step Screw Quantity Screw Type Speakers Disassembly M2 L3 4 ...

Page 95: ... the Removing the Palmrest Module Upper Cover procedure described on page 3 23 2 Detach the tape covering the power button cable Figure 3 35 Power Button Cable Tapes 3 Open the connector latch a and then disconnect the power button cable b Figure 3 36 Power Button Cable ...

Page 96: ...ew securing the power button board Figure 3 37 Power Button Board Screw 5 Remove the power button board from the upper cover Figure 3 38 Power Button Board Table 3 14 Screw Step Screw Quantity Screw Type Power Button Board Disassembly M2 L3 1 ...

Page 97: ... 2 Open the connector latch a and then disconnect the touchpad cable b Figure 3 39 Touchpad Board Cable 3 Detach the tape securing touchpad board Figure 3 40 Touchpad Board Tape 4 Insert a small flat blade screwdriver between the touchpad board and the upper cover and carefully pry the board loose Remove the touchpad board from the palm rest ...

Page 98: ...ne Maintenance Figure 3 41 Touchpad Board NOTE NOTE A circuit board that is 10cm2 has been highlighted with a yellow rectangle in Figure 3 41 Follow the local regulations for disposing this type of circuit board ...

Page 99: ...er Cover procedure described on page 3 23 2 Open the connector latches on both ends of the USB board cable a and then disconnect the USB board cable from both the mainboard and the USB board b Figure 3 42 USB Board Cable 3 Remove the USB board cable from the lower case Figure 3 43 USB Board Cable ...

Page 100: ...3 34 Machine Maintenance 4 Remove the USB board from the lower case Figure 3 44 USB Board ...

Page 101: ...rform the Removing the Palmrest Module Upper Cover procedure described on page 3 23 2 Disconnect the Bluetooth cable from the mainboard Figure 3 45 Bluetooth Cable Mainboard Connection 3 Detach the Bluetooth module from the mainboard Figure 3 46 Bluetooth Module ...

Page 102: ...talled remove it Perform the Main Unit Disassembly Process procedure described on pages 3 19 3 Perform the Removing the Palmrest Module Upper Cover procedure described on page 3 23 4 Disconnect the LCD cable from the mainboard Figure 3 47 LCD Cable 5 Remove the screw securing the mainboard Figure 3 48 Mainboard Screw Table 3 15 Screw Step Screw Quantity Screw Type Mainboard Disassembly M2 5 x L6 1...

Page 103: ...highlighted with a yellow rectangle in Figure 3 49 Follow the local regulations for disposing this type of circuit board NOTE NOTE The RTC battery has been highlighted with a yellow circle in Figure 3 49 Detach the RTC battery and follow the local regulations for disposing it 7 Disconnect the DC input cable from the mainboard Figure 3 50 DC input Cable ...

Page 104: ...ing section 2 Disconnect the thermal module fan cable from the mainboard Figure 3 51 Fan Cable 3 Loosen the spring loaded captive screws securing the thermal module Follow the screw sequence indicated on Figure 3 52 Figure 3 52 Thermal Module Screws Table 3 16 Screws Step Screw Quantity Screw Type Thermal Module Disassembly 5 ...

Page 105: ...Machine Maintenance 3 39 4 Remove the thermal module from the mainboard Figure 3 53 Thermal Module ...

Page 106: ...CPU 0 1 Perform the Removing the Mainboard procedure described on page 3 36 2 Use a flat blade screwdriver to turn the CPU socket lock screw counter clockwise Figure 3 54 CPU Socket Screw 3 Remove the CPU from the mainboard Figure 3 55 CPU ...

Page 107: ...e Removing the Mainboard procedure described on page 3 36 2 Release the antenna cables from their base side latches Figure 3 56 Antenna Cables Base Side Latches 3 Remove the black tapes securing the antenna cables to the lower case Figure 3 57 Antenna Cables Tapes ...

Page 108: ...nna cables from their top side latches Figure 3 58 Antenna Cables Top Side Latches 5 Remove the screws securing the LCD module Figure 3 59 LCD Module Hinge Screws Table 3 17 Screws Step Screw Quantity Screw Type LCD Module Disassembly M2 5 L6 4 ...

Page 109: ...Machine Maintenance 3 43 6 Remove the LCD module from the lower cover Figure 3 60 LCD Module ...

Page 110: ...y Flowchart Table 3 18 Screw List Step Screw Quantity Acer Part Number LCD Bezel Disassembly M2 5 L5 2 86 00F87 735 LCD Panel Disassembly M2 5 L4 4 86 00H36 534 LCD Brackets Disassembly M2 L3 4 86 00F80 723 LCD BEZEL LCD PANEL WEB CAMERA ANTENNAS LCD COVER MICROPHONE LEFT LCD BRACKET LCD FPC CABLE RIGHT LCD BRACKET LCD MODULE ...

Page 111: ...e described on page 3 41 2 Remove the screw rubber covers on the lower corners of the LCD bezel Figure 3 62 LCD Bezel Screw Covers 3 Remove the screws on the lower corners of the LCD bezel Figure 3 63 LCD Bezel Screws Table 3 19 Screws Step Screw Quantity Screw Type LCD Bezel Disassembly M2 5 L5 2 ...

Page 112: ...y pry loose the LCD bezel from the LCD cover Start on the bottom side continue to the left and right sides and finally the top side Remove the front panel Figure 3 64 LCD Bezel 5 Remove the bezel from the LCD module Figure 3 65 LCD Bezel ...

Page 113: ... LCD Panel 0 1 Perform the Removing the LCD Bezel procedure described on the preceding section 2 Disconnect the camera board cable Figure 3 66 Camera Board Cable 3 Detach the tapes securing the LCD webcam cable Figure 3 67 LCD Webcam Cable ...

Page 114: ...nnect the microphone cable from the LCD webcam cable Figure 3 68 Microphone Cable 5 Remove the screws securing the LCD panel Figure 3 69 LCD Panel Screws Table 3 20 Screws Step Screw Quantity Screw Type LCD Panel Disassembly M2 5 L4 4 ...

Page 115: ... 6 Lift the panel from the LCD cover Figure 3 70 LCD Panel 7 Turn the LCD on its front to access the LCD webcam cable 8 Detach the webcam side of the LCD webcam cable from the LCD panel Figure 3 71 LCD webcam Cable Webcam Side ...

Page 116: ...3 50 Machine Maintenance 9 Detach the transparent tape securing the LCD cable a and then disconnect the cable from the LCD board b Figure 3 72 LCD webcam Cable LCD Side ...

Page 117: ...oving the LCD Panel procedure described on the preceding section 2 Remove the screws securing the left and right LCD brackets then remove the left and right brackets Figure 3 73 LCD Brackets Table 3 21 Screws Step Screw Quantity Screw Type LCD Brackets Disassembly M2 L3 4 ...

Page 118: ...hone 0 1 Perform the Removing the LCD Panel procedure described on page 3 47 2 Release the microphone cable from the adhesive tabs securing them Figure 3 74 Microphone Cable Tapes 3 Remove the microphone from the LCD cover Figure 3 75 Microphone ...

Page 119: ...Machine Maintenance 3 53 Removing the Camera Board 0 1 Perform the Removing the LCD Panel procedure described on page 3 47 2 Carefully pry the camera board off the LCD cover Figure 3 76 Camera Board ...

Page 120: ...3 54 Machine Maintenance LCD Module Reassembly Process 0 Replacing the Camera Board 0 1 Place the camera board on the LCD cover and press down to secure in place Figure 3 77 Camera Board ...

Page 121: ...Machine Maintenance 3 55 Replacing the Microphone 0 1 Place the microphone on the LCD cover Figure 3 78 Microphone 2 Secure the microphone cable underneath the adhesive tabs Figure 3 79 Microphone Cable ...

Page 122: ...cing the LCD Brackets 0 1 Attach the LCD left and right brackets to the LCD panel then secure the brackets with the four screws Figure 3 80 LCD Brackets Table 3 22 Screws Step Screw Quantity Screw Type LCD Brackets Assembly M2 L3 4 ...

Page 123: ...t the LCD cable to the LCD board a and secure the LCD cable connection with the transparent tape b Figure 3 81 LCD webcam Cable Connector 2 Lay down the LCD webcam cable on the LCD panel and press down to secure it in place Figure 3 82 LCD webcam Cable LCD Side ...

Page 124: ...3 58 Machine Maintenance 3 Place the LCD panel on the LCD cover Figure 3 83 LCD Panel 4 Connect the microphone cable to the LCD webcam cable Figure 3 84 Microphone Cable ...

Page 125: ...achine Maintenance 3 59 5 Route the LCD webcam cable on the cable guides and secure with the two adhesive tabs Figure 3 85 LCD Webcam Cable 6 Connect the camera board cable Figure 3 86 Camera Board Cable ...

Page 126: ...3 60 Machine Maintenance 7 Secure the LCD panel with the four screws Figure 3 87 LCD Panel Screws Table 3 23 Screws Step Screw Quantity Screw Type LCD Panel Assembly M2 5 L4 4 ...

Page 127: ... into place Figure 3 88 LCD Bezel NOTE NOTE Make sure that the LCD webcam microphone and antenna cables are properly routed on the hinge sides and there is no gap between the bezel and the LCD cover 2 Secure the bezel with the two screws Figure 3 89 LCD Bezel Screws Table 3 24 Screws Step Screw Quantity Screw Type LCD Bezel Assembly M2 5 L5 2 ...

Page 128: ...3 62 Machine Maintenance 3 Secure the bezel with the two 2 screw covers Figure 3 90 LCD Bezel Screw Covers ...

Page 129: ...s 0 Replacing the LCD Module 0 1 Position the LCD module on the lower case Figure 3 91 LCD Module 2 Secure LCD module with the four screws Figure 3 92 LCD Module Hinge Screws Table 3 25 Screws Step Screw Quantity Screw Type LCD Module Assembly M2 5 L6 4 ...

Page 130: ...achine Maintenance 3 Route the antenna cables through their top side latches Figure 3 93 Antenna Cables Top Side Latches 4 Secure the antenna cables underneath the black tapes Figure 3 94 Antenna Cables Tapes ...

Page 131: ...chine Maintenance 3 65 5 Insert the antenna cables into the openings on the lower case Figure 3 95 Antennas 6 Secure the antenna cables their base side latches Figure 3 96 Antenna Cables Base Side Latches ...

Page 132: ...1 Place the CPU in the socket Figure 3 97 CPU 2 Make sure the gold arrow on the corner of the CPU is aligned with the beveled corner of the socket The CPU will easily fit into the socket if you orient it properly Figure 3 98 CPU Orientation Marker ...

Page 133: ...Machine Maintenance 3 67 3 Use a flat blade screwdriver to turn the socket screw clockwise to secure the CPU in place Figure 3 99 CPU Socket Screw ...

Page 134: ...rmal module and the CPU 2 Apply a small amount of thermal grease onto the center area of the CPU There is no need to spread the grease manually the force used during the installation of the thermal module is sufficient The following brands of thermal grease are approved for use N302 I Connosseur Honeywell Eapus XR PE 3 Place the thermal module on the mainboard Make sure to align the captive screws...

Page 135: ...ide each screw when securing the thermal module 5 Tighten the spring loaded captive screws to secure the thermal module Follow the screw sequence indicated on Figure 3 101 Figure 3 101 Thermal Module Screws 6 Connect the fan cable to the mainboard Figure 3 102 Fan Cable Table 3 26 Screws Step Screw Quantity Screw Type Thermal Module Disassembly 5 ...

Page 136: ... ports of the mainboard extruding from their port holes then lower the mainboard in place Note the following reminders Make sure a RTC battery is installed on the mainboard Check that the DC input cable is properly positioned on the top left corner of the lower case Check that the RF switch cable is properly routed through the cable guides on the front edge of the lower case Figure 3 104 Mainboard...

Page 137: ... 3 71 3 Secure the mainboard with the one screw Figure 3 105 Mainboard Screw 4 Connect the LCD cable from the mainboard Figure 3 106 LCD Cable Table 3 27 Screw Step Screw Quantity Screw Type Mainboard Assembly M2 5 x L6 1 ...

Page 138: ...cing the Bluetooth Module 0 1 Place the Bluetooth module on its assigned location beside the card reader Figure 3 107 Bluetooth Module 2 Connect the Bluetooth cable to the mainboard Figure 3 108 Bluetooth Cable Mainboard Connection ...

Page 139: ...rd toward the right side of the lower case with the I O ports of the USB board extruding from their port holes and then lower the USB board in place Figure 3 109 USB Board 2 Position the USB board cable on the lower case and press to secure it Figure 3 110 USB Board Cable ...

Page 140: ...3 74 Machine Maintenance 3 Connect the USB board cable to both the mainboard and the USB board a and then close the connector latches b Figure 3 111 USB Board Cable Connectors ...

Page 141: ...eplacing the Touchpad Board 0 1 Position the touchpad on the upper cover and press down to secure the board in place Figure 3 112 Touchpad Board 2 Press the adhesive tape over the touchpad board Figure 3 113 Touchpad Board Tape ...

Page 142: ...3 76 Machine Maintenance 3 Connect the touchpad cable a and then close the connector latch b Figure 3 114 Touchpad Board Cable ...

Page 143: ...rd 0 1 Position the power button board on the upper cover Figure 3 115 Power Button Board 2 Secure the power button board with a screw Figure 3 116 Power Button Board Screw Table 3 28 Screw Step Screw Quantity Screw Type Power Button Board Assembly M2 L3 1 ...

Page 144: ...achine Maintenance 3 Connect the power button cable a and then close the connector latch b Figure 3 117 Power Button Cable 4 Press the tape covering the power button cable Figure 3 118 Power Button Cable Tape ...

Page 145: ...acing the Speakers 0 1 Position the speakers on the upper cover Figure 3 119 Speakers 2 Secure the speakers with the four screws Figure 3 120 Speaker Screws Table 3 29 Screws Step Screw Quantity Screw Type Speakers Assembly M2 L3 4 ...

Page 146: ...0 Machine Maintenance 3 Connect the speaker cable to the power button board Figure 3 121 Speaker Cable 4 Secure the speaker installation with tapes as shown in Figure 3 122 Figure 3 122 Speaker Cable Tapes ...

Page 147: ...caught underneath the upper cover 2 Align the upper cover with the lower case then press it down on all sides until it snaps into place Figure 3 123 Upper Cover 3 Connect the touchpad cable to its mainboard connector a and then close the connector latches b Figure 3 124 Touchpad Cable 4 Connect the power button cable to its mainboard connector a and then close the ...

Page 148: ...Power Button Cable 5 Secure the upper cover with the one screw Figure 3 126 Upper Cover Screw Top Side 6 Close the LCD panel and turn the computer over so that the base is facing up Table 3 30 Screw Step Screw Quantity Screw Type Upper Cover Assembly M2 5 L6 1 ...

Page 149: ...e Maintenance 3 83 7 Secure the upper cover with the base side screws Figure 3 127 Upper Cover Screws Base Side Table 3 31 Screw Step Screw Quantity Screw Type Upper Cover Assembly M2 L3 3 10 12 M2 5 L6 9 1 9 ...

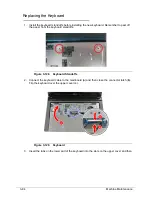
Page 150: ...r to peel off the paper from the keyboard standoffs Figure 3 128 Keyboard Standoffs 2 Connect the keyboard cable to the mainboard a and then close the connector latch b Flip the keyboard over the upper cover c Figure 3 129 Keyboard 3 Insert the tabs on the lower part of the keyboard into the slots on the upper cover and then ...

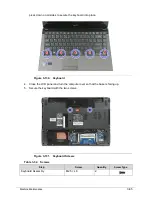
Page 151: ...yboard into place Figure 3 130 Keyboard 4 Close the LCD panel and turn the computer over so that the base is facing up 5 Secure the keyboard with the two screws Figure 3 131 Keyboard Screws Table 3 32 Screws Step Screw Quantity Screw Type Keyboard Assembly M2 5 L6 2 ...

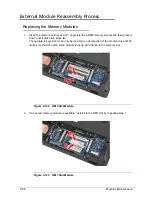
Page 152: ...d then press it down until it clicks into place b The module is keyed so it can only be inserted in one direction If the module does not fit make sure that the notch in the module lines up with the tab in the memory slot Figure 3 132 DM2 Slot Module 2 If a second memory module is available install it in the DM1 slot by repeating step 1 Figure 3 133 DM1 Slot Module ...

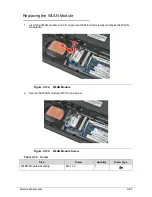
Page 153: ...t the WLAN module at a 30 angle into the Mini Card slot a and press the WLAN module b Figure 3 134 WLAN Module 2 Secure the WLAN module with the one screw Figure 3 135 WLAN Module Screw Table 3 33 Screw Step Screw Quantity Screw Type WLAN Module Assembly M2 L3 1 ...

Page 154: ...tenna cables to the WLAN module IMPORTANT The main antenna cable black should be attached to connector near the module screw the auxiliary antenna cable white should be attached to the connector near the lower case cable opening Figure 3 136 WLAN Module Antennas ...

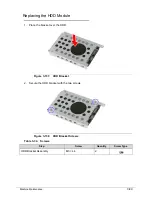
Page 155: ...ing the HDD Module 0 1 Place the bracket over the HDD Figure 3 137 HDD Bracket 2 Secure the HDD bracket with the two screws Figure 3 138 HDD Bracket Screws Table 3 34 Screws Step Screw Quantity Screw Type HDD Bracket Assembly M3 L4 2 ...

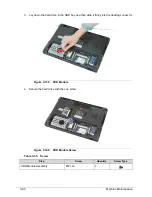
Page 156: ...drive in the HDD bay and then slide it firmly into the docking connector Figure 3 139 HDD Module 4 Secure the hard drive with the one screw Figure 3 140 HDD Module Screw Table 3 35 Screw Step Screw Quantity Screw Type HDD Module Assembly M2 x L3 1 ...

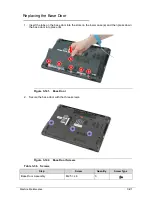
Page 157: ... the base door into the slots on the lower case a and then press down the base door into place b Figure 3 141 Base Door 2 Secure the base door with the three screws Figure 3 142 Base Door Screws Table 3 36 Screws Step Screw Quantity Screw Type Base Door Assembly M2 5 L6 3 ...

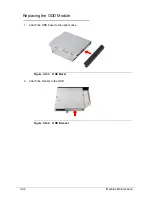
Page 158: ...3 92 Machine Maintenance Replacing the ODD Module 0 1 Attach the ODD bezel to the optical drive Figure 3 143 ODD Bezel 2 Attach the bracket to the ODD Figure 3 144 ODD Bracket ...

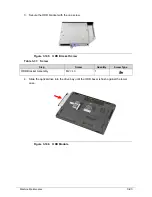
Page 159: ...t with the one screw Figure 3 145 ODD Bracket Screw 4 Slide the optical drive into the drive bay until the ODD bezel is flush against the lower case Figure 3 146 ODD Module Table 3 37 Screw Step Screw Quantity Screw Type ODD Bracket Assembly M2 L3 1 ...

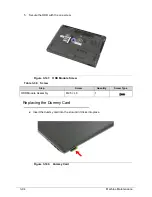
Page 160: ...D with the one screw Figure 3 147 ODD Module Screw Replacing the Dummy Card 0 Insert the dummy card into the slot until it clicks into place Figure 3 148 Dummy Card Table 3 38 Screw Step Screw Quantity Screw Type ODD Module Assembly M2 5 L6 1 ...

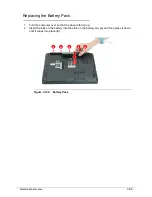
Page 161: ...eplacing the Battery Pack 0 1 Turn the computer over so that the base is facing up 2 Insert the tabs on the battery into the slots on the battery bay a and then press it down until it snaps into place b Figure 3 149 Battery Pack ...

Page 162: ...3 96 Machine Maintenance ...

Page 163: ...CHAPTER 4 Troubleshooting ...

Page 164: ... 9 Internal Speaker Failure 4 10 Microphone Failure 4 12 USB Failure 4 13 WLAN Failure 4 14 Bluetooth Failure 4 15 Card Reader Failure 4 16 Thermal Unit Failure 4 17 Other Functions Failure 4 18 Intermittent Problems 4 19 Undetermined Problems 4 19 Error Codes 4 20 BIOS Beep Codes 4 21 POST Codes 4 26 Component Codes 4 26 Progress Codes 4 30 ...

Page 165: ...tain as much detailed information as possible about the problem 2 If possible verify the symptoms by re creating the failure through diagnostic tests or repeating the operation that led to the problem 3 Refer to Table 4 1 for a list of verified symptom category to determine the solution 4 If the issue is still not resolved refer to the Online Support Information on page 9 3 Table 4 1 Common Proble...

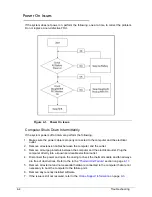
Page 166: ... the computer and the outlet 3 Remove all surge protectors between the computer and the electrical outlet Plug the computer directly into a known serviceable electrical outlet 4 Disconnect the power and open the casing to check the thermal module and fan airways are free of obstructions Refer to the to the Thermal Unit Failure section on page 4 17 5 Remove all external and non essential hardware c...

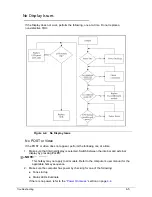
Page 167: ... following one at a time 1 Make sure that internal display is selected Switch between the internal and external display by pressing Fn F5 NOTE NOTE This hotkey may not apply to all models Refer to the computer s user manual for the applicable hotkey sequence 2 Make sure the computer has power by checking for one of the following Fans start up Status LEDs illuminate If there is no power refer to th...

Page 168: ... The same goes for when there is extensive pixel damage i e different colored spots in the same locations on the screen Perform the Removing the LCD Module and Removing the LCD Panel procedures described on pages 3 41 and 3 47 respectively NOTE NOTE Make sure that the computer is not running on battery alone as this may reduce display brightness 2 Adjust the brightness to its highest level Refer t...

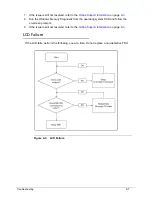
Page 169: ... Run the Windows Memory Diagnostic from the operating system DVD and follow the on screen prompts 9 If the issue is still not resolved refer to the Online Support Information on page 9 3 LCD Failure 0 If the LCD fails perform the following one at a time Do not replace a non defective FRU Figure 4 3 LCD Failure ...

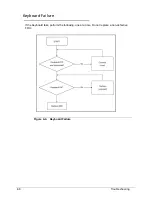
Page 170: ...4 8 Troubleshooting Keyboard Failure 0 If the Keyboard fails perform the following one at a time Do not replace a non defective FRU Figure 4 4 Keyboard Failure ...

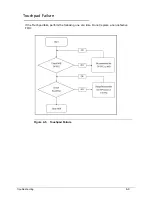
Page 171: ...Troubleshooting 4 9 Touchpad Failure 0 If the Touchpad fails perform the following one at a time Do not replace a non defective FRU Figure 4 5 Touchpad Failure ...

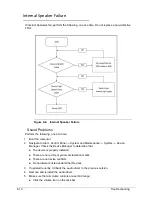
Page 172: ...o Start Control Panel System and Maintenance System Device Manager Check the Device Manager to determine that The device is properly installed There are no red Xs or yellow exclamation marks There are no device conflicts No hardware is listed under Other Devices 3 If updated recently roll back the audio driver to the previous version 4 Remove and reinstall the audio driver 5 Make sure that all vol...

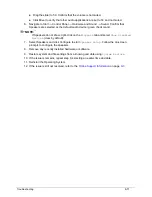
Page 173: ...ow right click on the Playback tab and select Show Disabled Devices clear by default 7 Select Speakers and click Configure to start Speaker Setup Follow the on screen prompts to configure the speakers 8 Remove any recently installed hardware or software 9 Restore system and file settings from a known good date using System Restore 10 If the issue is remains repeat step 9 selecting an earlier time ...

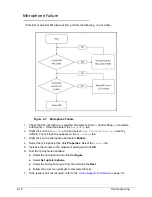
Page 174: ...evices clear by default The microphone appears on the Recording tab 3 Right click on the microphone and select Enable 4 Select the microphone then click Properties Select the Levels tab 5 Increase the volume to the maximum setting and click OK 6 Test the microphone hardware Select the microphone and click Configure Select Set up microphone Select the microphone type from the list and click Next Fo...

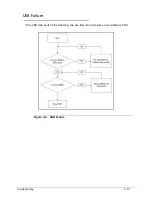
Page 175: ...Troubleshooting 4 13 USB Failure 0 If the USB fails perform the following one at a time Do not replace a non defective FRU Figure 4 8 USB Failure ...

Page 176: ...4 14 Troubleshooting WLAN Failure 0 If the WLAN fails perform the following one at a time Do not replace a non defective FRU Figure 4 9 WLAN Failure ...

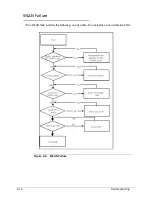
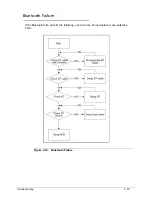
Page 177: ...Troubleshooting 4 15 Bluetooth Failure 0 If the Bluetooth fails perform the following one at a time Do not replace a non defective FRU Figure 4 10 Bluetooth Failure ...

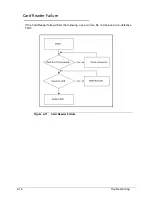
Page 178: ...4 16 Troubleshooting Card Reader Failure 0 If the Card Reader fails perform the following one at a time Do not replace a non defective FRU Figure 4 11 Card Reader Failure ...

Page 179: ...Troubleshooting 4 17 Thermal Unit Failure 0 If the Thermal Unit fails perform the following one at a time Do not replace a non defective FRU Figure 4 12 Thermal Unit Failure ...

Page 180: ...4 18 Troubleshooting Other Functions Failure 0 1 Check if drives are functioning correctly 2 Check if external modules are functioning correctly 3 Change mainboard to check if current one is defective ...

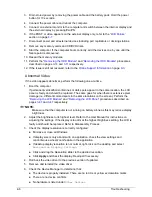
Page 181: ...t whether a short circuit is suspected or whether the system is inoperative Perform the following procedures to isolate the failing FRU do not isolate non defective FRU NOTE NOTE Verify that all attached devices are supported by the computer NOTE NOTE Verify that the power supply being used at the time of the failure is operating correctly 1 Remove power from the computer 2 Visually check the comp...

Page 182: ...uration Error 010 Memory Error at xxxx xxxx xxxxh R xxxxh W xxxxh 070 Real Time Clock Error 071 CMOS Battery Bad 072 CMOS Checksum Error 110 System is disabled An incorrect password was entered No error code Battery critically low In this situation BIOS will issue four 4 short beeps then shuts the system down No message is displayed No error code Temperature is critically high In this situation BI...

Page 183: ...d alternate registers with initial POST values 12h Restore CPU control word during warm boot 13h Initialize PCI Bus Mastering devices 14h Initialize keyboard controller 16h 1 2 2 3 BIOS ROM checksum 17h Initialize cache before memory autosize 18h 8254 timer initialization 1Ah 8237 DMA controller initialization 1Ch Reset Programmable Interrupt Controller 20h 1 3 1 1 Test DRAM refresh 22h 1 3 1 3 Te...

Page 184: ...MOS 49h Initialize PCI bus and devices 4Ah Initialize all video adapters in system 4Bh QuietBoot start optional 4Ch Shadow video BIOS ROM 4Eh Display BIOS copyright notice 50h Display CPU type and speed 51h Initialize EISA board 52h Test keyboard 54h Set key click if enabled 58h 2 2 3 1 Test for unexpected interrupts 59h Initialize POST display service 5Ah Display prompt Press F2 to enter SETUP 5B...

Page 185: ...tall external parallel ports 85h Initialize PC compatible PnP ISA devices 86h Re initialize onboard I O ports 87h Configure Motherboard Configurable Devices optional 88h Initialize BIOS Area 89h Enable Non Maskable Interrupts NMIs 8Ah Initialize Extended BIOS Data Area 8Bh Test and initialize PS 2 mouse 8Ch Initialize floppy controller 8Fh Determine number of ATA drives optional 90h Initialize har...

Page 186: ...g system B4h 1 One short beep before boot B5h Terminate QuietBoot optional B6h Check password optional B9h Prepare Boot BAh Initialize DMI parameters BBh Initialize PnP Option ROMs BCh Clear parity checkers BDh Display MultiBoot menu BEh Clear screen optional BFh Check virus and backup reminders C0h Try to boot with INT 19 C1h Initialize POST Error Manager PEM C2h Initialize error logging C3h Init...

Page 187: ...BIOS E8h Set Huge Segment E9h Initialize Multi Processor EAh Initialize OEM special code EBh Initialize PIC and DMA ECh Initialize Memory type EDh Initialize Memory size EEh Shadow Boot Block EFh System memory test F0h Initialize interrupt vectors F1h Initialize Run Time Clock F2h Initialize video F3h Initialize System Management Mode F4h 1 Output one beep before boot F5h Boot to Mini DOS F6h Clea...

Page 188: ... Codes Range Description 0x00 0x1f OEM Components These values are reserved for OEM components 0x20 0x9f These values are reserved for SecureCore Tiano core components POSTCODE_CC_VARIABLE_SERVICES 0x20 POSTCODE_CC_KEYBOARD_CONTROLLER 0x21 POSTCODE_CC_BOOT_MODE 0x22 POSTCODE_CC_S3_SUPPORT 0x23 POSTCODE_CC_TCG 0x24 POSTCODE_CC_HDD_PASSWORD 0x25 POSTCODE_CC_CPU_IO 0x26 POSTCODE_CC_BOOT_SCRIPT 0x27 P...

Page 189: ...S2_MOUSE 0x46 POSTCODE_CC_PS2_KEYBOARD 0x47 POSTCODE_CC_EHCI 0x48 POSTCODE_CC_XHCI 0x49 POSTCODE_CC_UHCI 0x4a POSTCODE_CC_OHCI 0x4b POSTCODE_CC_USB_KEYBOARD 0x4c POSTCODE_CC_USB_MOUSE 0x4d POSTCODE_CC_USB_MASS_STORAGE 0x4e POSTCODE_CC_CONSOLE_SPLITTER 0x4f POSTCODE_CC_GRAPHICS_CONSOLE 0x50 POSTCODE_CC_SERIAL_CONSOLE 0x51 POSTCODE_CC_TEXT_CONSOLE 0x52 POSTCODE_CC_DISK_IO 0x53 POSTCODE_CC_PARTITION ...

Page 190: ...0xb0 0xbf These values are reserved for future expansion 0xc0 0xcf These values are reserved for core chipset drivers north bridge south bridge and CPU and are assigned by chipset family POSTCODE_CC_MEMORY_CONTROLLER 0xc0 Memory Controller 0xd0 0xd7 These values are reserved for Small Silicon drivers SIOs flash fingerprint etc POSTCODE_CC_SUPER_IO 0xd0 Super I O POSTCODE_CC_FLASH_CONTROLLER 0xd1 F...

Page 191: ...OSTCODE_PC_IPL_S3 0xe5 Entering DXE IPL s S3 boot path POSTCODE_PC_S3_OS 0xe6 Exiting S3 boot path back to the OS POSTCODE_PC_IPL_RECOVERY 0xe7 Entering DXE IPL s recovery boot path POSTCODE_PC_IPL_EXIT 0xe8 POSTCODE_PC_DXE_ENTRY 0xe9 Entering DXE Dispatch POSTCODE_PC_DXE_EXIT 0xea Exiting DXE Dispatch POSTCODE_EC_PEI_MEMORY 0xeb No permanent memory found at the end of PEI POSTCODE_EC_PEI_IPL 0xec...

Page 192: ...tart member function of the component s instance of the Driver Binding protocol was called POSTCODE_PC_COMP_STOP 0x07 The Stop member function of the component s instance of the Driver Binding protocol was called POSTCODE_PC_COMP_SMM_INIT 0x08 The component was loaded and the entry point called inside of SMM POSTCODE_EC_DEVICE_ERROR 0x09 The driver encountered a condition where it cannot proceed d...

Page 193: ...CHAPTER 5 Jumper and Connector Locations ...

Page 194: ...5 2 Mainboard Layout 5 3 Clearing Password Check and BIOS Recovery 5 5 Clearing the BIOS Passwords 5 5 Performing a BIOS Recovery 5 6 ...

Page 195: ... 0 Figure 5 1 Mainboard Top Table 5 1 Mainboard Top No Code Component No Code Component 1 LCD1 LCD cable connector 5 8 Status indicators 2 KB1 Keyboard cable connector 9 RTC1 Battery 3 TPAD1 Touchpad board cable connector 10 CARD1 Memory card reader 4 USBCN1 USB board cable connector ...

Page 196: ...BAT1 Battery connector 8 USB2 USB 2 0 port 2 FAN1 Fan connector 9 ADM2 DDR3 slot 2 3 DCIN1 DC input cable connector 10 ADM1 DDR3 slot 1 4 RJ45 Ethernet jack 11 APU1 CPU socket 5 CRT1 Monitor port 12 HDD1 HDD connector 6 HDMI1 HDMI out port 13 G1901 Clear BIOS password hardware gap 7 AUSB1 USB 3 0 port 14 ODD1 ODD connector ...

Page 197: ...ver 3 If the Mini Card slot is occupied remove the installed wireless module and locate the G1901 gap 4 Use an electrical conductivity tool to short the two contacts on the hardware gap together 5 While resting the tool on the two contacts plug one end of the AC adapter into the DC in jack and plug one end to an electrical outlet 6 Press the button to turn on the computer 7 After the BIOS POST rem...

Page 198: ...NOTE NOTE The BIOS crisis recovery disk should be prepared in a computer running the Windows XP Vista or 7 OS 1 Prepare a removable USB flash drive Note that all data in the USB flash drive will be cleared during the creation of the crisis disk 2 Set up a computer running the Windows XP Vista or 7 operating system and plug in the USB flash drive into an available USB port 3 Open the Notepad progra...

Page 199: ... function is enabled the system will force the BIOS to execute the boot block program To perform a BIOS recovery 1 Shut down the BIOS failed computer 2 Connect the USB flash drive containing the Crisis Recovery disk files to the computer 3 Press and hold the Fn Esc keys then press the power button The BIOS recovery process begins When the process is complete the computer will automatically reboot ...

Page 200: ...5 8 Jumper and Connector Locations ...

Page 201: ...CHAPTER 6 FRU List ...

Page 202: ...6 2 Aspire 4560 4560G Exploded Diagram 6 4 Main Assembly 6 4 LCD Assembly 6 6 FRU List 6 7 ...

Page 203: ... web or channel Part number changes will not be noted on the printed Service Guide For ACER AUTHORIZED SERVICE PROVIDERS the Acer office may have a DIFFERENT part number code from those given in the FRU list of this printed Service Guide Users MUST use the local FRU list provided by the regional Acer office to order FRU parts for repair and service of customer machines NOTE NOTE To scrap or to ret...

Page 204: ... Unit Exploded Diagram No Description Part Number 1 Keyboard KB I140A 213 2 Uppercase 60 RC901 002 3 Power board 55 RC901 001 4 DC in cable module 50 RC801 001 5 Mainboard 50 RC801 001 6 Thermal module Discrete 60 RKC01 001 7 Touchpad board 56 PUD01 001 8 Dummy card 42 RC901 002 9 Lower case 60 RC901 001 10 ODD bracket 33 RC901 001 ...

Page 205: ...12 ODD bezel 42 RC901 004 13 USB board 55 RKC01 001 14 HDD bracket 33 RC901 002 15 HDD module KH 25004 006 16 Battery BT 00603 124 17 Base door 42 RC901 001 18 DC in rubber 19 Bluetooth module BH 21100 010 Table 6 1 Unit Exploded Diagram No Description Part Number ...

Page 206: ...re 6 2 LCD Assembly Exploded Diagram Table 6 2 LCD Assembly Exploded Diagram No Description Part Number 1 LCD cover 60 RC901 005 2 LCD module 6M RKC01 003 3 LCD left hinge bracket 33 RC901 004 4 LCD right hinge bracket 33 RC901 003 5 LCD bezel 60 RC901 004 ...

Page 207: ...2 5A 250V 3P BK 27 01518 541 POWER CORD 5A 250V 3P UK BK 27 03118 001 POWER CORD JAPAN 7A 125V 2P BK 27 01518 551 POWER CORD DENMARK 2 5A 250V 3P BK 27 01518 561 POWER CORD 10A 250V 3P DENMARK BK 27 01518 671 POWER CORD SOUTH AFRICA 16A 250V BK 27 01518 571 POWER CORD 16A 250V SOUTH AFRICA BK 27 01518 681 POWER CORD CHINA 10A 250V 3P 27 01518 591 POWER CORD 10A 250V 3P CHINA BK 27 01518 701 POWER ...

Page 208: ...CK LI SDI 6C 2 2AH SDI BT 00606 008 BTY PACK LI PANA 6C 2 2AH SMP BT 00607 125 BTY PACK LI LG 6C 2 2AH SMP BT 00607 126 BTY PACK LI SDI 6C 2 2AH SMP BT 00607 127 BOARDS BT MODULE BCM92070MD_REF V3 0 FW 2 2 3 BH 21100 010 FOXCONN BLUETOOTH ATH BU_12 BT 3 0 BH 21100 011 FOXCONN BLUETOOTH ATH BU_12 BT 2 1 BH 21100 012 POWER BD 10754 1 D 55 RC901 001 TOUCHPAD SYNAPTIC TM 01465 001 56 PUD01 001 TOUCHPA...

Page 209: ...YY 50 RC901 005 FFC PB U JE40 HR TR RESERVE FFC PB U JE40 HR JH RESERVE FFC PB U JE40 HR HB RESERVE FFC TP JE40 HR TR 50 RC901 001 FFC TP JE40 HR JH 50 RC901 001 FFC TP JE40 HR HB 50 RC901 001 C A LCD CABLE JE40 HR 50 RC901 004 C A LCD CABLE_HL JE40 HR 50 RC901 004 C A LCD CABLE_HC JE40 HR 50 RC901 004 C A LCD CABLE_YY JE40 HR 50 RC901 004 CAMERA CAMERA 1 3M HD 10P2SF137 LITEON 57 PT401 003 CAMERA...

Page 210: ...LUE SIPIX 60 RJE01 001 ASSY 60 ODD BEZEL BR JE40 HR 42 RC901 004 ASSY 60 ODD BEZEL JE40 HR 42 RC901 003 ASSY LCD BEZEL W CCD JE40 HR 60 RC901 004 ASSY PANEL WIFI JE40 HR BLACK 60 RC901 005 ASSY PANEL WIFI JE40HR BLACK FUJI 60 RC901 005 ASSY PANEL WIFI JE40HR BLACK SIPIX 60 RC901 005 ASSY PANEL WIFI JE40 HR_LEXUS BLUE 60 RJE01 002 ASSY PANEL WIFI JE40 HR_LEXUS BLUE FUJI 60 RJE01 002 ASSY PANEL WIFI...

Page 211: ...A4M IC CPU SABINE E2 3000M 2C 512K 2 4G KC 30002 E2M HDD HARD DISK DRIVE HDD 250GB TOSHIBA MK2559GSXP AF 5400RPM KH 25004 006 HDD 320GB HGST HTS543232A7A384 7MMH 5 4K KH 32007 013 HDD 500GB HGST HTS545050B9A300 KH 50007 010 HDD 500GB SEAGATE ST9500325AS 5400RPM KH 50001 017 HDD 640GB WD WD6400BPVT 22HXZT1 5 4K AF KH 64008 005 HDD 250GB TOSHIBA MK2559GSXP AF 5400RPM KH 25004 006 HDD 750GB TOSHIBA M...

Page 212: ...A 213 KB V104630DS3 GK GREEK 86KEY AC4T KB I140A 213 KB NSK AM202 CHINES 86KEY AC4T KB I140A 208 KB MP 09G23RC 442 CHINESE 86KEY AC4T KB I140A 208 KB V104630DS3 CH CHINESE 86KEY AC4T KB I140A 208 KB NSK AM203 THAILA 86KEY AC4T KB I140A 226 KB MP 09G23T0 442 THAILAND 86KEY AC4T KB I140A 226 Category Description Acer Part No ...

Page 213: ... KOREAN 86KEY AC4T KB I140A 217 KB V104630DS3 KR KOREAN 86KEY AC4T KB I140A 217 KB NSK AM20U UK 87KEY AC4T KB I140A 228 KB MP 09G26GB 442 UK 87KEY AC4T KB I140A 228 KB V104630DK3 UK UK 87KEY AC4T KB I140A 228 KB NSK AM20W SWEDIS 87KEY AC4T KB I140A 224 KB MP 09G26S0 442 SWEDISH 87KEY AC4T KB I140A 224 KB V104630DK3 SD SWEDISH 87KEY AC4T KB I140A 224 KB NSK AM20F FRENCH 87KEY AC4T KB I140A 211 KB M...

Page 214: ...RMAN 87KEY AC4T KB I140A 212 KB V104630DK3 GR GERMAN 87KEY AC4T KB I140A 212 KB NSK AM20N NORWEG 87KEY AC4T KB I140A 219 KB MP 09G26N0 442 NORWEGIAN 87KEY AC4T KB I140A 219 KB V104630DK3 NW NORWEGIAN 87KEY AC4T KB I140A 219 KB NSK AM20Q HUNGAR 87KEY AC4T KB I140A 214 KB MP 09G26HU 442 HUNGARIAN 87KEY AC4T KB I140A 214 KB V104630DK3 HG HUNGARIAN 87KEY AC4T KB I140A 214 KB NSK AM20S SPANIS 87KEY AC4...

Page 215: ...D 14 WXGA LG LP140WH4 TLC1 LK 14008 009 LCD 14 WXGA CMI BT140GW01 G LK 1400D 008 LCD NLED 14 WXGA ANT 2 W CAM 6M RKW01 001 MAINBOARD JE40_SB MB UMA 10273 1 D MB RKC01 001 JE40_SB MB WHISTLER 1G 10273 1 D MB RKW01 001 JE40_SB MB WHISTLER 2G 10273 1 D MB RKU01 001 JE40_SB MB WHISTLER SAM2G 10273 1 D MB RKU01 001 JE40_SB MB SYMOUR 1G 10273 1 D MB RKD01 001 JE40_SB MB SYMOUR SAM1G 10273 1 D MB RKD01 0...

Page 216: ...M 12 7 PANASONIC UJ8A0 W O BZL WIN7 KU 00807 075 ODD SM 12 7 HF W7 HLDS GT32N KU 0080D 055 ODD DVDRW 12 7 TL HF W7 HLDS GT34N KU 0080D 057 SCREWS KB_SCREW_JE40_GR 86 RC901 001 M2 L3 BLACK ZN 86 FR901 001 SCREW M3X4 86 9A524 4R0 86 9A524 4R0 ISO M2 5X6 H 0 7 0 8MM 86 00E12 536 M2 5 L5 BLACK ZN NYLOK 86 TK501 001 SCRW M2 5X4L NI NYLOK 86 00H36 534 SPEAKER SPEAKER FG JE40 HR 23 RC901 001 MISCELLANEOU...

Page 217: ...CHAPTER 7 Model Definition and Configuration ...

Page 218: ...7 2 Aspire 4560 4560G 7 3 ...

Page 219: ... 640 BT 6L2 2 5R CB_bgn_1 3 HD_GEb_ES61 AS4560G 8352G 50Mnbb AAP Thailand LX RKW0C 018 AS4560G 8352G50Mnbb LINPUSATH1 SEYMOUR_XT1GBCbb_3V3 2 1G 500_L BT 6L2 2 5R CB_bgn_1 3HD_GEb_TH51 AS4560G 8352G 64Mnbb AAP Thailand LX RKW0C 015 AS4560G 8352G64Mnbb LINPUSATH1 SEYMOUR_XT1GBCbb_3V3 2 1G 640 BT 6L2 2 5R CB_bgn_1 3 HD_GEb_TH51 AS4560G 4332G 64Mnbb AAP Thailand LX RKW0C 012 AS4560G 4332G64Mnbb LINPUS...

Page 220: ...332G64Mnbb LINPUSATH3 SEYMOUR_XT1GBCbb_3V3 2 1G 640 BT 6L2 2 5R CB_bgn_1 3 HD_GEb_EN11 AS4560G 8352G 64Mnbb AAP Thailand LX RKW0C 013 AS4560G 8352G64Mnbb LINPUSATH3 SEYMOUR_XT1GBCbb_3V3 2 1G 640 BT 6L2 2 5R CB_bgn_1 3 HD_GEb_EN11 AS4560G 4332G 50Mnbb AAP Vietnam LX RKW0C 021 AS4560G 4332G50Mnbb LINPUSAVN1 SEYMOUR_XT1GBCbb_3V3 2 1G 500_L BT 6L2 2 5R CB_bgn_1 3HD_GEb_EN11 AS4560G 8352G 50Mnbb AAP Vi...

Page 221: ...560G 4334G64Mnbb LINPUSAVN1 SEYMOUR_XT1GBCbb_3V3 2 2G 640 BT 6L2 2 5R CB_bgn_1 3 HD_GEb_EN11 AS4560G 4334G 64Mnbb AAP Thailand LX RKW0C 024 AS4560G 4334G64Mnbb LINPUSATH1 SEYMOUR_XT1GBCbb_3V3 2 2G 640 BT 6L2 2 5R CB_bgn_1 3 HD_GEb_TH51 AS4560G 4334G 64Mnbb AAP Thailand LX RKW0C 023 AS4560G 4334G64Mnbb LINPUSATH4 SEYMOUR_XT1GBCbb_3V3 2 2G 640 BT 6L2 2 5R CB_bgn_1 3 HD_GEb_ES61 AS4560G 4334G 64Mnbb ...

Page 222: ...PUSAVN1 SEYMOUR_XT1GBCkk_3V3 2 2G 500_L BT 6L2 2 5R CB_bgn_1 3HD_GEk_EN11 AS4560G 8354G 64Mnkk AAP Singapore LX RKD02 007 AS4560G 8354G64Mnkk W7HP64ASSG1 MC SEYMOUR_XT1GBCkk_3V3 2 2G 640 BT 6L2 2 5R CB_bgn_1 3 HD_GEk_ES61SP1 AS4560G 6344G 50Mnkk AAP Singapore LX RKD02 004 AS4560G 6344G50Mnkk W7HP64ASSG1 MC SEYMOUR_XT1GBCkk_3V3 2 2G 500 BT 6L2 2 5R CB_bgn_1 3 HD_GEk_ZH31SP1 AS4560G 8354G 50Mnkk AAP...

Page 223: ...60G 4334G50Mnkk W7HP64ASSG1 MC SEYMOUR_XT1GBCkk_3V3 2 2G 500 BT 6L2 2 5R CB_bgn_1 3 HD_GEk_ZH31SP1 AS4560G 4332G 50Mnkk AAP Thailand LX RKD02 010 AS4560G 4332G50Mnkk EM W7HP64EMASTH1 MC SEYMOUR_XT1GBCkk_3V3 2 1G 500 BT 6L2 2 5R CB_bgn_1 3 HD_GEk_TH71SP1 AS4560G 6342G 64Mnkk AAP Thailand LX RKD02 009 AS4560G 6342G64Mnkk EM W7HP64EMASTH1 MC SEYMOUR_XT1GBCkk_3V3 2 1G 640 BT 6L2 2 5R CB_bgn_1 3 HD_GEk...

Page 224: ... AS4560G 8352G50Mnkk LINPUSAVN1 WHISTLER_PRO1GBCkk_3V3 2 1G 500_L BT 6L2 2 5R CB_bgn_1 3HD_GEk_EN11 AS4560G 6342G 50Mnkk AAP Vietnam LX RKE0C 002 AS4560G 6342G50Mnkk LINPUSAVN1 WHISTLER_PRO1GBCkk_3V3 2 1G 500_L BT 6L2 2 5R CB_bgn_1 3HD_GEk_EN11 AS4560G 6342G 50Mnkk CHINA China LX RKE01 001 AS4560G 6342G50Mnkk W7HB64SCASCN1 MC WHISTLER_PRO1GBCkk_3V3 2 1G 500 6L2 2 5R CB_bgn_1 3HD _GEk_SC11SP1 AS456...

Page 225: ...0C 008 AS4560 4334G50Mnbb LINPUSATH3 UMACbb_3 2 2G 500_L BT 6L2 2 5R CB_bgn_1 3HD_GEb_EN11 AS4560 8352G5 0Mnbb AAP Vietnam LX RKV0C 007 AS4560 8352G50Mnbb LINPUSAVN1 UMACbb_3 2 1G 500_L BT 6L2 2 5R CB_bgn_1 3HD_GEb_EN11 AS4560 6342G5 0Mnbb AAP Vietnam LX RKV0C 006 AS4560 6342G50Mnbb LINPUSAVN1 UMACbb_3 2 1G 500_L BT 6L2 2 5R CB_bgn_1 3HD_GEb_EN11 AS4560 4332G5 0Mnbb AAP Vietnam LX RKV0C 004 AS4560...

Page 226: ... 5R CB_bgn_1 3HD_GEk_TH51 AS4560 4334G5 0Mnkk AAP Thailand LX RKC0C 009 AS4560 4334G50Mnkk LINPUSATH4 UMACkk_3 2 2G 500_L BT 6L2 2 5R CB_bgn_1 3HD_GEk_ES61 AS4560 4334G5 0Mnkk AAP Thailand LX RKC0C 008 AS4560 4334G50Mnkk LINPUSATH3 UMACkk_3 2 2G 500_L BT 6L2 2 5R CB_bgn_1 3HD_GEk_EN11 AS4560 8352G5 0Mnkk AAP Vietnam LX RKC0C 007 AS4560 8352G50Mnkk LINPUSAVN1 UMACkk_3 2 1G 500_L BT 6L2 2 5R CB_bgn_...

Page 227: ...64Mnbb AAP Thailand LX RKW0C 012 AS4560G_SEYMO UR_XT1GBCbb_3V 3 A43300M AS4560G 6342 G64Mnbb AAP Thailand LX RKW0C 006 AS4560G_SEYMO UR_XT1GBCbb_3V 3 A63400M AS4560G 6344 G64Mnbb AAP Thailand LX RKW0C 003 AS4560G_SEYMO UR_XT1GBCbb_3V 3 A63400M AS4560G 8352 G64Mnbb AAP Thailand LX RKW0C 014 AS4560G_SEYMO UR_XT1GBCbb_3V 3 A83500M AS4560G 8352 G50Mnbb AAP Thailand LX RKW0C 017 AS4560G_SEYMO UR_XT1GBC...

Page 228: ...4560G 8354 G64Mnbb AAP Thailand LX RKW0C 026 AS4560G_SEYMO UR_XT1GBCbb_3V 3 A83500M AS4560G 4332 G50Mnbb AAP Thailand LX RKW02 001 AS4560G_SEYMO UR_XT1GBCbb_3V 3 A43300M AS4560G 4334 G64Mnbb AAP Vietnam LX RKW0C 025 AS4560G_SEYMO UR_XT1GBCbb_3V 3 A43300M AS4560G 4334 G64Mnbb AAP Thailand LX RKW0C 024 AS4560G_SEYMO UR_XT1GBCbb_3V 3 A43300M AS4560G 4334 G64Mnbb AAP Thailand LX RKW0C 023 AS4560G_SEYM...

Page 229: ...G 6344 G50Mnkk AAP Singapore LX RKD02 004 AS4560G_SEYMO UR_XT1GBCkk_3V 3 A63400M AS4560G 8354 G50Mnkk AAP Singapore LX RKD02 006 AS4560G_SEYMO UR_XT1GBCkk_3V 3 A83500M AS4560G 6342 G64Mnkk AAP Thailand LX RKD0C 007 AS4560G_SEYMO UR_XT1GBCkk_3V 3 A63400M AS4560G 8352 G50Mnkk AAP Vietnam LX RKD0C 001 AS4560G_SEYMO UR_XT1GBCkk_3V 3 A83500M AS4560G 8354 G64Mnkk AAP Singapore LX RKD02 008 AS4560G_SEYMO...

Page 230: ...LX RKD0C 013 AS4560G_SEYMO UR_XT1GBCkk_3V 3 A83500M AS4560G 4334 G64Mnkk AAP Thailand LX RKD0C 011 AS4560G_SEYMO UR_XT1GBCkk_3V 3 A43300M AS4560G 4334 G64Mnkk AAP Thailand LX RKD0C 010 AS4560G_SEYMO UR_XT1GBCkk_3V 3 A43300M AS4560G 4334 G64Mnkk AAP Thailand LX RKD0C 009 AS4560G_SEYMO UR_XT1GBCkk_3V 3 A43300M AS4560G 8352 G50Mnkk AAP Vietnam LX RKE0C 001 AS4560G_WHISTL ER_PRO1GBCkk_3 V3 A83500M AS4...

Page 231: ...b_ 3 A63400M AS4560 4332G 50Mnbb AAP Vietnam LX RKV0C 004 AS4560_UMACbb_ 3 A43300M AS4560 4332G 50Mnkk AAP Thailand LX RKC0C 015 AS4560_UMACkk_ 3 A43300M AS4560 4332G 50Mnkk AAP Thailand LX RKC0C 016 AS4560_UMACkk_ 3 A43300M AS4560 4332G 50Mnkk AAP Thailand LX RKC0C 014 AS4560_UMACkk_ 3 A43300M AS4560 4333G 50Mnkk AAP Thailand LX RKC0C 013 AS4560_UMACkk_ 3 A43300M AS4560 4333G 50Mnkk AAP Thailand ...

Page 232: ...Configuration AS4560 4332G 50Mnkk AAP Vietnam LX RKC0C 005 AS4560_UMACkk_ 3 A43300M AS4560 6342G 50Mnkk AAP Vietnam LX RKC0C 006 AS4560_UMACkk_ 3 A63400M Table 7 2 Model Definition CPU Model RO Country Acer Part No BOM Name CPU ...

Page 233: ...T1GBCbb_3V3 NLED14W XGAG AS4560G 8352G 50Mnbb AAP Thailand LX RKW0C 017 AS4560G_SEYMOUR _XT1GBCbb_3V3 NLED14W XGAG AS4560G 6344G 64Mnbb AAP Thailand LX RKW0C 001 AS4560G_SEYMOUR _XT1GBCbb_3V3 NLED14W XGAG AS4560G 6342G 64Mnbb AAP Thailand LX RKW0C 004 AS4560G_SEYMOUR _XT1GBCbb_3V3 NLED14W XGAG AS4560G 4332G 64Mnbb AAP Thailand LX RKW0C 010 AS4560G_SEYMOUR _XT1GBCbb_3V3 NLED14W XGAG AS4560G 8352G 6...

Page 234: ...SEYMOUR _XT1GBCkk_3V3 NLED14W XGAG AS4560G 6342G 64Mnkk AAP Vietnam LX RKD0C 008 AS4560G_SEYMOUR _XT1GBCkk_3V3 NLED14W XGAG AS4560G 8354G 50Mnkk AAP Vietnam LX RKD0C 002 AS4560G_SEYMOUR _XT1GBCkk_3V3 NLED14W XGAG AS4560G 8354G 64Mnkk AAP Singapore LX RKD02 007 AS4560G_SEYMOUR _XT1GBCkk_3V3 NLED14W XGAG AS4560G 6344G 50Mnkk AAP Singapore LX RKD02 004 AS4560G_SEYMOUR _XT1GBCkk_3V3 NLED14W XGAG AS456...

Page 235: ...XGAG AS4560G 4334G 64Mnkk AAP Thailand LX RKD0C 009 AS4560G_SEYMOUR _XT1GBCkk_3V3 NLED14W XGAG AS4560G 8352G 50Mnkk AAP Vietnam LX RKE0C 001 AS4560G_WHISTLE R_PRO1GBCkk_3V3 NLED14W XGAG AS4560G 6342G 50Mnkk AAP Vietnam LX RKE0C 002 AS4560G_WHISTLE R_PRO1GBCkk_3V3 NLED14W XGAG AS4560G 6342G 50Mnkk CHINA China LX RKE01 001 AS4560G_WHISTLE R_PRO1GBCkk_3V3 NLED14W XGAG AS4560 4332G5 0Mnbb AAP Thailand...

Page 236: ...14W XGAG AS4560 4333G5 0Mnkk AAP Thailand LX RKC0C 013 AS4560_UMACkk_3 NLED14W XGAG AS4560 4333G5 0Mnkk AAP Thailand LX RKC0C 012 AS4560_UMACkk_3 NLED14W XGAG AS4560 4333G5 0Mnkk AAP Thailand LX RKC0C 011 AS4560_UMACkk_3 NLED14W XGAG AS4560 4334G5 0Mnkk AAP Thailand LX RKC0C 010 AS4560_UMACkk_3 NLED14W XGAG AS4560 4334G5 0Mnkk AAP Thailand LX RKC0C 009 AS4560_UMACkk_3 NLED14W XGAG AS4560 4334G5 0M...

Page 237: ...nbb AAP Thailand LX RKW0C 012 AS4560G_SEYMO UR_XT1GBCbb_3V 3 SEYMOU R_XT AS4560G 6342 G64Mnbb AAP Thailand LX RKW0C 006 AS4560G_SEYMO UR_XT1GBCbb_3V 3 SEYMOU R_XT AS4560G 6344 G64Mnbb AAP Thailand LX RKW0C 003 AS4560G_SEYMO UR_XT1GBCbb_3V 3 SEYMOU R_XT AS4560G 8352 G64Mnbb AAP Thailand LX RKW0C 014 AS4560G_SEYMO UR_XT1GBCbb_3V 3 SEYMOU R_XT AS4560G 8352 G50Mnbb AAP Thailand LX RKW0C 017 AS4560G_SE...

Page 238: ...4 G64Mnbb AAP Thailand LX RKW0C 026 AS4560G_SEYMO UR_XT1GBCbb_3V 3 SEYMOU R_XT AS4560G 4332 G50Mnbb AAP Thailand LX RKW02 001 AS4560G_SEYMO UR_XT1GBCbb_3V 3 SEYMOU R_XT AS4560G 4334 G64Mnbb AAP Vietnam LX RKW0C 025 AS4560G_SEYMO UR_XT1GBCbb_3V 3 SEYMOU R_XT AS4560G 4334 G64Mnbb AAP Thailand LX RKW0C 024 AS4560G_SEYMO UR_XT1GBCbb_3V 3 SEYMOU R_XT AS4560G 4334 G64Mnbb AAP Thailand LX RKW0C 023 AS456...

Page 239: ...0Mnkk AAP Singapore LX RKD02 004 AS4560G_SEYMO UR_XT1GBCkk_3V 3 SEYMOU R_XT AS4560G 8354 G50Mnkk AAP Singapore LX RKD02 006 AS4560G_SEYMO UR_XT1GBCkk_3V 3 SEYMOU R_XT AS4560G 6342 G64Mnkk AAP Thailand LX RKD0C 007 AS4560G_SEYMO UR_XT1GBCkk_3V 3 SEYMOU R_XT AS4560G 8352 G50Mnkk AAP Vietnam LX RKD0C 001 AS4560G_SEYMO UR_XT1GBCkk_3V 3 SEYMOU R_XT AS4560G 8354 G64Mnkk AAP Singapore LX RKD02 008 AS4560...

Page 240: ...0C 013 AS4560G_SEYMO UR_XT1GBCkk_3V 3 SEYMOU R_XT AS4560G 4334 G64Mnkk AAP Thailand LX RKD0C 011 AS4560G_SEYMO UR_XT1GBCkk_3V 3 SEYMOU R_XT AS4560G 4334 G64Mnkk AAP Thailand LX RKD0C 010 AS4560G_SEYMO UR_XT1GBCkk_3V 3 SEYMOU R_XT AS4560G 4334 G64Mnkk AAP Thailand LX RKD0C 009 AS4560G_SEYMO UR_XT1GBCkk_3V 3 SEYMOU R_XT AS4560G 8352 G50Mnkk AAP Vietnam LX RKE0C 001 AS4560G_WHISTL ER_PRO1GBCkk_ 3V3 W...

Page 241: ...ACbb_ 3 UMA AS4560 4332G 50Mnbb AAP Vietnam LX RKV0C 004 AS4560_UMACbb_ 3 UMA AS4560 4332G 50Mnkk AAP Thailand LX RKC0C 015 AS4560_UMACkk_ 3 UMA AS4560 4332G 50Mnkk AAP Thailand LX RKC0C 016 AS4560_UMACkk_ 3 UMA AS4560 4332G 50Mnkk AAP Thailand LX RKC0C 014 AS4560_UMACkk_ 3 UMA AS4560 4333G 50Mnkk AAP Thailand LX RKC0C 013 AS4560_UMACkk_ 3 UMA AS4560 4333G 50Mnkk AAP Thailand LX RKC0C 012 AS4560_U...

Page 242: ...onfiguration AS4560 4332G 50Mnkk AAP Vietnam LX RKC0C 005 AS4560_UMACkk_ 3 UMA AS4560 6342G 50Mnkk AAP Vietnam LX RKC0C 006 AS4560_UMACkk_ 3 UMA Table 7 4 Model Definition VGA Chip Model RO Country Acer Part No BOM Name VGA Chip ...

Page 243: ...V3 1G DDR3 128 16 4 AS4560G 8352G 50Mnbb AAP Thailand LX RKW0C 017 AS4560G_SEYMOU R_XT1GBCbb_3V3 1G DDR3 128 16 4 AS4560G 6344G 64Mnbb AAP Thailand LX RKW0C 001 AS4560G_SEYMOU R_XT1GBCbb_3V3 1G DDR3 128 16 4 AS4560G 6342G 64Mnbb AAP Thailand LX RKW0C 004 AS4560G_SEYMOU R_XT1GBCbb_3V3 1G DDR3 128 16 4 AS4560G 4332G 64Mnbb AAP Thailand LX RKW0C 010 AS4560G_SEYMOU R_XT1GBCbb_3V3 1G DDR3 128 16 4 AS45...

Page 244: ...R_XT1GBCkk_3V3 1G DDR3 128 16 4 AS4560G 6342G 64Mnkk AAP Vietnam LX RKD0C 008 AS4560G_SEYMOU R_XT1GBCkk_3V3 1G DDR3 128 16 4 AS4560G 8354G 50Mnkk AAP Vietnam LX RKD0C 002 AS4560G_SEYMOU R_XT1GBCkk_3V3 1G DDR3 128 16 4 AS4560G 8354G 64Mnkk AAP Singapore LX RKD02 007 AS4560G_SEYMOU R_XT1GBCkk_3V3 1G DDR3 128 16 4 AS4560G 6344G 50Mnkk AAP Singapore LX RKD02 004 AS4560G_SEYMOU R_XT1GBCkk_3V3 1G DDR3 1...

Page 245: ...X RKD0C 010 AS4560G_SEYMOU R_XT1GBCkk_3V3 1G DDR3 128 16 4 AS4560G 4334G 64Mnkk AAP Thailand LX RKD0C 009 AS4560G_SEYMOU R_XT1GBCkk_3V3 1G DDR3 128 16 4 AS4560G 8352G 50Mnkk AAP Vietnam LX RKE0C 001 AS4560G_WHISTLE R_PRO1GBCkk_3V3 1G DDR3 64 16 8 AS4560G 6342G 50Mnkk AAP Vietnam LX RKE0C 002 AS4560G_WHISTLE R_PRO1GBCkk_3V3 1G DDR3 64 16 8 AS4560G 6342G 50Mnkk CHINA China LX RKE01 001 AS4560G_WHIST...

Page 246: ... AS4560_UMACkk_3 N AS4560 4333G5 0Mnkk AAP Thailand LX RKC0C 013 AS4560_UMACkk_3 N AS4560 4333G5 0Mnkk AAP Thailand LX RKC0C 012 AS4560_UMACkk_3 N AS4560 4333G5 0Mnkk AAP Thailand LX RKC0C 011 AS4560_UMACkk_3 N AS4560 4334G5 0Mnkk AAP Thailand LX RKC0C 010 AS4560_UMACkk_3 N AS4560 4334G5 0Mnkk AAP Thailand LX RKC0C 009 AS4560_UMACkk_3 N AS4560 4334G5 0Mnkk AAP Thailand LX RKC0C 008 AS4560_UMACkk_3...

Page 247: ...X RKW0C 0 12 AS4560G_SEYM OUR_XT1GBCbb _3V3 SO1GBI II10 SO1GBI II10 AS4560G 634 2G64Mnbb AAP Thailand LX RKW0C 0 06 AS4560G_SEYM OUR_XT1GBCbb _3V3 SO1GBI II10 SO1GBI II10 AS4560G 634 4G64Mnbb AAP Thailand LX RKW0C 0 03 AS4560G_SEYM OUR_XT1GBCbb _3V3 SO2GBI II10 SO2GBI II10 AS4560G 835 2G64Mnbb AAP Thailand LX RKW0C 0 14 AS4560G_SEYM OUR_XT1GBCbb _3V3 SO1GBI II10 SO1GBI II10 AS4560G 835 2G50Mnbb AA...

Page 248: ...d LX RKW0C 0 26 AS4560G_SEYM OUR_XT1GBCbb _3V3 SO2GBI II10 SO2GBI II10 AS4560G 433 2G50Mnbb AAP Thailand LX RKW02 00 1 AS4560G_SEYM OUR_XT1GBCbb _3V3 SO1GBI II10 SO1GBI II10 AS4560G 433 4G64Mnbb AAP Vietnam LX RKW0C 0 25 AS4560G_SEYM OUR_XT1GBCbb _3V3 SO2GBI II10 SO2GBI II10 AS4560G 433 4G64Mnbb AAP Thailand LX RKW0C 0 24 AS4560G_SEYM OUR_XT1GBCbb _3V3 SO2GBI II10 SO2GBI II10 AS4560G 433 4G64Mnbb ...

Page 249: ... RKD02 00 4 AS4560G_SEYM OUR_XT1GBCkk _3V3 SO2GBI II10 SO2GBI II10 AS4560G 835 4G50Mnkk AAP Singapo re LX RKD02 00 6 AS4560G_SEYM OUR_XT1GBCkk _3V3 SO2GBI II10 SO2GBI II10 AS4560G 634 2G64Mnkk AAP Thailand LX RKD0C 00 7 AS4560G_SEYM OUR_XT1GBCkk _3V3 SO1GBI II10 SO1GBI II10 AS4560G 835 2G50Mnkk AAP Vietnam LX RKD0C 00 1 AS4560G_SEYM OUR_XT1GBCkk _3V3 SO1GBI II10 SO1GBI II10 AS4560G 835 4G64Mnkk AA...

Page 250: ...iland LX RKD0C 01 3 AS4560G_SEYM OUR_XT1GBCkk _3V3 SO2GBI II10 SO2GBI II10 AS4560G 433 4G64Mnkk AAP Thailand LX RKD0C 01 1 AS4560G_SEYM OUR_XT1GBCkk _3V3 SO2GBI II10 SO2GBI II10 AS4560G 433 4G64Mnkk AAP Thailand LX RKD0C 01 0 AS4560G_SEYM OUR_XT1GBCkk _3V3 SO2GBI II10 SO2GBI II10 AS4560G 433 4G64Mnkk AAP Thailand LX RKD0C 00 9 AS4560G_SEYM OUR_XT1GBCkk _3V3 SO2GBI II10 SO2GBI II10 AS4560G 835 2G50...

Page 251: ... _3 SO1GBI II10 SO1GBI II10 AS4560 6342 G50Mnbb AAP Vietnam LX RKV0C 00 6 AS4560_UMACbb _3 SO1GBI II10 SO1GBI II10 AS4560 4332 G50Mnbb AAP Vietnam LX RKV0C 00 4 AS4560_UMACbb _3 SO1GBI II10 SO1GBI II10 AS4560 4332 G50Mnkk AAP Thailand LX RKC0C 01 5 AS4560_UMACkk _3 SO1GBI II10 SO1GBI II10 AS4560 4332 G50Mnkk AAP Thailand LX RKC0C 01 6 AS4560_UMACkk _3 SO1GBI II10 SO1GBI II10 AS4560 4332 G50Mnkk AA...

Page 252: ...Mnkk AAP Vietnam LX RKC0C 00 7 AS4560_UMACkk _3 SO1GBI II10 SO1GBI II10 AS4560 4332 G50Mnkk AAP Vietnam LX RKC0C 00 5 AS4560_UMACkk _3 SO1GBI II10 SO1GBI II10 AS4560 6342 G50Mnkk AAP Vietnam LX RKC0C 00 6 AS4560_UMACkk _3 SO1GBI II10 SO1GBI II10 Table 7 6 Model Definition Memory 1 and 2 Model RO Country Acer Part No BOM Name Memory 1 Memory 2 ...

Page 253: ...T1GBCbb_3V3 N640GB5 4 KS AS4560G 8352 G64Mnbb AAP Thailand LX RKW0C 014 AS4560G_SEYMOU R_XT1GBCbb_3V3 N640GB5 4 KS AS4560G 8352 G50Mnbb AAP Thailand LX RKW0C 017 AS4560G_SEYMOU R_XT1GBCbb_3V3 N500GB5 4 KS AS4560G 6344 G64Mnbb AAP Thailand LX RKW0C 001 AS4560G_SEYMOU R_XT1GBCbb_3V3 N640GB5 4 KS AS4560G 6342 G64Mnbb AAP Thailand LX RKW0C 004 AS4560G_SEYMOU R_XT1GBCbb_3V3 N640GB5 4 KS AS4560G 4332 G6...

Page 254: ...R_XT1GBCkk_3V3 N500GB5 4 KS AS4560G 6342 G64Mnkk AAP Thailand LX RKD0C 005 AS4560G_SEYMOU R_XT1GBCkk_3V3 N640GB5 4 KS AS4560G 6342 G64Mnkk AAP Vietnam LX RKD0C 008 AS4560G_SEYMOU R_XT1GBCkk_3V3 N640GB5 4 KS AS4560G 8354 G50Mnkk AAP Vietnam LX RKD0C 002 AS4560G_SEYMOU R_XT1GBCkk_3V3 N500GB5 4 KS AS4560G 8354 G64Mnkk AAP Singapore LX RKD02 007 AS4560G_SEYMOU R_XT1GBCkk_3V3 N640GB5 4 KS_4K AS4560G 63...

Page 255: ...S AS4560G 4334 G64Mnkk AAP Thailand LX RKD0C 010 AS4560G_SEYMOU R_XT1GBCkk_3V3 N640GB5 4 KS AS4560G 4334 G64Mnkk AAP Thailand LX RKD0C 009 AS4560G_SEYMOU R_XT1GBCkk_3V3 N640GB5 4 KS AS4560G 8352 G50Mnkk AAP Vietnam LX RKE0C 001 AS4560G_WHISTLE R_PRO1GBCkk_3V3 N500GB5 4 KS AS4560G 6342 G50Mnkk AAP Vietnam LX RKE0C 002 AS4560G_WHISTLE R_PRO1GBCkk_3V3 N500GB5 4 KS AS4560G 6342 G50Mnkk CHINA China LX ...

Page 256: ...land LX RKC0C 014 AS4560_UMACkk_3 N500GB5 4 KS AS4560 4333G5 0Mnkk AAP Thailand LX RKC0C 013 AS4560_UMACkk_3 N500GB5 4 KS AS4560 4333G5 0Mnkk AAP Thailand LX RKC0C 012 AS4560_UMACkk_3 N500GB5 4 KS AS4560 4333G5 0Mnkk AAP Thailand LX RKC0C 011 AS4560_UMACkk_3 N500GB5 4 KS AS4560 4334G5 0Mnkk AAP Thailand LX RKC0C 010 AS4560_UMACkk_3 N500GB5 4 KS AS4560 4334G5 0Mnkk AAP Thailand LX RKC0C 009 AS4560_...

Page 257: ...560G_SEYMOU R_XT1GBCbb_3V3 NSM8XS AS4560G 8352 G50Mnbb AAP Thailand LX RKW0C 017 AS4560G_SEYMOU R_XT1GBCbb_3V3 NSM8XS AS4560G 6344 G64Mnbb AAP Thailand LX RKW0C 001 AS4560G_SEYMOU R_XT1GBCbb_3V3 NSM8XS AS4560G 6342 G64Mnbb AAP Thailand LX RKW0C 004 AS4560G_SEYMOU R_XT1GBCbb_3V3 NSM8XS AS4560G 4332 G64Mnbb AAP Thailand LX RKW0C 010 AS4560G_SEYMOU R_XT1GBCbb_3V3 NSM8XS AS4560G 8352 G64Mnbb AAP Thail...

Page 258: ... AS4560G_SEYMOU R_XT1GBCkk_3V3 NSM8XS AS4560G 6342 G64Mnkk AAP Vietnam LX RKD0C 008 AS4560G_SEYMOU R_XT1GBCkk_3V3 NSM8XS AS4560G 8354 G50Mnkk AAP Vietnam LX RKD0C 002 AS4560G_SEYMOU R_XT1GBCkk_3V3 NSM8XS AS4560G 8354 G64Mnkk AAP Singapore LX RKD02 007 AS4560G_SEYMOU R_XT1GBCkk_3V3 NSM8XS AS4560G 6344 G50Mnkk AAP Singapore LX RKD02 004 AS4560G_SEYMOU R_XT1GBCkk_3V3 NSM8XS AS4560G 8354 G50Mnkk AAP S...

Page 259: ...kk_3V3 NSM8XS AS4560G 4334 G64Mnkk AAP Thailand LX RKD0C 009 AS4560G_SEYMOU R_XT1GBCkk_3V3 NSM8XS AS4560G 8352 G50Mnkk AAP Vietnam LX RKE0C 001 AS4560G_WHISTLE R_PRO1GBCkk_3V3 NSM8XS AS4560G 6342 G50Mnkk AAP Vietnam LX RKE0C 002 AS4560G_WHISTLE R_PRO1GBCkk_3V3 NSM8XS AS4560G 6342 G50Mnkk CHINA China LX RKE01 001 AS4560G_WHISTLE R_PRO1GBCkk_3V3 NSM8XS AS4560 4332G5 0Mnbb AAP Thailand LX RKV0C 016 A...

Page 260: ...MACkk_3 NSM8XS AS4560 4333G5 0Mnkk AAP Thailand LX RKC0C 013 AS4560_UMACkk_3 NSM8XS AS4560 4333G5 0Mnkk AAP Thailand LX RKC0C 012 AS4560_UMACkk_3 NSM8XS AS4560 4333G5 0Mnkk AAP Thailand LX RKC0C 011 AS4560_UMACkk_3 NSM8XS AS4560 4334G5 0Mnkk AAP Thailand LX RKC0C 010 AS4560_UMACkk_3 NSM8XS AS4560 4334G5 0Mnkk AAP Thailand LX RKC0C 009 AS4560_UMACkk_3 NSM8XS AS4560 4334G5 0Mnkk AAP Thailand LX RKC0...

Page 261: ...bb_3V3 3rd WiFi 2x2 BGN AS4560G 8352 G50Mnbb AAP Thailand LX RKW0C 017 AS4560G_SEYMOU R_XT1GBCbb_3V3 3rd WiFi 2x2 BGN AS4560G 6344 G64Mnbb AAP Thailand LX RKW0C 001 AS4560G_SEYMOU R_XT1GBCbb_3V3 3rd WiFi 2x2 BGN AS4560G 6342 G64Mnbb AAP Thailand LX RKW0C 004 AS4560G_SEYMOU R_XT1GBCbb_3V3 3rd WiFi 2x2 BGN AS4560G 4332 G64Mnbb AAP Thailand LX RKW0C 010 AS4560G_SEYMOU R_XT1GBCbb_3V3 3rd WiFi 2x2 BGN ...

Page 262: ...1GBCkk_3V3 3rd WiFi 2x2 BGN AS4560G 6342 G64Mnkk AAP Vietnam LX RKD0C 008 AS4560G_SEYMOU R_XT1GBCkk_3V3 3rd WiFi 2x2 BGN AS4560G 8354 G50Mnkk AAP Vietnam LX RKD0C 002 AS4560G_SEYMOU R_XT1GBCkk_3V3 3rd WiFi 2x2 BGN AS4560G 8354 G64Mnkk AAP Singapore LX RKD02 007 AS4560G_SEYMOU R_XT1GBCkk_3V3 3rd WiFi 2x2 BGN AS4560G 6344 G50Mnkk AAP Singapore LX RKD02 004 AS4560G_SEYMOU R_XT1GBCkk_3V3 3rd WiFi 2x2 ...

Page 263: ...G 4334 G64Mnkk AAP Thailand LX RKD0C 009 AS4560G_SEYMOU R_XT1GBCkk_3V3 3rd WiFi 2x2 BGN AS4560G 8352 G50Mnkk AAP Vietnam LX RKE0C 001 AS4560G_WHISTLE R_PRO1GBCkk_3V3 3rd WiFi 2x2 BGN AS4560G 6342 G50Mnkk AAP Vietnam LX RKE0C 002 AS4560G_WHISTLE R_PRO1GBCkk_3V3 3rd WiFi 2x2 BGN AS4560G 6342 G50Mnkk CHINA China LX RKE01 001 AS4560G_WHISTLE R_PRO1GBCkk_3V3 3rd WiFi 2x2 BGN AS4560 4332G5 0Mnbb AAP Tha...

Page 264: ...0_UMACkk_3 3rd WiFi 2x2 BGN AS4560 4333G5 0Mnkk AAP Thailand LX RKC0C 011 AS4560_UMACkk_3 3rd WiFi 2x2 BGN AS4560 4334G5 0Mnkk AAP Thailand LX RKC0C 010 AS4560_UMACkk_3 3rd WiFi 2x2 BGN AS4560 4334G5 0Mnkk AAP Thailand LX RKC0C 009 AS4560_UMACkk_3 3rd WiFi 2x2 BGN AS4560 4334G5 0Mnkk AAP Thailand LX RKC0C 008 AS4560_UMACkk_3 3rd WiFi 2x2 BGN AS4560 8352G5 0Mnkk AAP Vietnam LX RKC0C 007 AS4560_UMAC...

Page 265: ...G_SEYMOU R_XT1GBCbb_3V3 5 in 1 Build in AS4560G 4332 G64Mnbb AAP Thailand LX RKW0C 010 AS4560G_SEYMOU R_XT1GBCbb_3V3 5 in 1 Build in AS4560G 8352 G64Mnbb AAP Thailand LX RKW0C 013 AS4560G_SEYMOU R_XT1GBCbb_3V3 5 in 1 Build in AS4560G 4332 G50Mnbb AAP Vietnam LX RKW0C 021 AS4560G_SEYMOU R_XT1GBCbb_3V3 5 in 1 Build in AS4560G 8352 G50Mnbb AAP Vietnam LX RKW0C 020 AS4560G_SEYMOU R_XT1GBCbb_3V3 5 in 1...

Page 266: ... R_XT1GBCkk_3V3 5 in 1 Build in AS4560G 8354 G64Mnkk AAP Singapore LX RKD02 007 AS4560G_SEYMOU R_XT1GBCkk_3V3 5 in 1 Build in AS4560G 6344 G50Mnkk AAP Singapore LX RKD02 004 AS4560G_SEYMOU R_XT1GBCkk_3V3 5 in 1 Build in AS4560G 8354 G50Mnkk AAP Singapore LX RKD02 006 AS4560G_SEYMOU R_XT1GBCkk_3V3 5 in 1 Build in AS4560G 6342 G64Mnkk AAP Thailand LX RKD0C 007 AS4560G_SEYMOU R_XT1GBCkk_3V3 5 in 1 Bu...

Page 267: ...5 in 1 Build in AS4560G 6342 G50Mnkk AAP Vietnam LX RKE0C 002 AS4560G_WHISTLE R_PRO1GBCkk_3V3 5 in 1 Build in AS4560G 6342 G50Mnkk CHINA China LX RKE01 001 AS4560G_WHISTLE R_PRO1GBCkk_3V3 5 in 1 Build in AS4560 4332G5 0Mnbb AAP Thailand LX RKV0C 016 AS4560_UMACbb_3 5 in 1 Build in AS4560 4332G5 0Mnbb AAP Thailand LX RKV0C 015 AS4560_UMACbb_3 5 in 1 Build in AS4560 4332G5 0Mnbb AAP Thailand LX RKV0...

Page 268: ...ild in AS4560 4333G5 0Mnkk AAP Thailand LX RKC0C 012 AS4560_UMACkk_3 5 in 1 Build in AS4560 4333G5 0Mnkk AAP Thailand LX RKC0C 011 AS4560_UMACkk_3 5 in 1 Build in AS4560 4334G5 0Mnkk AAP Thailand LX RKC0C 010 AS4560_UMACkk_3 5 in 1 Build in AS4560 4334G5 0Mnkk AAP Thailand LX RKC0C 009 AS4560_UMACkk_3 5 in 1 Build in AS4560 4334G5 0Mnkk AAP Thailand LX RKC0C 008 AS4560_UMACkk_3 5 in 1 Build in AS4...

Page 269: ...14 AS4560G_SEYMOU R_XT1GBCbb_3V3 BT 2 1 AS4560G 8352 G50Mnbb AAP Thailand LX RKW0C 017 AS4560G_SEYMOU R_XT1GBCbb_3V3 BT 2 1 AS4560G 6344 G64Mnbb AAP Thailand LX RKW0C 001 AS4560G_SEYMOU R_XT1GBCbb_3V3 BT 2 1 AS4560G 6342 G64Mnbb AAP Thailand LX RKW0C 004 AS4560G_SEYMOU R_XT1GBCbb_3V3 BT 2 1 AS4560G 4332 G64Mnbb AAP Thailand LX RKW0C 010 AS4560G_SEYMOU R_XT1GBCbb_3V3 BT 2 1 AS4560G 8352 G64Mnbb AAP...

Page 270: ...SEYMOU R_XT1GBCkk_3V3 BT 2 1 AS4560G 6342 G64Mnkk AAP Vietnam LX RKD0C 008 AS4560G_SEYMOU R_XT1GBCkk_3V3 BT 2 1 AS4560G 8354 G50Mnkk AAP Vietnam LX RKD0C 002 AS4560G_SEYMOU R_XT1GBCkk_3V3 BT 2 1 AS4560G 8354 G64Mnkk AAP Singapore LX RKD02 007 AS4560G_SEYMOU R_XT1GBCkk_3V3 BT 3 0 AS4560G 6344 G50Mnkk AAP Singapore LX RKD02 004 AS4560G_SEYMOU R_XT1GBCkk_3V3 BT 3 0 AS4560G 8354 G50Mnkk AAP Singapore ...

Page 271: ...BT 2 1 AS4560G 4334 G64Mnkk AAP Thailand LX RKD0C 009 AS4560G_SEYMOU R_XT1GBCkk_3V3 BT 2 1 AS4560G 8352 G50Mnkk AAP Vietnam LX RKE0C 001 AS4560G_WHISTLE R_PRO1GBCkk_3V3 BT 2 1 AS4560G 6342 G50Mnkk AAP Vietnam LX RKE0C 002 AS4560G_WHISTLE R_PRO1GBCkk_3V3 BT 2 1 AS4560G 6342 G50Mnkk CHINA China LX RKE01 001 AS4560G_WHISTLE R_PRO1GBCkk_3V3 N AS4560 4332G5 0Mnbb AAP Thailand LX RKV0C 016 AS4560_UMACbb...

Page 272: ...3 BT 2 1 AS4560 4333G5 0Mnkk AAP Thailand LX RKC0C 013 AS4560_UMACkk_3 BT 2 1 AS4560 4333G5 0Mnkk AAP Thailand LX RKC0C 012 AS4560_UMACkk_3 BT 2 1 AS4560 4333G5 0Mnkk AAP Thailand LX RKC0C 011 AS4560_UMACkk_3 BT 2 1 AS4560 4334G5 0Mnkk AAP Thailand LX RKC0C 010 AS4560_UMACkk_3 BT 2 1 AS4560 4334G5 0Mnkk AAP Thailand LX RKC0C 009 AS4560_UMACkk_3 BT 2 1 AS4560 4334G5 0Mnkk AAP Thailand LX RKC0C 008 ...

Page 273: ...MOU R_XT1GBCbb_3V3 AMD A60M FCH AS4560G 8352 G50Mnbb AAP Thailand LX RKW0C 017 AS4560G_SEYMOU R_XT1GBCbb_3V3 AMD A60M FCH AS4560G 6344 G64Mnbb AAP Thailand LX RKW0C 001 AS4560G_SEYMOU R_XT1GBCbb_3V3 AMD A60M FCH AS4560G 6342 G64Mnbb AAP Thailand LX RKW0C 004 AS4560G_SEYMOU R_XT1GBCbb_3V3 AMD A60M FCH AS4560G 4332 G64Mnbb AAP Thailand LX RKW0C 010 AS4560G_SEYMOU R_XT1GBCbb_3V3 AMD A60M FCH AS4560G ...

Page 274: ...R_XT1GBCkk_3V3 AMD A60M FCH AS4560G 6342 G64Mnkk AAP Vietnam LX RKD0C 008 AS4560G_SEYMOU R_XT1GBCkk_3V3 AMD A60M FCH AS4560G 8354 G50Mnkk AAP Vietnam LX RKD0C 002 AS4560G_SEYMOU R_XT1GBCkk_3V3 AMD A60M FCH AS4560G 8354 G64Mnkk AAP Singapore LX RKD02 007 AS4560G_SEYMOU R_XT1GBCkk_3V3 AMD A60M FCH AS4560G 6344 G50Mnkk AAP Singapore LX RKD02 004 AS4560G_SEYMOU R_XT1GBCkk_3V3 AMD A60M FCH AS4560G 8354...

Page 275: ...560G 4334 G64Mnkk AAP Thailand LX RKD0C 009 AS4560G_SEYMOU R_XT1GBCkk_3V3 AMD A60M FCH AS4560G 8352 G50Mnkk AAP Vietnam LX RKE0C 001 AS4560G_WHISTLE R_PRO1GBCkk_3V3 AMD A60M FCH AS4560G 6342 G50Mnkk AAP Vietnam LX RKE0C 002 AS4560G_WHISTLE R_PRO1GBCkk_3V3 AMD A60M FCH AS4560G 6342 G50Mnkk CHINA China LX RKE01 001 AS4560G_WHISTLE R_PRO1GBCkk_3V3 AMD A60M FCH AS4560 4332G 50Mnbb AAP Thailand LX RKV0...

Page 276: ...H AS4560 4333G 50Mnkk AAP Thailand LX RKC0C 013 AS4560_UMACkk_3 AMD A60M FCH AS4560 4333G 50Mnkk AAP Thailand LX RKC0C 012 AS4560_UMACkk_3 AMD A60M FCH AS4560 4333G 50Mnkk AAP Thailand LX RKC0C 011 AS4560_UMACkk_3 AMD A60M FCH AS4560 4334G 50Mnkk AAP Thailand LX RKC0C 010 AS4560_UMACkk_3 AMD A60M FCH AS4560 4334G 50Mnkk AAP Thailand LX RKC0C 009 AS4560_UMACkk_3 AMD A60M FCH AS4560 4334G 50Mnkk AAP...

Page 277: ...60G_SEYMOU R_XT1GBCbb_3V3 6CELL2 2 AS4560G 8352 G50Mnbb AAP Thailand LX RKW0C 017 AS4560G_SEYMOU R_XT1GBCbb_3V3 6CELL2 2 AS4560G 6344 G64Mnbb AAP Thailand LX RKW0C 001 AS4560G_SEYMOU R_XT1GBCbb_3V3 6CELL2 2 AS4560G 6342 G64Mnbb AAP Thailand LX RKW0C 004 AS4560G_SEYMOU R_XT1GBCbb_3V3 6CELL2 2 AS4560G 4332 G64Mnbb AAP Thailand LX RKW0C 010 AS4560G_SEYMOU R_XT1GBCbb_3V3 6CELL2 2 AS4560G 8352 G64Mnbb ...

Page 278: ...G_SEYMOU R_XT1GBCkk_3V3 6CELL2 2 AS4560G 6342 G64Mnkk AAP Vietnam LX RKD0C 008 AS4560G_SEYMOU R_XT1GBCkk_3V3 6CELL2 2 AS4560G 8354 G50Mnkk AAP Vietnam LX RKD0C 002 AS4560G_SEYMOU R_XT1GBCkk_3V3 6CELL2 2 AS4560G 8354 G64Mnkk AAP Singapore LX RKD02 007 AS4560G_SEYMOU R_XT1GBCkk_3V3 6CELL2 2 AS4560G 6344 G50Mnkk AAP Singapore LX RKD02 004 AS4560G_SEYMOU R_XT1GBCkk_3V3 6CELL2 2 AS4560G 8354 G50Mnkk AA...

Page 279: ...LL2 2 AS4560G 4334 G64Mnkk AAP Thailand LX RKD0C 009 AS4560G_SEYMOU R_XT1GBCkk_3V3 6CELL2 2 AS4560G 8352 G50Mnkk AAP Vietnam LX RKE0C 001 AS4560G_WHISTLE R_PRO1GBCkk_3V3 6CELL2 2 AS4560G 6342 G50Mnkk AAP Vietnam LX RKE0C 002 AS4560G_WHISTLE R_PRO1GBCkk_3V3 6CELL2 2 AS4560G 6342 G50Mnkk CHINA China LX RKE01 001 AS4560G_WHISTLE R_PRO1GBCkk_3V3 6CELL2 2 AS4560 4332G 50Mnbb AAP Thailand LX RKV0C 016 A...

Page 280: ...6CELL2 2 AS4560 4333G 50Mnkk AAP Thailand LX RKC0C 013 AS4560_UMACkk_3 6CELL2 2 AS4560 4333G 50Mnkk AAP Thailand LX RKC0C 012 AS4560_UMACkk_3 6CELL2 2 AS4560 4333G 50Mnkk AAP Thailand LX RKC0C 011 AS4560_UMACkk_3 6CELL2 2 AS4560 4334G 50Mnkk AAP Thailand LX RKC0C 010 AS4560_UMACkk_3 6CELL2 2 AS4560 4334G 50Mnkk AAP Thailand LX RKC0C 009 AS4560_UMACkk_3 6CELL2 2 AS4560 4334G 50Mnkk AAP Thailand LX ...

Page 281: ...KW0C 014 AS4560G_SEYMOU R_XT1GBCbb_3V3 90W AS4560G 8352 G50Mnbb AAP Thailand LX RKW0C 017 AS4560G_SEYMOU R_XT1GBCbb_3V3 90W AS4560G 6344 G64Mnbb AAP Thailand LX RKW0C 001 AS4560G_SEYMOU R_XT1GBCbb_3V3 90W AS4560G 6342 G64Mnbb AAP Thailand LX RKW0C 004 AS4560G_SEYMOU R_XT1GBCbb_3V3 90W AS4560G 4332 G64Mnbb AAP Thailand LX RKW0C 010 AS4560G_SEYMOU R_XT1GBCbb_3V3 90W AS4560G 8352 G64Mnbb AAP Thailand...

Page 282: ... AS4560G_SEYMOU R_XT1GBCkk_3V3 90W AS4560G 6342 G64Mnkk AAP Vietnam LX RKD0C 008 AS4560G_SEYMOU R_XT1GBCkk_3V3 90W AS4560G 8354 G50Mnkk AAP Vietnam LX RKD0C 002 AS4560G_SEYMOU R_XT1GBCkk_3V3 90W AS4560G 8354 G64Mnkk AAP Singapore LX RKD02 007 AS4560G_SEYMOU R_XT1GBCkk_3V3 90W AS4560G 6344 G50Mnkk AAP Singapore LX RKD02 004 AS4560G_SEYMOU R_XT1GBCkk_3V3 90W AS4560G 8354 G50Mnkk AAP Singapore LX RKD...

Page 283: ...GBCkk_3V3 90W AS4560G 4334 G64Mnkk AAP Thailand LX RKD0C 009 AS4560G_SEYMOU R_XT1GBCkk_3V3 90W AS4560G 8352 G50Mnkk AAP Vietnam LX RKE0C 001 AS4560G_WHISTLE R_PRO1GBCkk_3V3 90W AS4560G 6342 G50Mnkk AAP Vietnam LX RKE0C 002 AS4560G_WHISTLE R_PRO1GBCkk_3V3 90W AS4560G 6342 G50Mnkk CHINA China LX RKE01 001 AS4560G_WHISTLE R_PRO1GBCkk_3V3 90W AS4560 4332G5 0Mnbb AAP Thailand LX RKV0C 016 AS4560_UMACbb...

Page 284: ..._UMACkk_3 65W AS4560 4333G5 0Mnkk AAP Thailand LX RKC0C 013 AS4560_UMACkk_3 65W AS4560 4333G5 0Mnkk AAP Thailand LX RKC0C 012 AS4560_UMACkk_3 65W AS4560 4333G5 0Mnkk AAP Thailand LX RKC0C 011 AS4560_UMACkk_3 65W AS4560 4334G5 0Mnkk AAP Thailand LX RKC0C 010 AS4560_UMACkk_3 65W AS4560 4334G5 0Mnkk AAP Thailand LX RKC0C 009 AS4560_UMACkk_3 65W AS4560 4334G5 0Mnkk AAP Thailand LX RKC0C 008 AS4560_UMA...

Page 285: ...4560G_SEYMOU R_XT1GBCbb_3V3 1 3M HD AS4560G 8352 G50Mnbb AAP Thailand LX RKW0C 017 AS4560G_SEYMOU R_XT1GBCbb_3V3 1 3M HD AS4560G 6344 G64Mnbb AAP Thailand LX RKW0C 001 AS4560G_SEYMOU R_XT1GBCbb_3V3 1 3M HD AS4560G 6342 G64Mnbb AAP Thailand LX RKW0C 004 AS4560G_SEYMOU R_XT1GBCbb_3V3 1 3M HD AS4560G 4332 G64Mnbb AAP Thailand LX RKW0C 010 AS4560G_SEYMOU R_XT1GBCbb_3V3 1 3M HD AS4560G 8352 G64Mnbb AAP...

Page 286: ...60G_SEYMOU R_XT1GBCkk_3V3 1 3M HD AS4560G 6342 G64Mnkk AAP Vietnam LX RKD0C 008 AS4560G_SEYMOU R_XT1GBCkk_3V3 1 3M HD AS4560G 8354 G50Mnkk AAP Vietnam LX RKD0C 002 AS4560G_SEYMOU R_XT1GBCkk_3V3 1 3M HD AS4560G 8354 G64Mnkk AAP Singapore LX RKD02 007 AS4560G_SEYMOU R_XT1GBCkk_3V3 1 3M HD AS4560G 6344 G50Mnkk AAP Singapore LX RKD02 004 AS4560G_SEYMOU R_XT1GBCkk_3V3 1 3M HD AS4560G 8354 G50Mnkk AAP S...

Page 287: ... 1 3M HD AS4560G 4334 G64Mnkk AAP Thailand LX RKD0C 009 AS4560G_SEYMOU R_XT1GBCkk_3V3 1 3M HD AS4560G 8352 G50Mnkk AAP Vietnam LX RKE0C 001 AS4560G_WHISTLE R_PRO1GBCkk_3V3 1 3M HD AS4560G 6342 G50Mnkk AAP Vietnam LX RKE0C 002 AS4560G_WHISTLE R_PRO1GBCkk_3V3 1 3M HD AS4560G 6342 G50Mnkk CHINA China LX RKE01 001 AS4560G_WHISTLE R_PRO1GBCkk_3V3 1 3M HD AS4560 4332G 50Mnbb AAP Thailand LX RKV0C 016 AS...

Page 288: ..._3 1 3M HD AS4560 4333G 50Mnkk AAP Thailand LX RKC0C 013 AS4560_UMACkk_3 1 3M HD AS4560 4333G 50Mnkk AAP Thailand LX RKC0C 012 AS4560_UMACkk_3 1 3M HD AS4560 4333G 50Mnkk AAP Thailand LX RKC0C 011 AS4560_UMACkk_3 1 3M HD AS4560 4334G 50Mnkk AAP Thailand LX RKC0C 010 AS4560_UMACkk_3 1 3M HD AS4560 4334G 50Mnkk AAP Thailand LX RKC0C 009 AS4560_UMACkk_3 1 3M HD AS4560 4334G 50Mnkk AAP Thailand LX RKC...

Page 289: ...MOU R_XT1GBCbb_3V3 Resource CD AS4560G 8352 G50Mnbb AAP Thailand LX RKW0C 017 AS4560G_SEYMOU R_XT1GBCbb_3V3 Resource CD AS4560G 6344 G64Mnbb AAP Thailand LX RKW0C 001 AS4560G_SEYMOU R_XT1GBCbb_3V3 Resource CD AS4560G 6342 G64Mnbb AAP Thailand LX RKW0C 004 AS4560G_SEYMOU R_XT1GBCbb_3V3 Resource CD AS4560G 4332 G64Mnbb AAP Thailand LX RKW0C 010 AS4560G_SEYMOU R_XT1GBCbb_3V3 Resource CD AS4560G 8352 ...

Page 290: ...AP Thailand LX RKD0C 005 AS4560G_SEYMOU R_XT1GBCkk_3V3 Resource CD AS4560G 6342 G64Mnkk AAP Vietnam LX RKD0C 008 AS4560G_SEYMOU R_XT1GBCkk_3V3 Resource CD AS4560G 8354 G50Mnkk AAP Vietnam LX RKD0C 002 AS4560G_SEYMOU R_XT1GBCkk_3V3 Resource CD AS4560G 8354 G64Mnkk AAP Singapore LX RKD02 007 AS4560G_SEYMOU R_XT1GBCkk_3V3 AS4560G 6344 G50Mnkk AAP Singapore LX RKD02 004 AS4560G_SEYMOU R_XT1GBCkk_3V3 A...

Page 291: ... 4334 G64Mnkk AAP Thailand LX RKD0C 009 AS4560G_SEYMOU R_XT1GBCkk_3V3 Resource CD AS4560G 8352 G50Mnkk AAP Vietnam LX RKE0C 001 AS4560G_WHISTLE R_PRO1GBCkk_3V3 Resource CD AS4560G 6342 G50Mnkk AAP Vietnam LX RKE0C 002 AS4560G_WHISTLE R_PRO1GBCkk_3V3 Resource CD AS4560G 6342 G50Mnkk CHINA China LX RKE01 001 AS4560G_WHISTLE R_PRO1GBCkk_3V3 AS4560 4332G 50Mnbb AAP Thailand LX RKV0C 016 AS4560_UMACbb_...

Page 292: ...ce CD AS4560 4333G 50Mnkk AAP Thailand LX RKC0C 013 AS4560_UMACkk_3 Resource CD AS4560 4333G 50Mnkk AAP Thailand LX RKC0C 012 AS4560_UMACkk_3 Resource CD AS4560 4333G 50Mnkk AAP Thailand LX RKC0C 011 AS4560_UMACkk_3 Resource CD AS4560 4334G 50Mnkk AAP Thailand LX RKC0C 010 AS4560_UMACkk_3 Resource CD AS4560 4334G 50Mnkk AAP Thailand LX RKC0C 009 AS4560_UMACkk_3 Resource CD AS4560 4334G 50Mnkk AAP ...

Page 293: ...X RKW0C 014 AS4560G_SEYMOU R_XT1GBCbb_3V3 N AS4560G 8352 G50Mnbb AAP Thailand LX RKW0C 017 AS4560G_SEYMOU R_XT1GBCbb_3V3 N AS4560G 6344 G64Mnbb AAP Thailand LX RKW0C 001 AS4560G_SEYMOU R_XT1GBCbb_3V3 N AS4560G 6342 G64Mnbb AAP Thailand LX RKW0C 004 AS4560G_SEYMOU R_XT1GBCbb_3V3 N AS4560G 4332 G64Mnbb AAP Thailand LX RKW0C 010 AS4560G_SEYMOU R_XT1GBCbb_3V3 N AS4560G 8352 G64Mnbb AAP Thailand LX RKW...

Page 294: ...k_3V3 N AS4560G 6342 G64Mnkk AAP Vietnam LX RKD0C 008 AS4560G_SEYMOU R_XT1GBCkk_3V3 N AS4560G 8354 G50Mnkk AAP Vietnam LX RKD0C 002 AS4560G_SEYMOU R_XT1GBCkk_3V3 N AS4560G 8354 G64Mnkk AAP Singapore LX RKD02 007 AS4560G_SEYMOU R_XT1GBCkk_3V3 W7 Standard AS4560G 6344 G50Mnkk AAP Singapore LX RKD02 004 AS4560G_SEYMOU R_XT1GBCkk_3V3 W7 Standard AS4560G 8354 G50Mnkk AAP Singapore LX RKD02 006 AS4560G_...

Page 295: ...560G_SEYMOU R_XT1GBCkk_3V3 N AS4560G 4334 G64Mnkk AAP Thailand LX RKD0C 009 AS4560G_SEYMOU R_XT1GBCkk_3V3 N AS4560G 8352 G50Mnkk AAP Vietnam LX RKE0C 001 AS4560G_WHISTLE R_PRO1GBCkk_3V3 N AS4560G 6342 G50Mnkk AAP Vietnam LX RKE0C 002 AS4560G_WHISTLE R_PRO1GBCkk_3V3 N AS4560G 6342 G50Mnkk CHINA China LX RKE01 001 AS4560G_WHISTLE R_PRO1GBCkk_3V3 W7 Standard AS4560 4332G 50Mnbb AAP Thailand LX RKV0C ...

Page 296: ...AS4560_UMACkk_3 N AS4560 4333G 50Mnkk AAP Thailand LX RKC0C 013 AS4560_UMACkk_3 N AS4560 4333G 50Mnkk AAP Thailand LX RKC0C 012 AS4560_UMACkk_3 N AS4560 4333G 50Mnkk AAP Thailand LX RKC0C 011 AS4560_UMACkk_3 N AS4560 4334G 50Mnkk AAP Thailand LX RKC0C 010 AS4560_UMACkk_3 N AS4560 4334G 50Mnkk AAP Thailand LX RKC0C 009 AS4560_UMACkk_3 N AS4560 4334G 50Mnkk AAP Thailand LX RKC0C 008 AS4560_UMACkk_3 ...

Page 297: ... LX RKW0C 014 AS4560G_SEYMOU R_XT1GBCbb_3V3 ATH AS4560G 8352 G50Mnbb AAP Thailand LX RKW0C 017 AS4560G_SEYMOU R_XT1GBCbb_3V3 ATH AS4560G 6344 G64Mnbb AAP Thailand LX RKW0C 001 AS4560G_SEYMOU R_XT1GBCbb_3V3 ATH AS4560G 6342 G64Mnbb AAP Thailand LX RKW0C 004 AS4560G_SEYMOU R_XT1GBCbb_3V3 ATH AS4560G 4332 G64Mnbb AAP Thailand LX RKW0C 010 AS4560G_SEYMOU R_XT1GBCbb_3V3 ATH AS4560G 8352 G64Mnbb AAP Tha...

Page 298: ...560G_SEYMOU R_XT1GBCkk_3V3 ATH AS4560G 6342 G64Mnkk AAP Vietnam LX RKD0C 008 AS4560G_SEYMOU R_XT1GBCkk_3V3 AVN AS4560G 8354 G50Mnkk AAP Vietnam LX RKD0C 002 AS4560G_SEYMOU R_XT1GBCkk_3V3 AVN AS4560G 8354 G64Mnkk AAP Singapore LX RKD02 007 AS4560G_SEYMOU R_XT1GBCkk_3V3 ACS AS4560G 6344 G50Mnkk AAP Singapore LX RKD02 004 AS4560G_SEYMOU R_XT1GBCkk_3V3 ACS AS4560G 8354 G50Mnkk AAP Singapore LX RKD02 0...

Page 299: ..._3V3 ATH AS4560G 4334 G64Mnkk AAP Thailand LX RKD0C 009 AS4560G_SEYMOU R_XT1GBCkk_3V3 ATH AS4560G 8352 G50Mnkk AAP Vietnam LX RKE0C 001 AS4560G_WHISTLE R_PRO1GBCkk_3V3 AVN AS4560G 6342 G50Mnkk AAP Vietnam LX RKE0C 002 AS4560G_WHISTLE R_PRO1GBCkk_3V3 AVN AS4560G 6342 G50Mnkk CHINA China LX RKE01 001 AS4560G_WHISTLE R_PRO1GBCkk_3V3 ACCN AS4560 4332G 50Mnbb AAP Thailand LX RKV0C 016 AS4560_UMACbb_3 A...

Page 300: ...kk_3 ATH AS4560 4333G 50Mnkk AAP Thailand LX RKC0C 013 AS4560_UMACkk_3 ATH AS4560 4333G 50Mnkk AAP Thailand LX RKC0C 012 AS4560_UMACkk_3 ATH AS4560 4333G 50Mnkk AAP Thailand LX RKC0C 011 AS4560_UMACkk_3 ATH AS4560 4334G 50Mnkk AAP Thailand LX RKC0C 010 AS4560_UMACkk_3 ATH AS4560 4334G 50Mnkk AAP Thailand LX RKC0C 009 AS4560_UMACkk_3 ATH AS4560 4334G 50Mnkk AAP Thailand LX RKC0C 008 AS4560_UMACkk_3...

Page 301: ...60G_SEYMOU R_XT1GBCbb_3V3 LINPUS AS4560G 8352 G50Mnbb AAP Thailand LX RKW0C 017 AS4560G_SEYMOU R_XT1GBCbb_3V3 LINPUS AS4560G 6344 G64Mnbb AAP Thailand LX RKW0C 001 AS4560G_SEYMOU R_XT1GBCbb_3V3 LINPUS AS4560G 6342 G64Mnbb AAP Thailand LX RKW0C 004 AS4560G_SEYMOU R_XT1GBCbb_3V3 LINPUS AS4560G 4332 G64Mnbb AAP Thailand LX RKW0C 010 AS4560G_SEYMOU R_XT1GBCbb_3V3 LINPUS AS4560G 8352 G64Mnbb AAP Thaila...

Page 302: ...05 AS4560G_SEYMOU R_XT1GBCkk_3V3 LINPUS AS4560G 6342 G64Mnkk AAP Vietnam LX RKD0C 008 AS4560G_SEYMOU R_XT1GBCkk_3V3 LINPUS AS4560G 8354 G50Mnkk AAP Vietnam LX RKD0C 002 AS4560G_SEYMOU R_XT1GBCkk_3V3 LINPUS AS4560G 8354 G64Mnkk AAP Singapore LX RKD02 007 AS4560G_SEYMOU R_XT1GBCkk_3V3 W7HP64 AS4560G 6344 G50Mnkk AAP Singapore LX RKD02 004 AS4560G_SEYMOU R_XT1GBCkk_3V3 W7HP64 AS4560G 8354 G50Mnkk AAP...

Page 303: ...Ckk_3V3 LINPUS AS4560G 4334 G64Mnkk AAP Thailand LX RKD0C 009 AS4560G_SEYMOU R_XT1GBCkk_3V3 LINPUS AS4560G 8352 G50Mnkk AAP Vietnam LX RKE0C 001 AS4560G_WHISTLE R_PRO1GBCkk_3V3 LINPUS AS4560G 6342 G50Mnkk AAP Vietnam LX RKE0C 002 AS4560G_WHISTLE R_PRO1GBCkk_3V3 LINPUS AS4560G 6342 G50Mnkk CHINA China LX RKE01 001 AS4560G_WHISTLE R_PRO1GBCkk_3V3 W7HB64SC AS4560 4332G 50Mnbb AAP Thailand LX RKV0C 01...

Page 304: ...UMACkk_3 LINPUS AS4560 4333G 50Mnkk AAP Thailand LX RKC0C 013 AS4560_UMACkk_3 LINPUS AS4560 4333G 50Mnkk AAP Thailand LX RKC0C 012 AS4560_UMACkk_3 LINPUS AS4560 4333G 50Mnkk AAP Thailand LX RKC0C 011 AS4560_UMACkk_3 LINPUS AS4560 4334G 50Mnkk AAP Thailand LX RKC0C 010 AS4560_UMACkk_3 LINPUS AS4560 4334G 50Mnkk AAP Thailand LX RKC0C 009 AS4560_UMACkk_3 LINPUS AS4560 4334G 50Mnkk AAP Thailand LX RKC...

Page 305: ...14 AS4560G_SEYMOU R_XT1GBCbb_3V3 TH4ES61 AS4560G 8352 G50Mnbb AAP Thailand LX RKW0C 017 AS4560G_SEYMOU R_XT1GBCbb_3V3 TH4ES61 AS4560G 6344 G64Mnbb AAP Thailand LX RKW0C 001 AS4560G_SEYMOU R_XT1GBCbb_3V3 TH3EN11 AS4560G 6342 G64Mnbb AAP Thailand LX RKW0C 004 AS4560G_SEYMOU R_XT1GBCbb_3V3 TH3EN11 AS4560G 4332 G64Mnbb AAP Thailand LX RKW0C 010 AS4560G_SEYMOU R_XT1GBCbb_3V3 TH3EN11 AS4560G 8352 G64Mnb...

Page 306: ...EYMOU R_XT1GBCkk_3V3 TH3EN11 AS4560G 6342 G64Mnkk AAP Vietnam LX RKD0C 008 AS4560G_SEYMOU R_XT1GBCkk_3V3 VN1EN11 AS4560G 8354 G50Mnkk AAP Vietnam LX RKD0C 002 AS4560G_SEYMOU R_XT1GBCkk_3V3 VN1EN11 AS4560G 8354 G64Mnkk AAP Singapore LX RKD02 007 AS4560G_SEYMOU R_XT1GBCkk_3V3 SG1ES61 AS4560G 6344 G50Mnkk AAP Singapore LX RKD02 004 AS4560G_SEYMOU R_XT1GBCkk_3V3 SG1ZH31 AS4560G 8354 G50Mnkk AAP Singap...

Page 307: ...S61 AS4560G 4334 G64Mnkk AAP Thailand LX RKD0C 009 AS4560G_SEYMOU R_XT1GBCkk_3V3 TH3EN11 AS4560G 8352 G50Mnkk AAP Vietnam LX RKE0C 001 AS4560G_WHISTLE R_PRO1GBCkk_3V3 VN1EN11 AS4560G 6342 G50Mnkk AAP Vietnam LX RKE0C 002 AS4560G_WHISTLE R_PRO1GBCkk_3V3 VN1EN11 AS4560G 6342 G50Mnkk CHINA China LX RKE01 001 AS4560G_WHISTLE R_PRO1GBCkk_3V3 CN1SC11 AS4560 4332G 50Mnbb AAP Thailand LX RKV0C 016 AS4560_...

Page 308: ...3EN11 AS4560 4333G 50Mnkk AAP Thailand LX RKC0C 013 AS4560_UMACkk_3 TH1TH51 AS4560 4333G 50Mnkk AAP Thailand LX RKC0C 012 AS4560_UMACkk_3 TH4ES61 AS4560 4333G 50Mnkk AAP Thailand LX RKC0C 011 AS4560_UMACkk_3 TH3EN11 AS4560 4334G 50Mnkk AAP Thailand LX RKC0C 010 AS4560_UMACkk_3 TH1TH51 AS4560 4334G 50Mnkk AAP Thailand LX RKC0C 009 AS4560_UMACkk_3 TH4ES61 AS4560 4334G 50Mnkk AAP Thailand LX RKC0C 00...

Page 309: ... R_XT1GBCbb_3V3 LINPUSATH4 ES61 AS4560G 8352 G50Mnbb AAP Thailand LX RKW0C 017 AS4560G_SEYMOU R_XT1GBCbb_3V3 LINPUSATH4 ES61 AS4560G 6344 G64Mnbb AAP Thailand LX RKW0C 001 AS4560G_SEYMOU R_XT1GBCbb_3V3 LINPUSATH3 EN11 AS4560G 6342 G64Mnbb AAP Thailand LX RKW0C 004 AS4560G_SEYMOU R_XT1GBCbb_3V3 LINPUSATH3 EN11 AS4560G 4332 G64Mnbb AAP Thailand LX RKW0C 010 AS4560G_SEYMOU R_XT1GBCbb_3V3 LINPUSATH3 E...

Page 310: ...3V3 LINPUSATH3 EN11 AS4560G 6342 G64Mnkk AAP Vietnam LX RKD0C 008 AS4560G_SEYMOU R_XT1GBCkk_3V3 LINPUSAVN1 EN11 AS4560G 8354 G50Mnkk AAP Vietnam LX RKD0C 002 AS4560G_SEYMOU R_XT1GBCkk_3V3 LINPUSAVN1 EN11 AS4560G 8354 G64Mnkk AAP Singapore LX RKD02 007 AS4560G_SEYMOU R_XT1GBCkk_3V3 W7HP64ASS G1ES61 AS4560G 6344 G50Mnkk AAP Singapore LX RKD02 004 AS4560G_SEYMOU R_XT1GBCkk_3V3 W7HP64ASS G1ZH31 AS4560...

Page 311: ...334 G64Mnkk AAP Thailand LX RKD0C 009 AS4560G_SEYMOU R_XT1GBCkk_3V3 LINPUSATH3 EN11 AS4560G 8352 G50Mnkk AAP Vietnam LX RKE0C 001 AS4560G_WHISTLE R_PRO1GBCkk_3V3 LINPUSAVN1 EN11 AS4560G 6342 G50Mnkk AAP Vietnam LX RKE0C 002 AS4560G_WHISTLE R_PRO1GBCkk_3V3 LINPUSAVN1 EN11 AS4560G 6342 G50Mnkk CHINA China LX RKE01 001 AS4560G_WHISTLE R_PRO1GBCkk_3V3 W7HB64SCAS CN1SC11 AS4560 4332G 50Mnbb AAP Thailan...

Page 312: ...0 4333G 50Mnkk AAP Thailand LX RKC0C 013 AS4560_UMACkk_3 LINPUSATH1T H51 AS4560 4333G 50Mnkk AAP Thailand LX RKC0C 012 AS4560_UMACkk_3 LINPUSATH4 ES61 AS4560 4333G 50Mnkk AAP Thailand LX RKC0C 011 AS4560_UMACkk_3 LINPUSATH3 EN11 AS4560 4334G 50Mnkk AAP Thailand LX RKC0C 010 AS4560_UMACkk_3 LINPUSATH1T H51 AS4560 4334G 50Mnkk AAP Thailand LX RKC0C 009 AS4560_UMACkk_3 LINPUSATH4 ES61 AS4560 4334G 50...

Page 313: ...X RKW0C 014 AS4560G_SEYMOUR _XT1GBCbb_3V3 EN AS4560G 835 2G50Mnbb AAP Thailand LX RKW0C 017 AS4560G_SEYMOUR _XT1GBCbb_3V3 EN AS4560G 634 4G64Mnbb AAP Thailand LX RKW0C 001 AS4560G_SEYMOUR _XT1GBCbb_3V3 EN AS4560G 634 2G64Mnbb AAP Thailand LX RKW0C 004 AS4560G_SEYMOUR _XT1GBCbb_3V3 EN AS4560G 433 2G64Mnbb AAP Thailand LX RKW0C 010 AS4560G_SEYMOUR _XT1GBCbb_3V3 EN AS4560G 835 2G64Mnbb AAP Thailand L...

Page 314: ...MOUR _XT1GBCkk_3V3 EN AS4560G 634 2G64Mnkk AAP Vietnam LX RKD0C 008 AS4560G_SEYMOUR _XT1GBCkk_3V3 EN AS4560G 835 4G50Mnkk AAP Vietnam LX RKD0C 002 AS4560G_SEYMOUR _XT1GBCkk_3V3 EN AS4560G 835 4G64Mnkk AAP Singapore LX RKD02 007 AS4560G_SEYMOUR _XT1GBCkk_3V3 EN AS4560G 634 4G50Mnkk AAP Singapore LX RKD02 004 AS4560G_SEYMOUR _XT1GBCkk_3V3 ENHK Z H SC AS4560G 835 4G50Mnkk AAP Singapore LX RKD02 006 A...

Page 315: ...OUR _XT1GBCkk_3V3 EN AS4560G 433 4G64Mnkk AAP Thailand LX RKD0C 009 AS4560G_SEYMOUR _XT1GBCkk_3V3 EN AS4560G 835 2G50Mnkk AAP Vietnam LX RKE0C 001 AS4560G_WHISTLER _PRO1GBCkk_3V3 EN AS4560G 634 2G50Mnkk AAP Vietnam LX RKE0C 002 AS4560G_WHISTLER _PRO1GBCkk_3V3 EN AS4560G 634 2G50Mnkk CHINA China LX RKE01 001 AS4560G_WHISTLER _PRO1GBCkk_3V3 SC AS4560 4332 G50Mnbb AAP Thailand LX RKV0C 016 AS4560_UMA...

Page 316: ...0_UMACkk_3 EN AS4560 4333 G50Mnkk AAP Thailand LX RKC0C 013 AS4560_UMACkk_3 EN AS4560 4333 G50Mnkk AAP Thailand LX RKC0C 012 AS4560_UMACkk_3 EN AS4560 4333 G50Mnkk AAP Thailand LX RKC0C 011 AS4560_UMACkk_3 EN AS4560 4334 G50Mnkk AAP Thailand LX RKC0C 010 AS4560_UMACkk_3 EN AS4560 4334 G50Mnkk AAP Thailand LX RKC0C 009 AS4560_UMACkk_3 EN AS4560 4334 G50Mnkk AAP Thailand LX RKC0C 008 AS4560_UMACkk_3...

Page 317: ... 2G50Mnbb AAP Thailand LX RKW0C 017 AS4560G_SEYMOU R_XT1GBCbb_3V3 US International KB I140A 229 AS4560G 634 4G64Mnbb AAP Thailand LX RKW0C 001 AS4560G_SEYMOU R_XT1GBCbb_3V3 US International KB I140A 229 AS4560G 634 2G64Mnbb AAP Thailand LX RKW0C 004 AS4560G_SEYMOU R_XT1GBCbb_3V3 US International KB I140A 229 AS4560G 433 2G64Mnbb AAP Thailand LX RKW0C 010 AS4560G_SEYMOU R_XT1GBCbb_3V3 US Internatio...

Page 318: ...onal KB I140A 229 AS4560G 634 2G64Mnkk AAP Vietnam LX RKD0C 008 AS4560G_SEYMOU R_XT1GBCkk_3V3 US International KB I140A 229 AS4560G 835 4G50Mnkk AAP Vietnam LX RKD0C 002 AS4560G_SEYMOU R_XT1GBCkk_3V3 US International KB I140A 229 AS4560G 835 4G64Mnkk AAP Singapore LX RKD02 007 AS4560G_SEYMOU R_XT1GBCkk_3V3 US International KB I140A 229 AS4560G 634 4G50Mnkk AAP Singapore LX RKD02 004 AS4560G_SEYMOU...

Page 319: ...and LX RKD0C 009 AS4560G_SEYMOU R_XT1GBCkk_3V3 US International KB I140A 229 AS4560G 835 2G50Mnkk AAP Vietnam LX RKE0C 001 AS4560G_WHISTLE R_PRO1GBCkk_3V3 US International KB I140A 229 AS4560G 634 2G50Mnkk AAP Vietnam LX RKE0C 002 AS4560G_WHISTLE R_PRO1GBCkk_3V3 US International KB I140A 229 AS4560G 634 2G50Mnkk CHINA China LX RKE01 001 AS4560G_WHISTLE R_PRO1GBCkk_3V3 US International KB I140A 229...

Page 320: ...33 G50Mnkk AAP Thailand LX RKC0C 013 AS4560_UMACkk_3 Thailand KB I140A 226 AS4560 4333 G50Mnkk AAP Thailand LX RKC0C 012 AS4560_UMACkk_3 US International KB I140A 229 AS4560 4333 G50Mnkk AAP Thailand LX RKC0C 011 AS4560_UMACkk_3 US International KB I140A 229 AS4560 4334 G50Mnkk AAP Thailand LX RKC0C 010 AS4560_UMACkk_3 Thailand KB I140A 226 AS4560 4334 G50Mnkk AAP Thailand LX RKC0C 009 AS4560_UMAC...

Page 321: ...4 AS4560G_SEYMOU R_XT1GBCbb_3V3 Continental AS4560G 835 2G50Mnbb AAP Thailand LX RKW0C 017 AS4560G_SEYMOU R_XT1GBCbb_3V3 Continental AS4560G 634 4G64Mnbb AAP Thailand LX RKW0C 001 AS4560G_SEYMOU R_XT1GBCbb_3V3 Europe AS4560G 634 2G64Mnbb AAP Thailand LX RKW0C 004 AS4560G_SEYMOU R_XT1GBCbb_3V3 Europe AS4560G 433 2G64Mnbb AAP Thailand LX RKW0C 010 AS4560G_SEYMOU R_XT1GBCbb_3V3 Europe AS4560G 835 2G6...

Page 322: ...X RKD0C 005 AS4560G_SEYMOU R_XT1GBCkk_3V3 Europe AS4560G 634 2G64Mnkk AAP Vietnam LX RKD0C 008 AS4560G_SEYMOU R_XT1GBCkk_3V3 Europe AS4560G 835 4G50Mnkk AAP Vietnam LX RKD0C 002 AS4560G_SEYMOU R_XT1GBCkk_3V3 Europe AS4560G 835 4G64Mnkk AAP Singapore LX RKD02 007 AS4560G_SEYMOU R_XT1GBCkk_3V3 UK AS4560G 634 4G50Mnkk AAP Singapore LX RKD02 004 AS4560G_SEYMOU R_XT1GBCkk_3V3 UK AS4560G 835 4G50Mnkk AA...

Page 323: ...60G_SEYMOU R_XT1GBCkk_3V3 Continental AS4560G 433 4G64Mnkk AAP Thailand LX RKD0C 009 AS4560G_SEYMOU R_XT1GBCkk_3V3 Europe AS4560G 835 2G50Mnkk AAP Vietnam LX RKE0C 001 AS4560G_WHISTL ER_PRO1GBCkk_3 V3 Europe AS4560G 634 2G50Mnkk AAP Vietnam LX RKE0C 002 AS4560G_WHISTL ER_PRO1GBCkk_3 V3 Europe AS4560G 634 2G50Mnkk CHINA China LX RKE01 001 AS4560G_WHISTL ER_PRO1GBCkk_3 V3 PRC AS4560 4332 G50Mnbb AAP...

Page 324: ...iland LX RKC0C 014 AS4560_UMACkk_3 Europe AS4560 4333 G50Mnkk AAP Thailand LX RKC0C 013 AS4560_UMACkk_3 US 110V AS4560 4333 G50Mnkk AAP Thailand LX RKC0C 012 AS4560_UMACkk_3 Continental AS4560 4333 G50Mnkk AAP Thailand LX RKC0C 011 AS4560_UMACkk_3 Europe AS4560 4334 G50Mnkk AAP Thailand LX RKC0C 010 AS4560_UMACkk_3 US 110V AS4560 4334 G50Mnkk AAP Thailand LX RKC0C 009 AS4560_UMACkk_3 Continental A...

Page 325: ...CHAPTER 8 Test Compatible Components ...

Page 326: ...8 2 Microsoft Windows 7 Environment Test 8 4 ...

Page 327: ... department All of its system functions are tested under Windows 7 environment Refer to the following lists for components adapter cards and peripherals which have passed these tests Regarding configuration combination and test procedures please refer to the Compatibility Test Report released by the Acer Mobile System Testing Department ...

Page 328: ...0D Li Ion 3S2P PANASONIC 6 cell 4400mAh Main COMMON ID AS10D51 BT 00605 062 60002162 SIMPLO 6CELL2 2 Battery SIMPLO AS10D Li Ion 3S2P PANASONIC 6 cell 4400mAh Main COMMON ID AS10D71 BT 00607 125 Bluetooth 10001018 HON HAI BT 2 1 Foxconn Bluetooth ATH BU_12 BH 21100 012 10001018 HON HAI BT 3 0 Foxconn Bluetooth ATH BU12 BH 21100 011 Camera PLM00012 Suyin 1 3M HD Suyin 1 3M HD SY_6A1 CSP _SP AM 2140...

Page 329: ...1 01A01 KH 50008 021 60001994 WD N640GB5 4KS_ 4K HDD WD 2 5 5400rpm 640GB WD6400BPVT 22HXZT1 ML375M SATA 8MB LF F W 01 01A01 KH 64008 005 60002005 HGST SG N320GB5 4KS HDD HGST 2 5 5400rpm 320GB HTS543232A7A384 Eagle B7 320G P SATA LF HF F W A60W KH 32007 013 60002005 HGST SG N500GB5 4KS HDD HGST 2 5 5400rpm 500GB HTS545050B9A300 Panther B SATA LF F W C60F Disk imbalance criteria 0 014g cm KH 50007...

Page 330: ...t Intel CS BD82HM65 B3 Huron River KI G6501 004 ODD 60001922 TOSHIBA DIGI NSM8XS ODD TOSHIBA Super Multi DRIVE 12 7mm Tray DL 8X TS L633F LF W O bezel SATA HF Windows 7 KU 00801 040 60001939 PIONEER NSM8XS ODD PIONEER Super Multi DRIVE 12 7mm Tray DL 8X DVR TD10RS LF W O bezel 1 00 SATA KU 00805 049 60003901 HITACHI EAST NSM8XS ODD HLDS Super Multi DRIVE 12 7mm Tray DL 8X GT34N LF W O bezel SATA Z...

Page 331: ...G Graphic DDRIII 900 1Gb K4W1G1646G BC11 LF 64 16 35nm VR 1GB0B 008 60002215 SAMSUNG VR2GBIII9 VRAM SAMSUNG Graphic DDRIII 900 2Gb K4W2G1646C HC11 LF 128 16 46nm VR 2GB0B 003 9999995 ONE TIME VENDOR N N no VRAM KI 23300 014 WiFi Antenna 10000105 WNC PIFA PIFA LZ 23500 006 Wireless LAN 10001023 LITE ON 3rd WiFi 2x2 BGN Liteon Wireless LAN Atheris HB97 2x2 BGN HM WN6603AH NI 23600 073 23707801 FOXCO...

Page 332: ...8 8 Test Compatible Components ...

Page 333: ...CHAPTER 9 Online Support Information ...

Page 334: ...9 2 Online Support Information 9 3 ...

Page 335: ...n section users can download information on all of Acer s Notebook Desktop and Server models including Service guides for all models Bios updates Software utilities Spare parts lists TABs Technical Announcement Bulletin For these purposes we have included an Acrobat File to facilitate the problem free downloading of our technical material Also contained on this website are Detailed information on ...

Page 336: ...9 4 Online Support Information ...

Reviews: