208
Memory Check
138
MIC Module
103
Model Definition
178
Modem Module
85
N
No Display Issue
139
Notebook Manager
hotkey
15
O
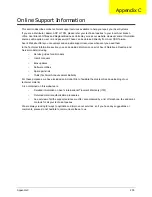
Online Support Information
205
optical drive module
59
P
Panel
5
Bottom
10
left
5
PC Card
11
Power On Failure
138
S
speakers
hotkey
15
System
Block Diagram
4
T
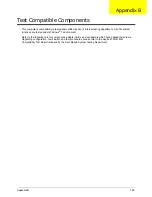
Test Compatible Components
199
Thermal Unit Failure
152
Top
161
touchpad
hotkey
15
Touchpad Failure
142
Troubleshooting
Built-in KB Failure
141
EasyTouch Buttons
151
Fingerprint Reader
152
Internal Microphone
144
Internal Speakers
142
LCD Failure
141
MediTouch Buttons
151
No Display
139
Other Failures
153
Power On
138
Thermal Unit
152
Touchpad
142
USB
149
WLAN
150
U
Undetermined Problems
154
USB Failure (Rightside)
149
utility
BIOS
29–37
W
Windows 2000 Environment Test
200
Wireless Function Failure
150
Summary of Contents for Aspire 4740G
Page 6: ...VI ...
Page 10: ...X Table of Contents ...
Page 56: ...46 Chapter 2 ...
Page 63: ...Chapter 3 53 5 Carefully open the HDD Cover ...
Page 65: ...Chapter 3 55 5 Remove two 2 screws from the WLAN bracket and lift it clear of the device ...
Page 90: ...80 Chapter 3 5 Remove the TouchPad Bracket from the Upper Cover ...
Page 92: ...82 Chapter 3 Step Size Quantity Screw Type Media Board M2 5 3 2 ...
Page 97: ...Chapter 3 87 Step Size Quantity Screw Type Bluetooth Module M2 5 3 1 ...
Page 99: ...Chapter 3 89 7 Lift one edge of the mainboard as shown to remove it from the base ...
Page 107: ...Chapter 3 97 4 Lift the bezel away from the panel ...
Page 110: ...100 Chapter 3 4 Lift the LCD Panel out of the casing as shown ...
Page 117: ...Chapter 3 107 13 Ensure that the securing pin is properly located ...
Page 129: ...Chapter 3 119 ...
Page 134: ...124 Chapter 3 4 Turn the computer over Replace the fifteen screws on the bottom panel ...
Page 141: ...Chapter 3 131 4 Turn the computer over and replace the six 6 securing screws as shown ...
Page 186: ...176 Chapter 6 ...
Page 187: ...Chapter 6 177 ...
Page 208: ...Appendix A 198 ...
Page 214: ...204 Appendix B ...
Page 216: ...206 Appendix C ...


