56
Chapter 3
Removing the TV tuner Module
1.
See “Removing the Lower Covers” on page 51.
1.
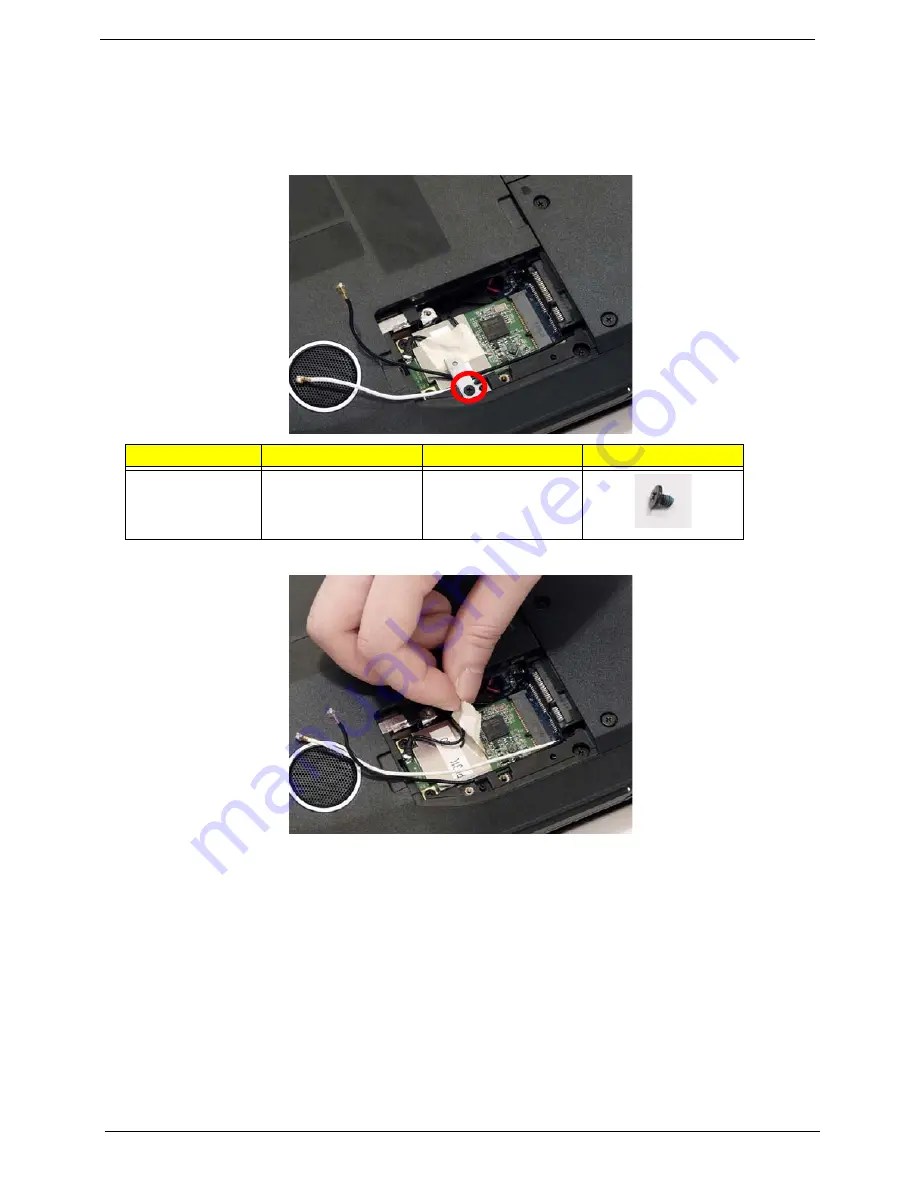
Remove the securing screw, located on the WLAN bracket, and remove the bracket.
NOTE:
Move the antenna cables out of the way to allow for easier access.
2.
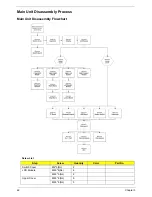
Remove the adhesive strip to release the cable.
NOTE:
Do not throw away the adhesive strip it is necessary to secure the cable on the new module.
Step
Size
Quantity
Screw Type
WLAN Bracket
M2*3 (NL)
1
Summary of Contents for Aspire 5230
Page 6: ...VI ...
Page 14: ...4 Chapter 1 System Block Diagram ...
Page 64: ...52 Chapter 3 6 Remove the HDD cover as shown 7 Remove the WLAN cover as shown ...
Page 85: ...Chapter 3 73 6 Turn the upper cover over The upper cover appears as follows ...
Page 106: ...94 Chapter 3 7 Lift the Thermal Module clear of the Mainboard ...
Page 112: ...100 Chapter 3 6 Disconnect the left and right Inverter board cables as shown ...
Page 126: ...114 Chapter 3 3 Replace the RJ 11 cable in its housing ...
Page 137: ...Chapter 3 125 2 Replace the bracket as shown 3 Replace the single securing screw ...
Page 140: ...128 Chapter 3 2 Connect the seven cables on the mainboard as shown B C D E F G A ...
Page 152: ...140 Chapter 3 ...
Page 193: ...Chapter 6 181 ...
Page 200: ...188 Appendix B ...
Page 202: ...190 Appendix C ...
Page 205: ...193 Windows 2000 Environment Test 184 Wireless Function Failure 154 WLAN Board 54 ...
Page 206: ...194 ...


