Chapter 3
91
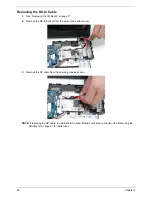
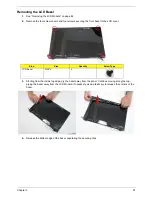
Removing the LCD Bezel
1.
See “Removing the LCD Module” on page 84.
2.
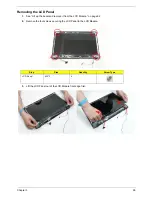
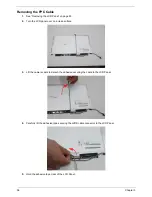
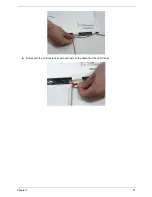
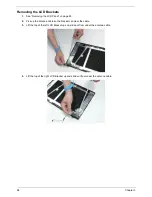
Remove the four screw covers and four screws securing the front bezel to the LCD cover.
3.
Starting from the inside top edge, pry the bezel away from the panel. Continue moving along the top,
prying the bezel away from the LCD Module. If necessary, use a plastic pry to release the corners of the
bezel.
4.
Release the bottom edge of the bezel, separating the securing clips.
Step
Size
Quantity
Screw Type
LCD Bezel
M2.5*4
4
p
Summary of Contents for Aspire 5534 Series
Page 6: ...VI ...
Page 10: ...X Table of Contents ...
Page 32: ...22 Chapter 1 ...
Page 51: ...Chapter 2 41 ...
Page 52: ...42 Chapter 2 ...
Page 65: ...Chapter 3 55 ...
Page 79: ...Chapter 3 69 ...
Page 81: ...Chapter 3 71 5 Lift the Power Board from the Lower Cover ...
Page 83: ...Chapter 3 73 6 Lift the right side speaker out from the Lower Cover as shown ...
Page 89: ...Chapter 3 79 7 Disconnect the I O Board Cable from the I O Board ...
Page 97: ...Chapter 3 87 ...
Page 103: ...Chapter 3 93 ...
Page 107: ...Chapter 3 97 6 Disconnect the LCD cable as shown and remove the cable from the LCD Panel ...
Page 110: ...100 Chapter 3 ...
Page 197: ...Chapter 6 187 ...
Page 224: ...214 ...

