Chapter 3
93
Removing the FPC Cable
1.
See “Removing the Battery Pack” on page 44.
2.
See “Removing the SD Dummy Card” on page 45.
3.
See “Removing the Hard Disk Drive 2 (HDD2) Module” on page 46.
4.
See “Removing the Back Cover” on page 48.
5.
See “Removing the Hard Disk Drive 1 (HDD1) Module” on page 48.
6.
See “Removing the TV Tuner Card (for certain models only)” on page 50.
7.
See “Removing the Wireless LAN Card” on page 52.
8.
See “Removing the DIMM Module” on page 53.
9.
See “Removing the Optical Drive Module” on page 54.
10.
See “Removing the Middle Cover” on page 57.
11.
See “Removing the Keyboard” on page 60.
12.
See “Removing the LCD Module” on page 61.
13.
See “Removing the LCD Bezel” on page 85.
14.
See “Removing the LCD panel with the Brackets” on page 88.
15.
See “Removing the LCD Brackets” on page 90.
16.
See “Removing the Web Camera” on page 90.
17.
See “Removing the Microphone Module” on page 91.
18.
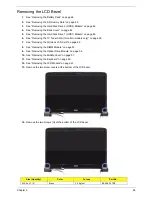
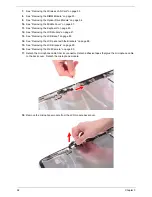
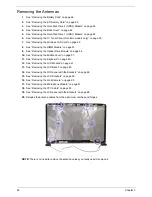
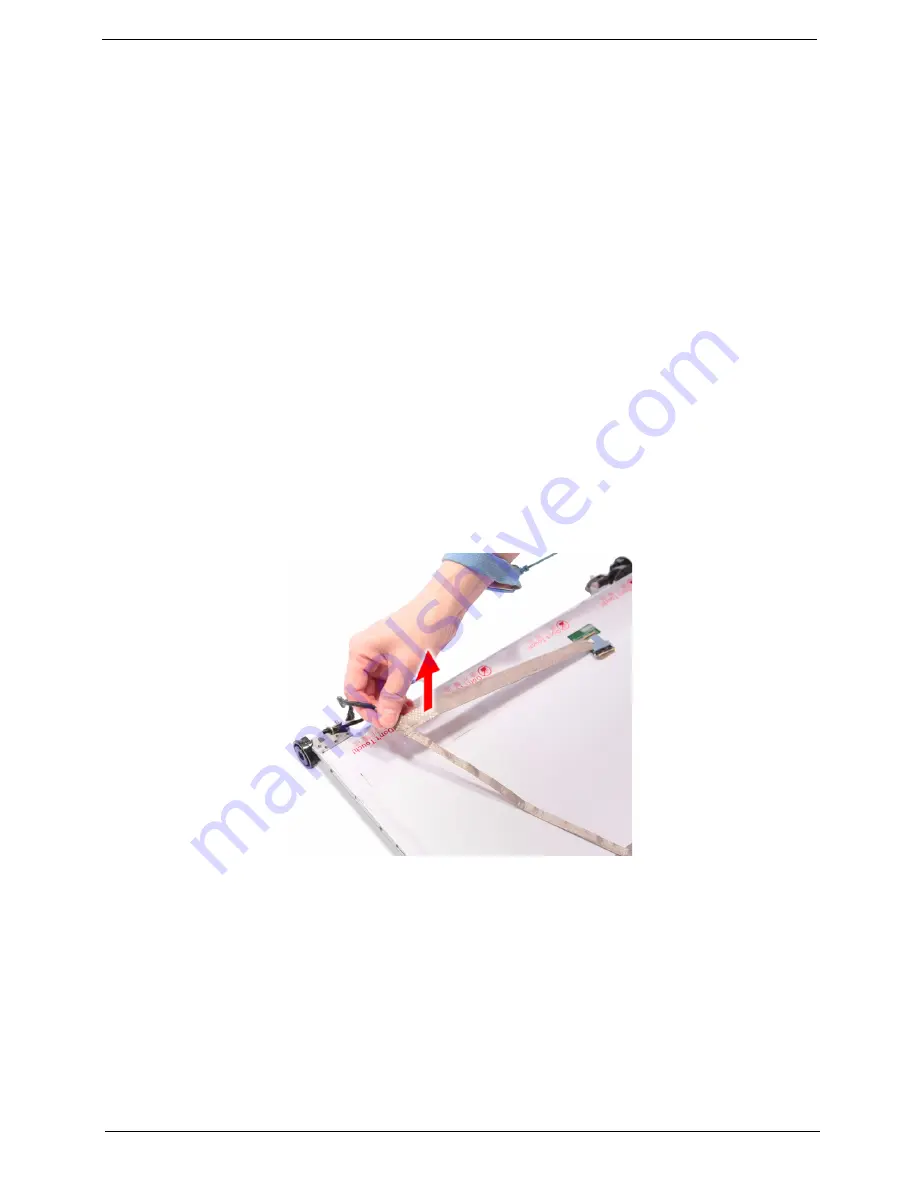
Detach all adhesive tapes and any cable that is glued to the LCD panel.
19.
Disconnect the FPC cable from the LCD panel.
Summary of Contents for Aspire 7235 Series
Page 6: ...VI ...
Page 13: ...Chapter 1 5 For Aspire 7535 7535G 7235 Series ...
Page 191: ...Appendix A 183 Model Definition and Configuration Appendix A ...
Page 212: ...Appendix A 204 ...
Page 216: ...208 Appendix B ...
Page 218: ...210 Appendix C ...


