12
Chapter 1
Touchpad basics (with two-click buttons)
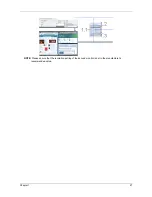
The following items show you how to use the touchpad with two-click buttons.
•
Move your finger across the touchpad (1) to move the cursor.
•
Press the left (2) and right (3) buttons located beneath the touchpad to perform selection and execution
functions. These two buttons are similar to the left and right buttons on a mouse. Tapping on the
touchpad is the same as clicking the left button.
NOTE: Illustrations for reference only. The exact configuration of your PC depends on the model purchased.
NOTE: When using the touchpad, keep it — and your fingers — dry and clean. The touchpad is sensitive to
finger movement; hence, the lighter the touch, the better the response. Tapping harder will not increase
the touchpad's responsiveness.
NOTE: By default, vertical and horizontal scrolling is enabled on your touchpad. It can be disabled under
Mouse settings in Windows Control Panel.
Function
Left button (2)
Right button (3)
Main touchpad (1)
Execute
Quickly click twice.
Tap twice (at the same speed as double-clicking
a mouse button).
Select
Click once.
Tap once.
Drag
Click and hold, then use
finger on the touchpad
to drag the cursor.
Tap twice (at the same speed as double-clicking
a mouse button); rest your finger on the touchpad
on the second tap and drag the cursor.
Access
context menu
Click once.
1
2
3
Summary of Contents for Aspire 8530 Series
Page 6: ...VI ...
Page 10: ...X Table of Contents ...
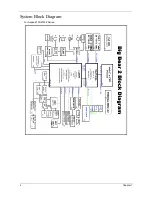
Page 14: ...4 Chapter 1 System Block Diagram For Aspire 8730 8730Z Series ...
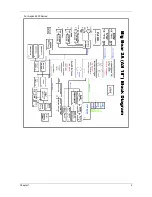
Page 15: ...Chapter 1 5 For Aspire 8530 Series ...
Page 46: ...36 Chapter 1 ...
Page 60: ...50 Chapter 2 ...
Page 77: ...Chapter 3 67 2 Remove the two captive screws securing the hard disk drive cover ...
Page 100: ...90 Chapter 3 19 Disconnect the Media console cable from LEDB1 on the main board ...
Page 118: ...108 Chapter 3 21 Remove the USB board module from the lower case ...
Page 124: ...114 Chapter 3 13 Detach any adhesive tapes and any cable that is glued to the LCD panel ...
Page 125: ...Chapter 3 115 14 Disconnect the FPC cable from the LCD panel ...
Page 142: ...132 Chapter 4 F5h Boot to Mini DOS F6h Clear Huge Segment F7h Boot to Full DOS Code Beeps ...
Page 149: ...Chapter 5 139 Motherboard Jumper and Connector Locations Chapter 5 ...
Page 150: ...140 Chapter 5 ...
Page 154: ...144 Chapter 5 ...
Page 156: ...146 Chapter 6 Aspire 8730 8730Z 8530 Series Exploded Diagram ...
Page 188: ...Appendix A 178 ...
Page 192: ...182 Appendix B ...
Page 194: ...184 Appendix C ...

