Chapter 1
13
Using the Keyboard
The keyboard has full-sized keys and an embedded numeric keypad, separate cursor, lock, Windows, function
and special keys.
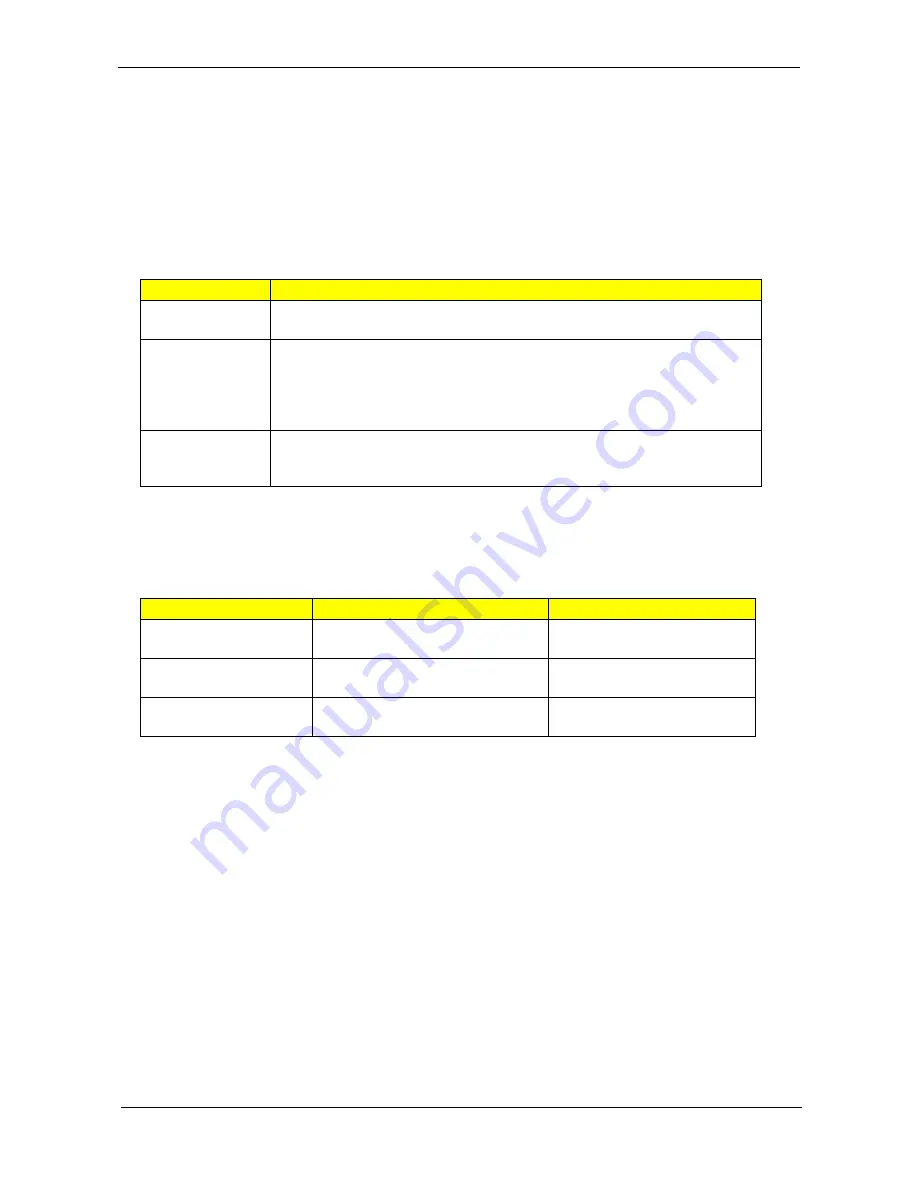
Lock Keys and embedded numeric keypad
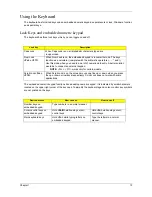
The keyboard has three lock keys which you can toggle on and off.
The embedded numeric keypad functions like a desktop numeric keypad. It is indicated by small characters
located on the upper right corner of the key caps. To simplify the keyboard legend, cursor-control key symbols
are not printed on the keys.
Lock key
Description
Caps Lock
When Caps Lock is on, all alphabetic characters typed are
in uppercase.
Num Lock
<Fn> + <F11>
When Num Lock is on, the embedded keypad is in numeric mode. The keys
function as a calculator (complete with the arithmetic ope, -, *, and /).
Use this mode when you need to do a lot of numeric data entry. A better solution
would be to connect an external keypad.
NOTE: <Fn> + <F11> works only for certain models.
Scroll Lock <Fn> +
<F12>
When Scroll Lock is on, the screen moves one line up or down when you press
the up or down arrow keys respectively. Scroll Lock does not work with some
applications.
Desired access
Num Lock on
Num Lock off
Number keys on
embedded keypad
Type numbers in a normal manner.
Cursor-control keys on
embedded keypad
Hold <Shift> while using cursor-
control keys.
Hold <Fn> while using cursor-
control keys.
Main keyboard keys
Hold <Fn> while typing letters on
embedded keypad.
Type the letters in a normal
manner.
Summary of Contents for Aspire 8530 Series
Page 6: ...VI ...
Page 10: ...X Table of Contents ...
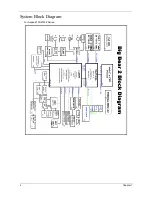
Page 14: ...4 Chapter 1 System Block Diagram For Aspire 8730 8730Z Series ...
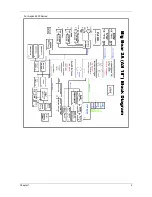
Page 15: ...Chapter 1 5 For Aspire 8530 Series ...
Page 46: ...36 Chapter 1 ...
Page 60: ...50 Chapter 2 ...
Page 77: ...Chapter 3 67 2 Remove the two captive screws securing the hard disk drive cover ...
Page 100: ...90 Chapter 3 19 Disconnect the Media console cable from LEDB1 on the main board ...
Page 118: ...108 Chapter 3 21 Remove the USB board module from the lower case ...
Page 124: ...114 Chapter 3 13 Detach any adhesive tapes and any cable that is glued to the LCD panel ...
Page 125: ...Chapter 3 115 14 Disconnect the FPC cable from the LCD panel ...
Page 142: ...132 Chapter 4 F5h Boot to Mini DOS F6h Clear Huge Segment F7h Boot to Full DOS Code Beeps ...
Page 149: ...Chapter 5 139 Motherboard Jumper and Connector Locations Chapter 5 ...
Page 150: ...140 Chapter 5 ...
Page 154: ...144 Chapter 5 ...
Page 156: ...146 Chapter 6 Aspire 8730 8730Z 8530 Series Exploded Diagram ...
Page 188: ...Appendix A 178 ...
Page 192: ...182 Appendix B ...
Page 194: ...184 Appendix C ...


