background image

70 - Traveling with your computer

Traveling with the computer

When you are moving within a larger distance, for instance, from your 
office building to a client's office building or traveling locally.

Preparing the computer

Prepare the computer as if you were taking it home. Make sure that the 
battery in the computer is charged. Airport security may require you to turn 
on your computer when carrying it into the gate area.

What to take with you

Take the following items with you:
• AC adapter
• Spare, fully-charged battery pack(s)
• Additional printer driver files if you plan to use another printer

Special considerations

In addition to the guidelines for taking the computer home, follow these 
guidelines to protect your computer while traveling:
• Always take the computer as carry-on luggage.
• If possible, have the computer inspected by hand. Airport security X-ray 

machines are safe, but do not put the computer through a metal 
detector.

Summary of Contents for Aspire E1-472

Page 1: ...Aspire E1 472 E1 470 E1 430 E1 422 User s Manual ...

Page 2: ...anytime anywhere This computer comes with AcerCloud pre installed AcerCloud is a personal cloud service that allows you to access your files over the Internet and make sure your most important files are always up to date With your personal cloud all your connected devices PC tablet phone can access files on your main Cloud PC For more information please visit the AcerCloud website www acer com ace...

Page 3: ...chpad gestures 36 Recovery 37 Creating a recovery backup 37 Creating a drivers and applications backup 41 Recovering your system 44 Reinstalling drivers and applications 45 Returning to an earlier system snapshot 48 Returning your system to its factory condition 49 Recovering from Windows 50 Recovering from a recovery backup 54 Power management 58 Saving power 58 Battery pack 61 Battery pack chara...

Page 4: ...ity 82 Boot sequence 82 Setting passwords 82 Frequently asked questions 83 Requesting service 85 Troubleshooting 87 Troubleshooting tips 87 Error messages 87 Tips and hints for using Windows 8 89 Three concepts you might want to keep in mind 89 How do I access the charms 89 How do I get to Start 89 How do I jump between apps 90 How do I turn off my computer 90 Why is there a new interface 90 How d...

Page 5: ... sure to unplug the power cord from the electrical outlet Disconnecting the power source Observe the following guidelines when connecting and disconnecting power to the power supply unit Install the power supply unit before connecting the power cord to the AC power outlet Unplug the power cord before removing the power supply unit from the computer If the system has multiple sources of power disco...

Page 6: ... a safety feature Using a power outlet that is not properly grounded may result in electric shock and or injury Note The grounding pin also provides good protection from unexpected noise produced by other nearby electrical devices that may interfere with the performance of this product The system can be powered using a wide range of voltages 100 to 120 or 220 to 240 V AC The power cord included wi...

Page 7: ...openings should never be blocked by placing the product on a bed sofa rug or other similar surface This product should never be placed near or over a radiator or heat register or in a built in installation unless proper ventilation is provided Never push objects of any kind into this product through cabinet slots as they may touch dangerous voltage points or short out parts that could result in a ...

Page 8: ...g the operating instructions Note Adjust only those controls that are covered by the operating instructions since improper adjustment of other controls may result in damage and will often require extensive work by a qualified technician to restore the product to normal condition Guidelines for safe battery usage This computer uses a Lithium ion battery Do not use it in a humid wet or corrosive env...

Page 9: ...your pocket or purse Short circuiting the terminals may damage the battery or the connecting object The capacity and lifetime of the battery will be reduced if the battery is left in hot or cold places such as in a closed car in summer or winter Always try to keep the battery between 15 C and 25 C 59 F and 77 F A device with a hot or cold battery may not work temporarily even when the battery is f...

Page 10: ...ansmission is completed Parts of the device are magnetic Metallic materials may be attracted to the device and persons with hearing aids should not hold the device to the ear with the hearing aid Do not place credit cards or other magnetic storage media near the device because information stored on them may be erased MEDICAL DEVICES Operation of any radio transmitting equipment including wireless ...

Page 11: ...mmable liquids gases or explosive materials in the same compartment as the device its parts or enhancements For vehicles equipped with an air bag remember that air bags inflate with great force Do not place objects including installed or portable wireless equipment in the area over the air bag or in the air bag deployment area If in vehicle wireless equipment is improperly installed and the air ba...

Page 12: ...is electronic device into the trash when discarding To minimize pollution and ensure utmost protection of the global environment please recycle For more information on the Waste from Electrical and Electronics Equipment WEEE regulations visit www acer group com public Sustainability Mercury advisory For bulb inside projectors or electronic products containing a non LED backlit LCD CRT monitor or d...

Page 13: ...ly go into display Sleep and computer Sleep mode after 10 and 30 minutes of inactivity respectively wake from Sleep mode if the keyboard is pressed or mouse is moved save more than 80 energy when in Sleep mode ENERGY STAR and the ENERGY STAR mark are registered U S marks TIPS AND INFORMATION FOR COMFORTABLE USE Computer users may complain of eyestrain and headaches after prolonged use Users are al...

Page 14: ...nd regularly to remove the strain on your leg muscles Take short rests to relax your neck and shoulders Avoid tensing your muscles or shrugging your shoulders Install the external display keyboard and mouse properly and within comfortable reach If you view your monitor more than your documents place the display at the center of your desk to minimize neck strain Taking care of your vision Long view...

Page 15: ... reduction filter using a display visor such as a piece of cardboard extended from the display s top front edge Avoid adjusting your display to an awkward viewing angle Avoid looking at bright light sources for extended periods of time Developing good work habits The following work habits make computer use more relaxing and productive Take short breaks regularly and often Perform some stretching e...

Page 16: ...N CAS D OUVERTURE EVITTER TOUTE EXPOSITION AUX RAYONS LUOKAN 1 LASERLAITE LASER KLASSE 1 VORSICHT UNSICHTBARE LASERSTRAHLUNG WENN ABDECKUNG GEÖFFNET NICHT DEM STRAHLL AUSSETZEN PRODUCTO LÁSER DE LA CLASE I ADVERTENCIA RADIACIÓN LÁSER INVISIBLE AL SER ABIERTO EVITE EXPONERSE A LOS RAYOS ADVARSEL LASERSTRÅLING VEDÅBNING SE IKKE IND I STRÅLEN VARO LAVATTAESSA OLET ALTTINA LASERSÅTEILYLLE VARNING LASE...

Page 17: ...r computer can help you to be more productive please refer to the User s Manual This guide contains detailed information on such subjects as system utilities data recovery expansion options and troubleshooting In addition it contains general regulations and safety notices for your notebook It is available from Desktop double click the Help icon and click User s Manual in the menu that opens Basic ...

Page 18: ...n wait at least two seconds before powering up Taking care of your computer Your computer will serve you well if you take care of it Do not expose the computer to direct sunlight Do not place it near sources of heat such as a radiator Do not expose the computer to temperatures below 0º C 32º F or above 50º C 122º F Do not subject the computer to magnetic fields Do not expose the computer to rain o...

Page 19: ...atings of the equipment plugged in should not exceed the ampere rating of the cord if you are using an extension cord Also the total current rating of all equipment plugged into a single wall outlet should not exceed the fuse rating Taking care of your battery pack Here are some ways to take care of your battery pack Use only batteries of the same kind as replacements Turn the power off before rem...

Page 20: ...2 Disconnect the AC adapter 3 Use a soft moist cloth Do not use liquid or aerosol cleaners If either of the following occurs The computer has been dropped or the body has been damaged The computer does not operate normally Please refer to Frequently asked questions on page 83 ...

Page 21: ...Your Acer notebook tour 21 YOUR ACER NOTEBOOK TOUR After setting up your computer as illustrated in the setup poster let us show you around your new Acer computer Aspire E1 472 E1 470 E1 430 E1 422 ...

Page 22: ...r notebook tour Screen view Icon Item Description 1 Webcam Web camera for video communication A light next to the webcam indicates that the webcam is active 2 Screen Displays computer output 3 Microphone 3 1 2 4 5 ...

Page 23: ...he computer s power status Battery indicator Indicates the computer s battery status Charging The light is amber when the battery is charging Fully charged The light is blue when plugged in HDD indicator Indicates when the hard disk drive is active Communication indicator Indicates the computer s wireless connectivity device status Icon Item Description ...

Page 24: ...ew Icon Item Description 1 Power button Turns the computer on and off 2 Keyboard For entering data into your computer See Using the keyboard on page 31 3 Touchpad Touch sensitive pointing device which functions like a computer mouse 1 2 3 4 ...

Page 25: ...Your Acer notebook tour 25 4 Click buttons left and right The left and right side of the button function as left and right selection buttons Icon Item Description ...

Page 26: ...r Insert the lock into the notch and turn the key to secure the lock Keyless models are also available 2 Ethernet RJ 45 port Connects to an Ethernet 10 100 1000 based network 3 External display VGA port Connects to a display device e g external monitor LCD projector 4 HDMI port Supports high definition digital video connections 5 USB port Connects to USB devices If a port is black it is USB 2 0 co...

Page 27: ...peed USB Right view Note Depending on configuration your system may not be equipped with an optical CD DVD drive 6 Headset speaker jack Connects to audio devices e g speakers headphones or a headset with microphone Icon Item Description 1 USB ports Connect to USB devices If a port is black it is USB 2 0 compatible if it is blue it is also USB 3 0 compatible Icon Item Description 1 2 3 4 5 6 ...

Page 28: ... up when the optical drive is active 4 Optical drive eject button Ejects the optical disk from the drive 5 Emergency eject hole Ejects the optical drive tray when the computer is turned off Carefully insert a straightened paper clip to eject the optical drive tray 6 DC in jack Connects to an AC adapter Icon Item Description ...

Page 29: ...lease latch Releases the battery for removal Insert a suitable tool and slide to release 2 Memory compartment Houses the computer s main memory 3 Speakers Deliver stereo audio output 4 Ventilation and cooling fan Allows the computer to stay cool Do not cover or obstruct the openings ...

Page 30: ...dels with an AMD processor and a single memory module If you replace the memory module the new module must go into the same slot occupied by the module that was removed 5 Battery bay Houses the computer s battery pack Icon Item Description ...

Page 31: ...s to the Start screen It can also be used with other keys for special functions please check Windows Help Application key This key has the same effect as clicking the right selection button it opens the application s context menu Lock keys and embedded numeric keypad Toggle the keyboard lock keys to change how the keyboard acts Caps Lock When Caps Lock is on all alphabetic characters typed are in ...

Page 32: ...y type letters Embedded numeric keypad The embedded numeric keypad is indicated by small characters located on the upper right corner of some keys When Num Lock is on the keys function as a calculator complete with the arithmetic operators and Use this mode when you need to do a lot of numeric data entry Tip It is possible to use the cursor control functions provided by full keypads If Num Lock is...

Page 33: ...ction Description Fn F3 Airplane mode Turns on off the computer s network devices Network devices vary by configuration Fn F4 Sleep Puts the computer in Sleep mode Fn F5 Display toggle Switches display output between the display screen external monitor if connected and both Fn F6 Display off Turns the display screen backlight off to save power Press any key to return Fn F7 Touchpad toggle Turns th...

Page 34: ...creen brightness Fn Brightness down Decreases the screen brightness Fn Volume up Increases the sound volume Fn Volume down Decreases the sound volume Fn Home Play Pause Play or pause a selected media file Fn Pg Up Stop Stop playing the selected media file Fn Pg Dn Previous Return to the previous media file Fn End Next Jump to the next media file Hotkey Icon Function Description ...

Page 35: ...button Note The touchpad is sensitive to finger movement the lighter the touch the better the response Please keep the touchpad and your fingers dry and clean The cursor is controlled by some basic gestures Single finger slide Slide a finger across the touchpad to move the cursor Single finger tap Lightly tap the touchpad with your finger to perform a click which will select or start an item Quick...

Page 36: ...e Access Windows tools by swiping into the center of the touchpad from the right top or left Swipe in from right edge Toggle the charms Swipe in from top edge Toggle the app commands Swipe in from left edge Switch to the previous app Two finger slide Swiftly scroll through web pages documents and playlists by placing two fingers on the touchpad and moving both in any direction Two finger pinch Zoo...

Page 37: ... Management is only available with a pre installed Windows operating system Important We recommend that you create a Recovery Backup and Drivers and Applications Backup and as soon as possible In certain situations a full recovery will require a USB recovery backup Creating a recovery backup To reinstall from a USB storage drive you must first create a recovery backup The recovery backup includes ...

Page 38: ...st 16 GB of storage after formatting it is recommended to use a USB drive with a capacity of 32 GB or larger 1 From Start type Recovery and then click Acer Recovery Management in the list of apps 2 Click Create Factory Default Backup The Recovery Drive window ...

Page 39: ...Recovery 39 opens Make sure Copy contents from the recovery partition to the recovery drive is selected This provides the most complete and safest recovery backup 3 Plug in the USB drive then click Next ...

Page 40: ... 4 You will be shown the backup progress on the screen 5 Follow the process until it completes 6 After creating the recovery backup you can choose to delete the recovery information on your computer If you delete this information you can only use the USB recovery backup to restore your computer if you lose or erase the USB drive you cannot restore your computer ...

Page 41: ... on the backup such as Windows Recovery Backup Make sure you keep the backup in a safe place that you will remember Creating a drivers and applications backup To create a Drivers and Applications Backup that contains the factory loaded software and drivers needed by your computer you may use either ...

Page 42: ... DVD recorder one or more blank recordable DVDs 1 From Start type Recovery and then click Acer Recovery Management in the list of apps 2 Click Create Drivers and Applications Backup Plug in the USB drive or insert a blank DVD into the optical drive then click Next ...

Page 43: ...ake sure your USB drive has enough capacity before continuing If using DVDs it will also show the number of blank recordable discs you will need to complete the recovery discs Make sure that you have the required number of identical blank discs ...

Page 44: ...h backup such as Drivers and Applications Backup Make sure you keep the backup in a safe place that you will remember Recovering your system To recover your system 1 Perform minor fixes If only one or two items of software or hardware have stopped working correctly the problem may be solved by reinstalling the software or the device drivers To reinstall software and drivers that were pre installed...

Page 45: ... your system to factory condition see Returning your system to its factory condition on page 49 Reinstalling drivers and applications As a troubleshooting step you may need to reinstall the applications and device drivers that came pre installed on your computer from the factory You can reinstall using either your hard drive or the backup you have created Other applications If you need to reinstal...

Page 46: ...f you are reinstalling using Windows and the recovery information stored on your computer From Start type Recovery and then click Acer Recovery Management in the list of apps Click Reinstall Drivers or Applications ...

Page 47: ...rom a Drivers and Applications Backup on a DVD or USB drive 1 Insert the Drivers and Applications Backup into the disc drive or connect it to a free USB port If you inserted a DVD wait for Acer Resource Center to start If Acer Resource Center does not start automatically press the Windows key E then double click on the optical drive icon If you are using a USB drive press the Windows key E then do...

Page 48: ...crosoft System Restore periodically takes a snapshot of your system settings and saves them as restore points In most cases of hard to resolve software problems you can return to one of these restore points to get your system running again Windows automatically creates an additional restore point each day and also each time you install software or device drivers Note For more information about usi...

Page 49: ...sing the restore point you specified This process may take several minutes and may restart your computer Returning your system to its factory condition If your computer experiences problems that are not recoverable by other methods you may need to reinstall everything to return your system to its factory condition You can recover from either your hard drive or the recovery backup you have created ...

Page 50: ... then reinstalls Windows and all software and drivers that were pre installed on your system If you can access important files on your hard drive back them up now See Restore Factory Settings with Acer Recovery Management on page 51 Customized Restore will attempt to retain your files user data but will reinstall all software and drivers Software installed since you purchased your PC will be remov...

Page 51: ...th Acer Recovery Management 1 Click Restore Factory Settings Caution Restore Factory Settings will erase all files on your hard drive 2 The Reset your PC window opens Images for reference only 3 Click Next then choose how to erase your files ...

Page 52: ...ng files to your hard drive 6 After the recovery has finished you can start using your computer by repeating the first start process Recovering from the hard drive during startup 1 Turn on your computer and press Alt F10 during startup A screen appears asking you to choose the keyboard layout 2 Several options are now presented Click Troubleshoot 3 Click either Refresh your PC or Reset your PC Not...

Page 53: ...gement 1 Click Customized Restore Retain User Data 2 The Refresh your PC window opens 3 Click Next then Refresh 4 The recovery process begins by restarting your computer then continues by copying files to your hard drive This process takes about 30 minutes ...

Page 54: ...menu c Press the down key until F12 Boot Menu is selected press F5 to change this setting to Enabled d Use the left or right arrow keys to select the Exit menu e Depending on the type of BIOS your computer uses select Save Changes and Exit or Exit Saving Changes and press Enter Select OK or Yes to confirm f Your computer will restart 5 During startup press F12 to open the boot menu The boot menu a...

Page 55: ... start the reset process Reset your PC deletes everything on your hard drive then reinstalls Windows and all software and drivers that were pre installed on your system If you can access important files on your hard drive back them up now See Reset your PC from the recovery backup on page 56 c Click Refresh your PC to start the refresh process Refresh your PC will attempt to retain your files user...

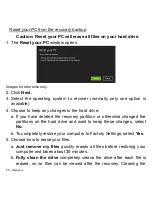
Page 56: ...the hard drive a If you have deleted the recovery partition or otherwise changed the partitions on the hard drive and want to keep these changes select No b To completely restore your computer to Factory Settings select Yes 5 Choose how to erase your files a Just remove my files quickly erases all files before restoring your computer and takes about 30 minutes b Fully clean the drive completely cl...

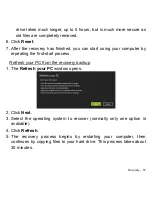
Page 57: ...your computer by repeating the first start process Refresh your PC from the recovery backup 1 The Refresh your PC window opens 2 Click Next 3 Select the operating system to recover normally only one option is available 4 Click Refresh 5 The recovery process begins by restarting your computer then continues by copying files to your hard drive This process takes about 30 minutes ...

Page 58: ... is detected for a period of time the computer stops some or all of these devices in order to conserve energy Saving power Disable Fast startup Your computer uses Fast startup to start quickly but also uses a small amount of power to check for signals to start These checks will slowly drain your computer s battery If you prefer to reduce your computer s power requirements and environmental impact ...

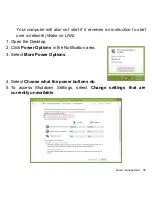
Page 59: ...an instruction to start over a network Wake on LAN 1 Open the Desktop 2 Click Power Options in the Notification area 3 Select More Power Options 4 Select Choose what the power buttons do 5 To access Shutdown Settings select Change settings that are currently unavailable ...

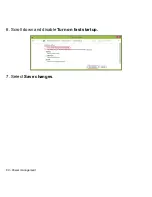
Page 60: ...60 Power management 6 Scroll down and disable Turn on fast startup 7 Select Save changes ...

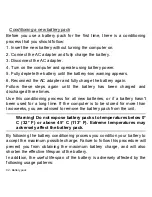
Page 61: ... is advisable to have an extra fully charged battery pack available as backup Contact your dealer for details on ordering a spare battery pack Charging the battery To charge the battery first make sure that it is correctly installed in the battery bay Plug the AC adapter into the computer and connect to a mains power outlet You can continue to operate your computer on AC power while your battery i...

Page 62: ...charged three times Use this conditioning process for all new batteries or if a battery hasn t been used for a long time If the computer is to be stored for more than two weeks you are advised to remove the battery pack from the unit Warning Do not expose battery packs to temperatures below 0 C 32 F or above 45 C 113 F Extreme temperatures may adversely affect the battery pack By following the bat...

Page 63: ... life Optimizing battery life helps you get the most out of battery operation prolonging the charge recharge cycle and improving recharging efficiency You are advised to follow the suggestions set out below Purchase an extra battery pack Use AC power whenever possible reserving battery for mobile use Remove accessories that are not being used e g a USB disk drive as they can continue to draw power...

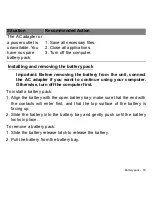
Page 64: ... to become fully depleted and the computer shuts down When the battery low warning appears the recommended course of action depends on your situation Situation Recommended Action The AC adapter and a power outlet are available 1 Plug the AC adapter into the computer and then connect to the main power supply 2 Save all necessary files 3 Resume work Turn off the computer if you want to recharge the ...

Page 65: ... that the end with the contacts will enter first and that the top surface of the battery is facing up 2 Slide the battery into the battery bay and gently push until the battery locks in place To remove a battery pack 1 Slide the battery release latch to release the battery 2 Pull the battery from the battery bay The AC adapter or a power outlet is unavailable You have no spare battery pack 1 Save ...

Page 66: ...nal accessories 1 Save any open files 2 Remove discs from optical drive s 3 Shut down the computer 4 Close the display cover 5 Disconnect the cord from the AC adapter 6 Disconnect the keyboard pointing device printer external monitor and other external devices 7 Disconnect the Kensington lock if you are using one to secure the computer Moving around When you are just moving within short distances ...

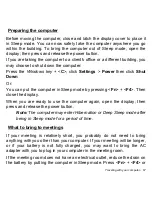
Page 67: ...e computer in Sleep mode by pressing Fn F4 Then close the display When you are ready to use the computer again open the display then press and release the power button Note The computer may enter Hibernation or Deep Sleep mode after being in Sleep mode for a period of time What to bring to meetings If your meeting is relatively short you probably do not need to bring anything with you other than y...

Page 68: ... trip home Check that you have removed all media and compact discs from the drive s Failure to remove the media can damage the drive head Pack the computer in a protective case that can prevent the computer from sliding around and cushion it if it should fall Caution Avoid packing items next to the top cover of the computer Pressure against the top cover can damage the screen What to take with you...

Page 69: ...r to return to room temperature and inspect the screen for condensation before turning on the computer If the temperature change is greater than 10 C 18 F allow the computer to come to room temperature slowly If possible leave the computer for 30 minutes in an environment with a temperature between outside and room temperature Setting up a home office If you frequently work on your computer at hom...

Page 70: ...turn on your computer when carrying it into the gate area What to take with you Take the following items with you AC adapter Spare fully charged battery pack s Additional printer driver files if you plan to use another printer Special considerations In addition to the guidelines for taking the computer home follow these guidelines to protect your computer while traveling Always take the computer a...

Page 71: ...o which you are traveling Spare fully charged battery packs Additional printer driver files if you plan to use another printer Proof of purchase in case you need to show it to customs officials International Travelers Warranty passport Special considerations Follow the same special considerations as when traveling with the computer In addition these tips are useful when traveling internationally W...

Page 72: ...hat is compatible with the local AC voltage Do not use converter kits sold for appliances to power the computer If you are using the modem check if the modem and connector are compatible with the telecommunications system of the country you are traveling in ...

Page 73: ...of a locked drawer Insert the lock into the notch and turn the key to secure the lock Some keyless models are also available Using passwords Passwords protect your computer from unauthorized access Setting these passwords creates several different levels of protection for your computer and data Supervisor Password prevents unauthorized entry into the BIOS utility Once set you must enter this passw...

Page 74: ...a prompt appears when you the BIOS utility Type the Supervisor Password and press Enter to access the BIOS utility If you enter the password incorrectly a warning message appears Try again and press Enter When the User Password is set and the password on boot parameter is enabled a prompt appears at boot up Type the User Password and press Enter to use the computer If you enter the password incorr...

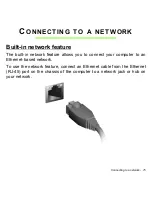
Page 75: ...etwork feature The built in network feature allows you to connect your computer to an Ethernet based network To use the network feature connect an Ethernet cable from the Ethernet RJ 45 port on the chassis of the computer to a network jack or hub on your network ...

Page 76: ...s Please refer to your ISP or router documentation Wireless networks A wireless LAN or WLAN is a wireless local area network which may link two or more computers without using wires Setting up a wireless network is easy and allows you to share files peripheral devices and an Internet connection What are benefits of a wireless network Mobility Wireless LAN systems allow you and other users of your ...

Page 77: ...ccess points routers are two way transceivers that broadcast data into the surrounding environment Access points act as a mediator between wired and wireless network Most routers have a built in DSL modem that will allow you access to a high speed DSL internet connection The ISP Internet Service Provider you have chosen normally supplies a modem router with the subscription to their services Read ...

Page 78: ...between any compatible digital audio video source such as a set top box DVD player and A V receiver and a compatible digital audio and or video monitor such as a digital television DTV over a single cable Use the HDMI port on your computer to connect with high end audio and video equipment Single cable implementation allows tidy setup and fast connection ...

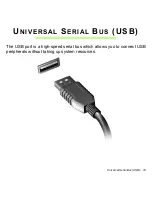
Page 79: ...Universal Serial Bus USB 79 UNIVERSAL SERIAL BUS USB The USB port is a high speed serial bus which allows you to connect USB peripherals without taking up system resources ...

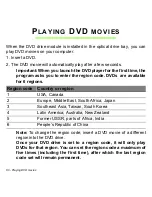
Page 80: ... for 6 regions Note To change the region code insert a DVD movie of a different region into the DVD drive Once your DVD drive is set to a region code it will only play DVDs for that region You can set the region code a maximum of five times including the first time after which the last region code set will remain permanent Region code Country or region 1 USA Canada 2 Europe Middle East South Afric...

Page 81: ...Playing DVD movies 81 Recovering your hard disk does not reset the number of times the region code has been set ...

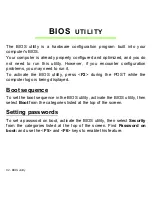
Page 82: ...to run it To activate the BIOS utility press F2 during the POST while the computer logo is being displayed Boot sequence To set the boot sequence in the BIOS utility activate the BIOS utility then select Boot from the categories listed at the top of the screen Setting passwords To set a password on boot activate the BIOS utility then select Security from the categories listed at the top of the scr...

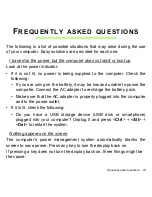
Page 83: ... may be low and unable to power the computer Connect the AC adapter to recharge the battery pack Make sure that the AC adapter is properly plugged into the computer and to the power outlet If it is lit check the following Do you have a USB storage device USB disk or smartphone plugged into your computer Unplug it and press Ctrl Alt Del to restart the system Nothing appears on the screen The comput...

Page 84: ...ed In Windows look at the volume control speaker icon on the taskbar If it is crossed out click the icon and deselect the Mute all option The volume level may be too low In Windows look at the volume control icon on the taskbar You can also use the volume control buttons to adjust the volume If headphones earphones or external speakers are connected to the line out port on the computer the interna...

Page 85: ...worldwide network of service centers are there to give you a helping hand An ITW passport comes with your computer This passport contains all you need to know about the ITW program A list of available authorized service centers is in this handy booklet Read this passport thoroughly Always have your ITW passport on hand especially when you travel to receive the benefits from our support centers Pla...

Page 86: ...support we can reduce the amount of time a call takes and help solve your problems efficiently If there are error messages or beeps reported by your computer write them down as they appear on the screen or the number and sequence in the case of beeps You are required to provide the following information Name Address Telephone number Machine and model type Serial number Date of purchase ...

Page 87: ...ror message reports to help you solve problems If the system reports an error message or an error symptom occurs see Error messages below If the problem cannot be resolved contact your dealer See Requesting service on page 85 Error messages If you receive an error message note the message and take the corrective action The following table lists the error messages in alphabetical order together wit...

Page 88: ...reboot Hard disk 0 error Contact your dealer or an authorized service center Hard disk 0 extended type error Contact your dealer or an authorized service center I O parity error Contact your dealer or an authorized service center Keyboard error or no keyboard connected Contact your dealer or an authorized service center Keyboard interface error Contact your dealer or an authorized service center M...

Page 89: ...he Start screen 2 Tiles Live tiles are similar to thumbnails of the apps 3 Charms Charms allow you to perform useful functions such as sharing content turning off your PC or changing settings How do I access the charms Move the cursor to the upper or lower right hand corner of the screen to access the charms or press the Windows key C How do I get to Start Press the Windows key on the keyboard pre...

Page 90: ... Desktop click Acer Power Button and select the action you d like to take Why is there a new interface The new interface for Windows 8 is designed to work well with touch input Windows Store apps will automatically use the whole screen and don t require closing in the traditional way Windows Store apps will be displayed on Start using live tiles What are live tiles Live tiles are similar to thumbn...

Page 91: ... click Settings Change PC settings Personalize Click Start screen at the top of the page and select a color and image How do I move tiles Click and hold a tile to select it then drag it to the place on Start that you want it to appear Other tiles will be moved to accommodate the tile in its new location Can I make tiles bigger or smaller Right click on a tile then select Smaller or Larger from the...

Page 92: ...king on a thumbnail and selecting Close Can I change the screen resolution From Start start typing Control Panel to open Search and display the results click Control Panel Adjust screen resolution I want to use Windows in the way that I m used to give me my desktop back From Start click the Desktop tile to see a traditional desktop You can pin apps you frequently use to the taskbar to easily open ...

Page 93: ...reen How do I make an app appear on my taskbar in Desktop If you re in All apps and you want to make an app appear on the taskbar in Desktop you can select the app and right click on it Select Pin to taskbar from the menu that appears at the bottom of the screen How do I install apps You can download Windows Store apps from Store You will need to have a Microsoft ID to purchase and download apps f...

Page 94: ...ndows 8 but it makes life easier because you can sync data across different machines you sign in to using a Microsoft ID How do I get one If you ve already installed Windows 8 and didn t sign in with a Microsoft account or you don t have a Microsoft account and want to get one press the Windows key C and click Settings Change PC settings Users Switch to a Microsoft account and follow the onscreen ...

Page 95: ...ates Press the Windows key C and click Settings Change PC settings Windows Updates Click Check for updates now Where can I get more information For more information please visit Windows 8 tutorials www acer com windows8 tutorial Support FAQs www acer com support ...

Page 96: ... television reception which can be determined by turning the device off and on the user is encouraged to try to correct the interference by one or more of the following measures Reorient or relocate the receiving antenna Increase the separation between the device and receiver Connect the device into an outlet on a circuit different from that to which the receiver is connected Consult the dealer or...

Page 97: ...precision manufacturing techniques Nevertheless some pixels may occasionally misfire or appear as black or red dots This has no effect on the recorded image and does not constitute a malfunction RADIO DEVICE REGULATORY NOTICES Note Below regulatory information is for models with wireless LAN and or Bluetooth only To prevent radio interference to the licensed service this device is intended to be o...

Page 98: ...een 2446 5 MHz and 2483 5 MHz Note Channels 10 through 13 inclusive operate in the band 2446 6 MHz to 2483 5 MHz There are few possibilities for outdoor use On private property or on the private property of public persons use is subject to a preliminary authorization procedure by the Ministry of Defense with maximum authorized power of 100 mW in the 2446 5 2483 5 MHz band Use outdoors on public pr...

Page 99: ...www art telecom fr Note Your WLAN Card transmits less than 100 mW but more than 10 mW 01 Ain Orientales 02 Aisne 03 Allier 05 Hautes Alpes 08 Ardennes 09 Ariege 11 Aude 12 Aveyron 16 Charente 24 Dordogne 25 Doubs 26 Drome 32 Gers 36 Indre 37 Indre et Loire 41 Loir et Cher 45 Loret 50 Manche 55 Meuse 58 Nievre 59 Nord 60 Oise 61 Orne 63 Puy Du Dome 64 Pyrenees Atlantique 66 Pyrenees 67 Bas Rhin 68 ...

Page 100: ... general population consult Safety Code 6 obtainable from Health Canada s website at www hc sc gc ca rpb Country Austria Belgium Cyprus Czech Republic Denmark Estonia Finland France Germany Greece Hungary Ireland Italy Latvia Lithuania Luxembourg ISO 3166 2 letter code AT BE CY CZ DK EE FI FR DE GR HU IE IT LV LT LU Country Malta Netherlands Poland Portugal Slovakia Slovenia Spain Sweden United Ki...

Page 101: ...t être placé loin des fenêtres afin de fournir un écran de blindage maximal Si le matériel ou son antenne d émission est installé à l extérieur il doit faire l objet d une licence Caution When using IEEE 802 11a wireless LAN this product is restricted to indoor use due to its operation in the 5 15 to 5 25 GHz frequency range Industry Canada requires this product to be used indoors for the frequenc...

Page 102: ...r the integrated wireless LAN Mini PCI Card built in to the screen section and all persons Note The wireless Mini PCI adapter implements a transmission diversity function The function does not emit radio frequencies simultaneously from both antennas One of the antennas is selected automatically or manually by users to ensure good quality radiocommunication 1 This device is restricted to indoor use...

Page 103: ...numérique de la classe B est conforme à la norme NMB 003 No 4 et CNR 210 No 4 Dec 2000 et No 5 Nov 2001 Pour empêcher que cet appareil cause du brouillage au service faisant l objet d une licence il doit être utilisé a l intérieur et devrait être placé loin des fenêtres afin de fournir un écran de blindage maximal Si le matériel ou son antenne d émission est installé à l extérieur il doit faire l ...

Reviews: