10
Chapter 2
Entering BIOS setup
IMPORTANT:
To enter the BIOS setup, you need a debug board.
1.
Turn off the computer and all attached devices.
2.
Remove the cover. See “Removing the System Cover” on page 27.
3.
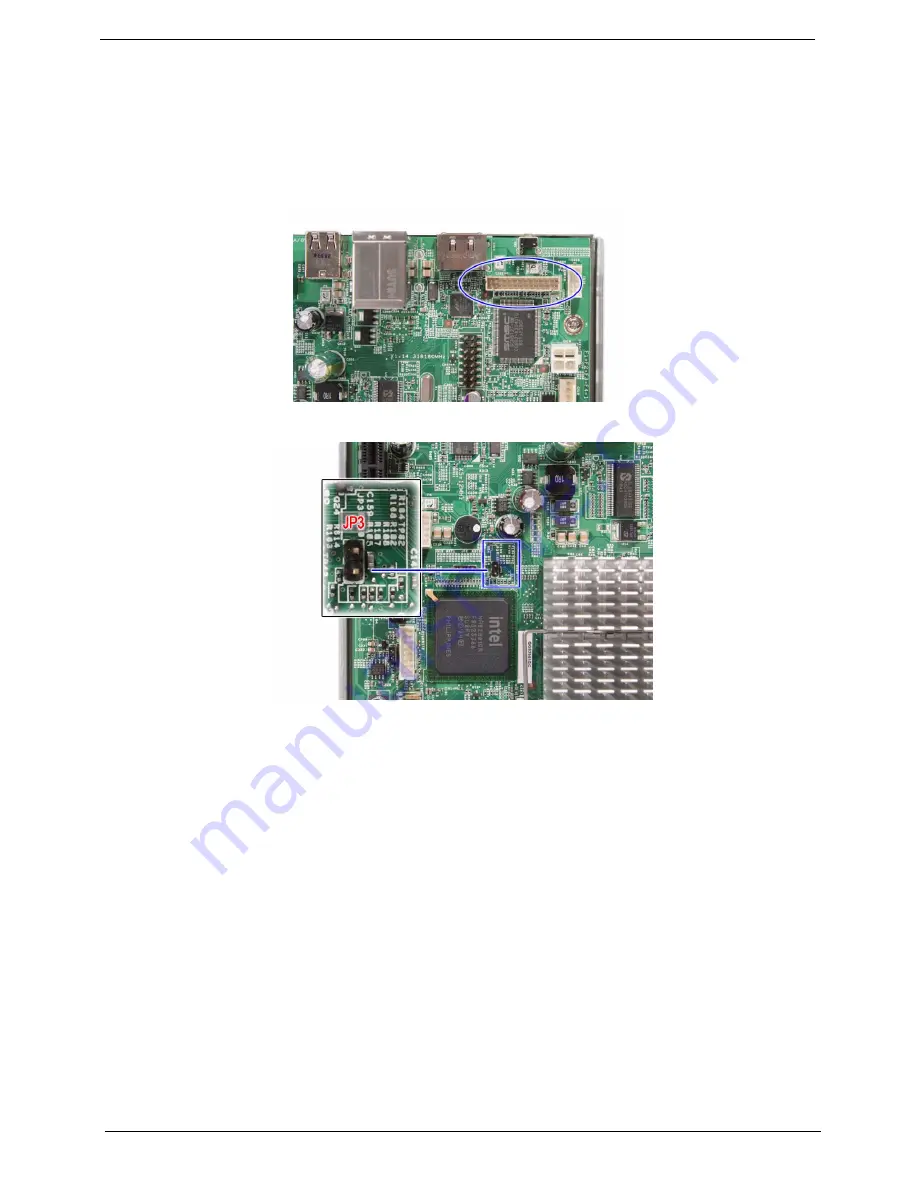
Connect the debug board cable to the debug board connector on the mainboard.
4.
Locate the JP3 Debug/User mode jumper on the mainboard.
5.
Close the jumper to enable system for debug mode.
6.
Connect the power cable to the rear panel.
7.
Connect a USB keyboard to the debug board.
8.
Connect a monitor to the debug board.
9.
Restart the system.
10.
Turn on the monitor.
11.
During POST, press
F2
.
If you fail to press
F2
before POST is completed, you will need to restart the server.
The Setup Main menu will be displayed showing the Setup’s menu bar. Use the left and right arrow keys
to move between selections on the menu bar.
Summary of Contents for Aspire easyStore H340
Page 8: ...viii ...
Page 16: ...8 Chapter 1 ...
Page 28: ...20 Chapter 2 ...
Page 33: ...Chapter 3 25 3 Flex the carrier handle 4 Slide the hard drive carrier out of the HDD bay ...
Page 37: ...Chapter 3 29 4 Pull the bezel away from the chassis ...
Page 42: ...34 Chapter 3 8 Remove the backplane board from the bracket ...
Page 57: ...Chapter 5 49 System Block Diagram System Block Diagram and Board Layout Chapter 5 ...
Page 60: ...52 Chapter 5 ...
Page 62: ...54 Chapter 6 Exploded Diagram ...


