6
Chapter 1
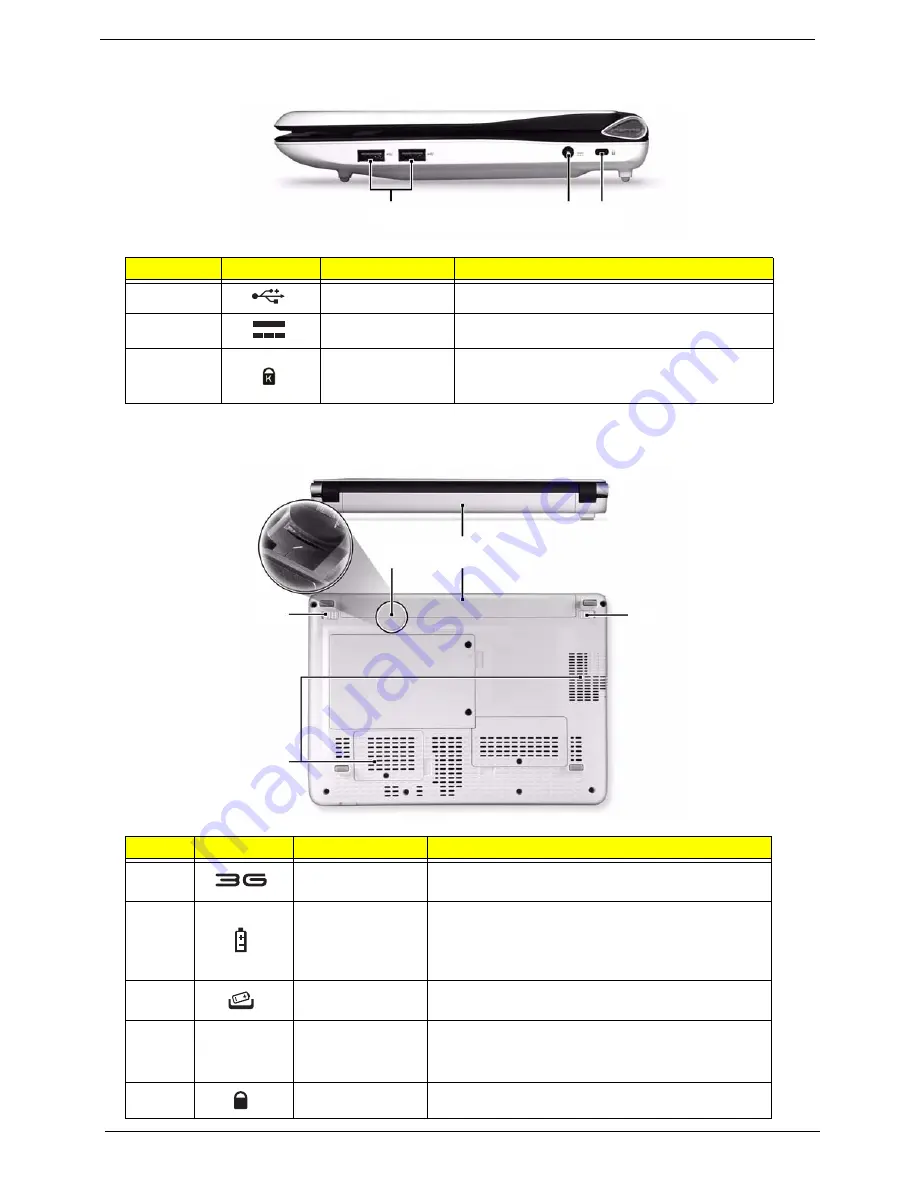
Right View
Bottom View
No.
Icon
Item
Description
1
USB 2.0 ports
Connect to USB 2.0 devices (e.g. USB mouse).
2
DC-in jack
Connects to an AC adapter
3
Kensington lock
slot
Connects to a Kensington-compatible computer
security lock.
No.
Icon
Item
Description
1
3G SIM card slot
Accepts a 3G SIM card for 3G connectivity (only for
certain models).
2
Battery bay
Houses the computer's battery pack.
Note:
The battery shown is for reference only. Your
PC may have a different battery, depending on the
model purchased.
3
Battery release
latch
Releases the battery for removal.
4
Ventilation slots
Vents enable the computer to stay cool, even after
prolonged use.
Note
: Do not cover or obstruct the cooling vents.
5
Battery lock
Locks the battery in position.
1
2 3
1 2
3
4
5
Summary of Contents for Aspire One AOD150
Page 6: ...VI ...
Page 10: ...X Table of Contents ...
Page 28: ...18 Chapter 1 ...
Page 42: ...32 Chapter 2 5 Flash is complete when the message Flash programming complete displays ...
Page 55: ...Chapter 3 45 4 Lift the Memory cover up to remove 5 Lift the WLAN cover up to remove ...
Page 67: ...Chapter 3 57 7 Lift the Upper Cover clear of the computer ...
Page 78: ...68 Chapter 3 4 Lift the USB Board clear of the computer rear edge first ...
Page 80: ...70 Chapter 3 4 Turn the Bluetooth Module over and disconnect the Bluetooth cable ...
Page 83: ...Chapter 3 73 9 Turn the Mainboard over and disconnect the Power Cable ...
Page 85: ...Chapter 3 75 5 Remove the Speaker Module from the Lower Cover ...
Page 110: ...100 Chapter 3 4 Secure the Speaker Module cable in place with the adhesive strips ...
Page 220: ...Appendix A 210 ...
Page 228: ...218 Appendix C ...


