26
Chapter 2
Exit
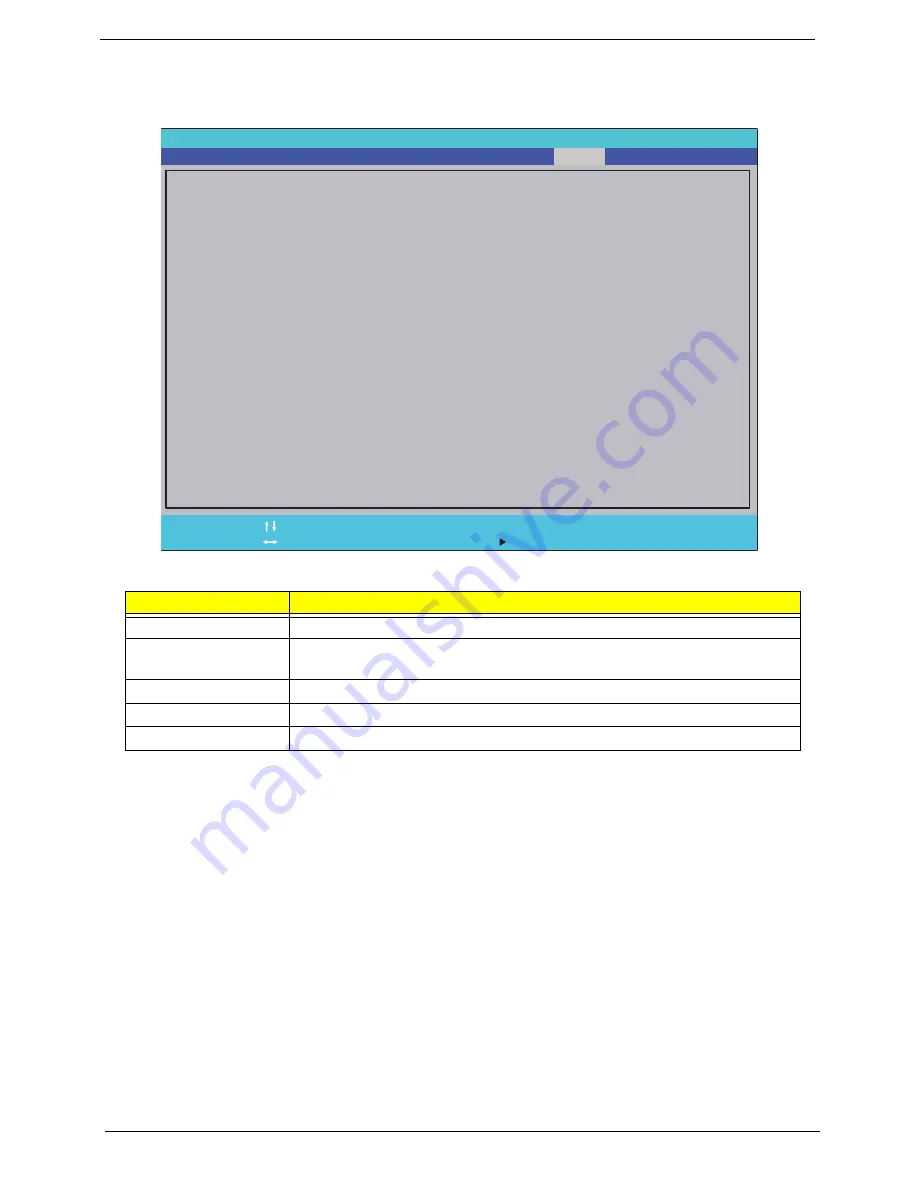
The Exit screen allows you to save or discard any changes you made and quit the BIOS Utility.
The table below describes the parameters in this screen.
Parameter
Description
Exit Saving Changes
Exit System Setup and save your changes to CMOS.
Exit Discarding
Changes
Exit utility without saving setup data to CMOS.
Load Setup Default
Load default values for all SETUP item.
Discard Changes
Load previous values from CMOS for all SETUP items.
Save Changes
Save Setup Data to CMOS.
InsydeH2O Se t u p U t i l i t y
E x i t S a v i n g C h a n g e s
E x i t D i s c a r d i n g C h a n g e s
L o a d S e t u p D e f a u l t s
S a v e C h a n g e s
F1
Es c
H e l p
E x i t
S e l e c t I t e m
S e l e c t M e n u
C h a n g e Va l u e s
S e l e c t
S u b - M e n u
-/+
Ente r
F9
F1 0
S e t u p D e f a u l t s
S a v e a n d E x i t
I n f o r m a t i o n
S e c u r i t y
Exi t
M a i n
Boot
D i s c a r d C h a n g e s
Summary of Contents for Aspire One AOP531h
Page 6: ...VI ...
Page 10: ...X Table of Contents ...
Page 41: ...Chapter 2 31 Clear User or Supervisor Password 1 Open the RAM door 2 Short RTC_RST ...
Page 83: ...Chapter 3 73 Pull the cable completely away from the bezel ...
Page 95: ...Chapter 3 85 4 Replace the four screws and screw caps ...
Page 107: ...Chapter 3 97 The upper cover is now ready to attach to the bottom cover ...
Page 109: ...Chapter 3 99 Turn the unit over and affix the five screws in the top cover ...
Page 115: ...Chapter 3 105 Replacing the SIMM Card Insert the SIMM Card into the slot ...
Page 130: ...120 Chapter 4 ...
Page 138: ...128 Chapter 4 ...
Page 152: ...142 Chapter 6 ...
Page 153: ...Chapter 6 143 ...
Page 267: ...257 Appendix A ...
Page 268: ...Appendix A 258 ...
Page 274: ...264 Appendix B ...
Page 276: ...266 Appendix C ...
Page 280: ...270 ...


