56
Chapter 7
Mainboard removal and installation
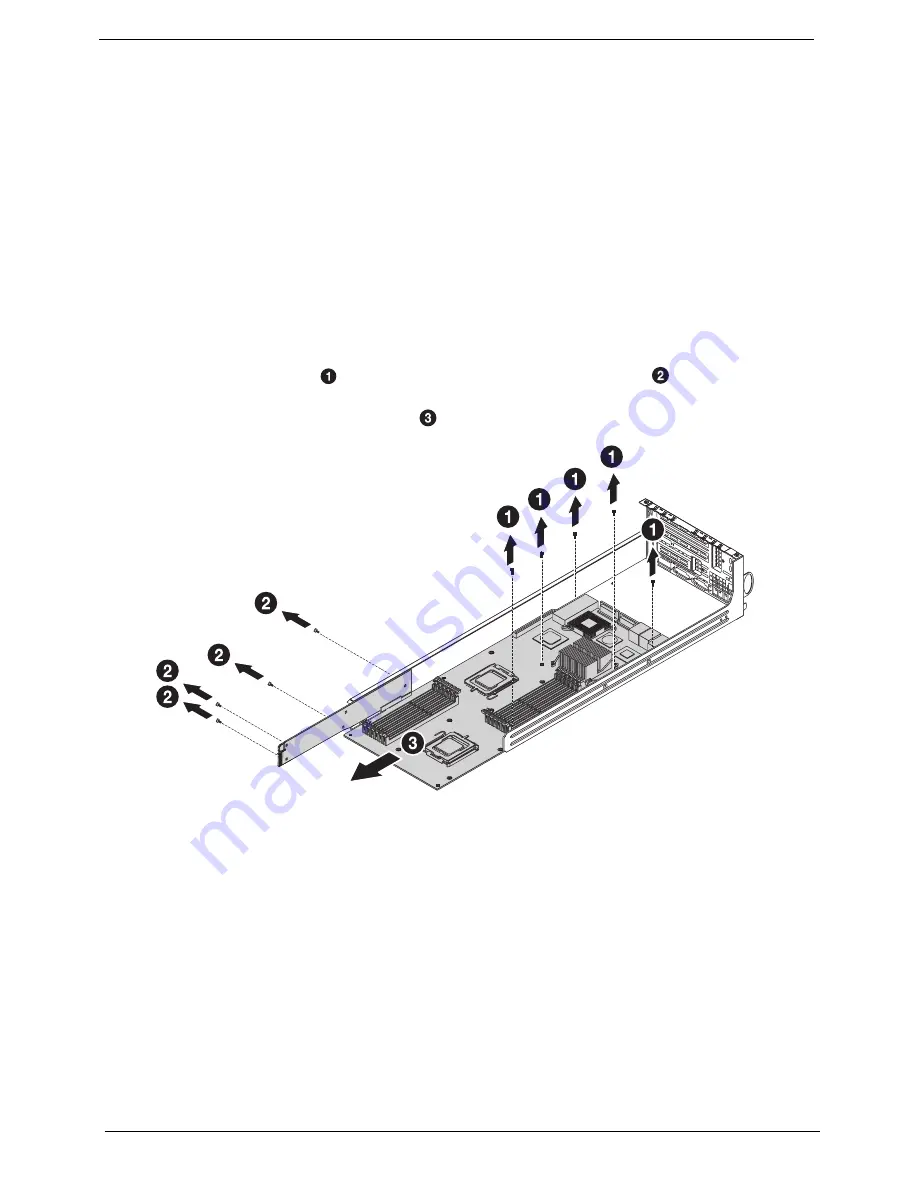
To remove the mainboard, follow these steps:
1.
Power down the server and unplug the power cord.
2.
Remove the server node (see
“Replacing a server node” on page 41
).
3.
Remove all installed PCI Express cards (see
“PCI Express card removal and installation” on page
42
).
4.
Remove the riser card module (see
“Replacing the riser card module” on page 43
).
5.
Remove the cover plate (see
“Removing the cover plate” on page 45
).
6.
Remove the air shroud (see
“Removing the air shroud” on page 46
).
7.
Remove the heatsink (see
“Heatsink removal and installation” on page 47
).
8.
Remove the CPU (see
“CPU removal and installation” on page 49
).
9.
Remove the memory (see
“Memory removal and installation” on page 51
).
10.
Remove the five screws (
) that secure the mainboard and the four screws (
) that secure the SATA
board to the server node tray.
11.
Pull out the mainboard and SATA board (
) from the server node tray. .
Summary of Contents for AW2000ht-AW170ht F1
Page 1: ...Acer AW2000ht Service Guide PART NO PRINTED IN TAIWAN ...
Page 18: ...12 Chapter 2 ...
Page 28: ...22 Chapter 4 System block diagram ...
Page 30: ...24 Chapter 5 Mainboard connectors ...
Page 34: ...28 Chapter 5 ...
Page 72: ...66 Chapter 8 ...
Page 89: ...Chapter 10 83 ...
Page 90: ...84 Chapter 10 ...
Page 91: ...Chapter 11 85 Information unavailable BIOS POST Error Messages List Chapter 11 ...
Page 92: ...86 Chapter 11 ...


