55
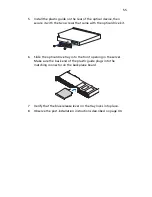
5
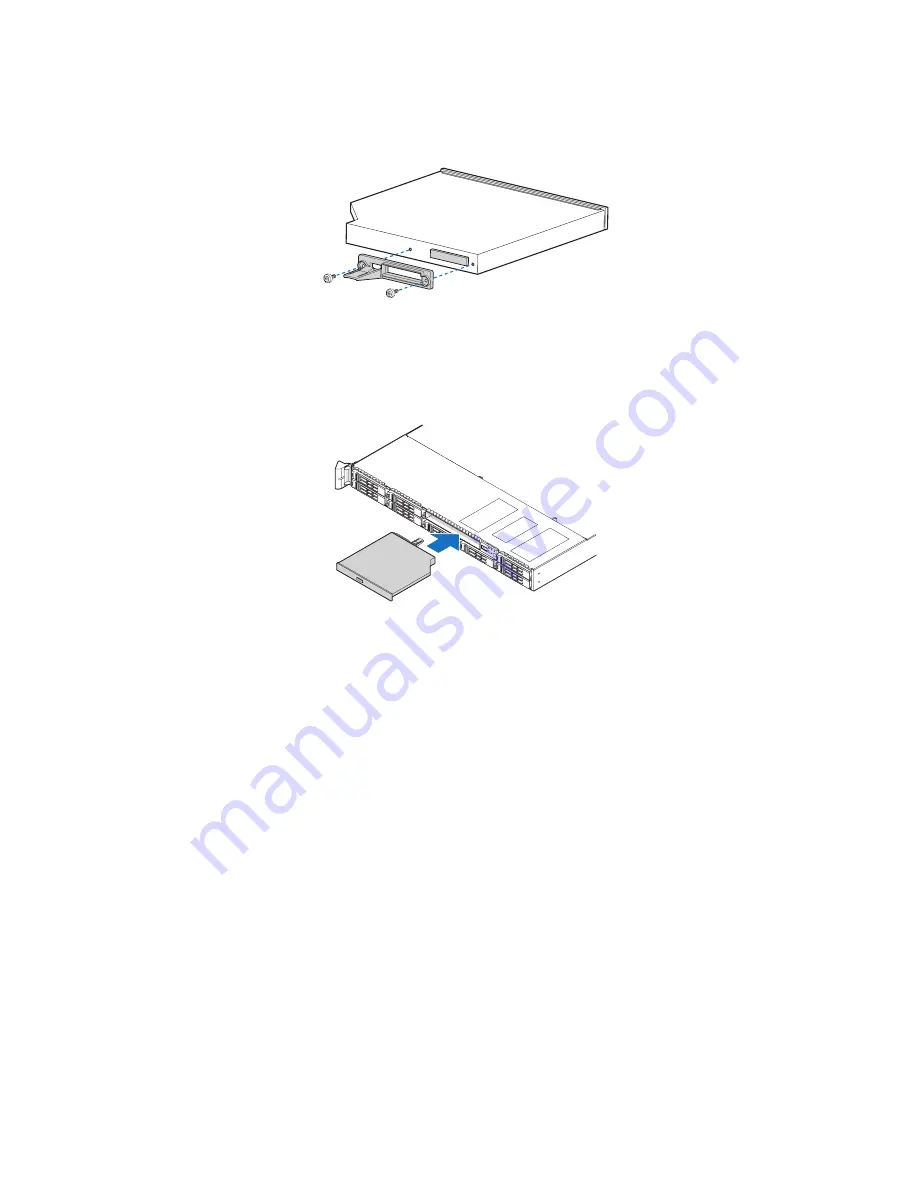
Install the plastic guide on the rear of the optical device, then
secure it with the two screws that came with the optical drive kit.
6
Slide the optical drive tray into the front opening in the server.
Make sure the back end of the plastic guide plugs into the
matching connector on the backplane board.
7
Verify that the blue release lever on the tray locks into place.
8
Observe the post-installation instructions described on page 40.
TP02233
Summary of Contents for Network Device Altos R520
Page 1: ...Acer Altos R520 Series User s Guide...
Page 10: ...x...
Page 11: ...1 System tour...
Page 38: ...1 System tour 28...
Page 39: ...2 System setup...
Page 47: ...3 System upgrade...
Page 99: ...4 BIOS setup...
Page 136: ...4 BIOS setup 126...
Page 137: ...5 Troubleshooting...
Page 158: ...5 Troubleshooting 148...
Page 159: ...Appendix A Acer Altos R520 rack installation guide...
Page 160: ...This appendix shows you how to set up the Acer Altos R520 server in a rack mount configuration...
Page 172: ...Appendix A Acer Altos R520 rack installation guide 162...
Page 173: ...Appendix B RAID configuration...
Page 184: ...174...


