3 System upgrade
66
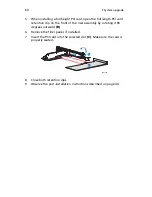
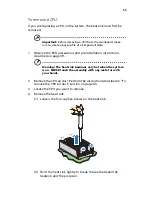
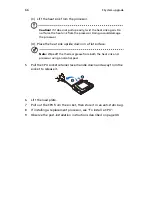
(3) Lift the heat sink from the processor.
Caution!
If it does not pull up easily, twist the heat sink again. Do
not force the heat sink from the processor. Doing so could damage
the processor.
(4) Place the heat sink upside down on a flat surface.
Note:
Wipe off the thermal grease from both the heat sink and
processor using an alcohol pad.
5
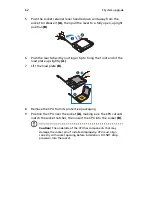
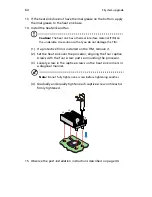
Pull the CPU socket retainer lever handle down and away from the
socket to release it.
6
Lift the load plate.
7
Pull out the CPU from the socket, then store it in an anti-static bag.
8
If installing a replacement processor, see “To install a CPU”.
9
Observe the post-installation instructions described on page 40.
Summary of Contents for Network Device Altos R520
Page 1: ...Acer Altos R520 Series User s Guide...
Page 10: ...x...
Page 11: ...1 System tour...
Page 38: ...1 System tour 28...
Page 39: ...2 System setup...
Page 47: ...3 System upgrade...
Page 99: ...4 BIOS setup...
Page 136: ...4 BIOS setup 126...
Page 137: ...5 Troubleshooting...
Page 158: ...5 Troubleshooting 148...
Page 159: ...Appendix A Acer Altos R520 rack installation guide...
Page 160: ...This appendix shows you how to set up the Acer Altos R520 server in a rack mount configuration...
Page 172: ...Appendix A Acer Altos R520 rack installation guide 162...
Page 173: ...Appendix B RAID configuration...
Page 184: ...174...

