68
Chapter 3
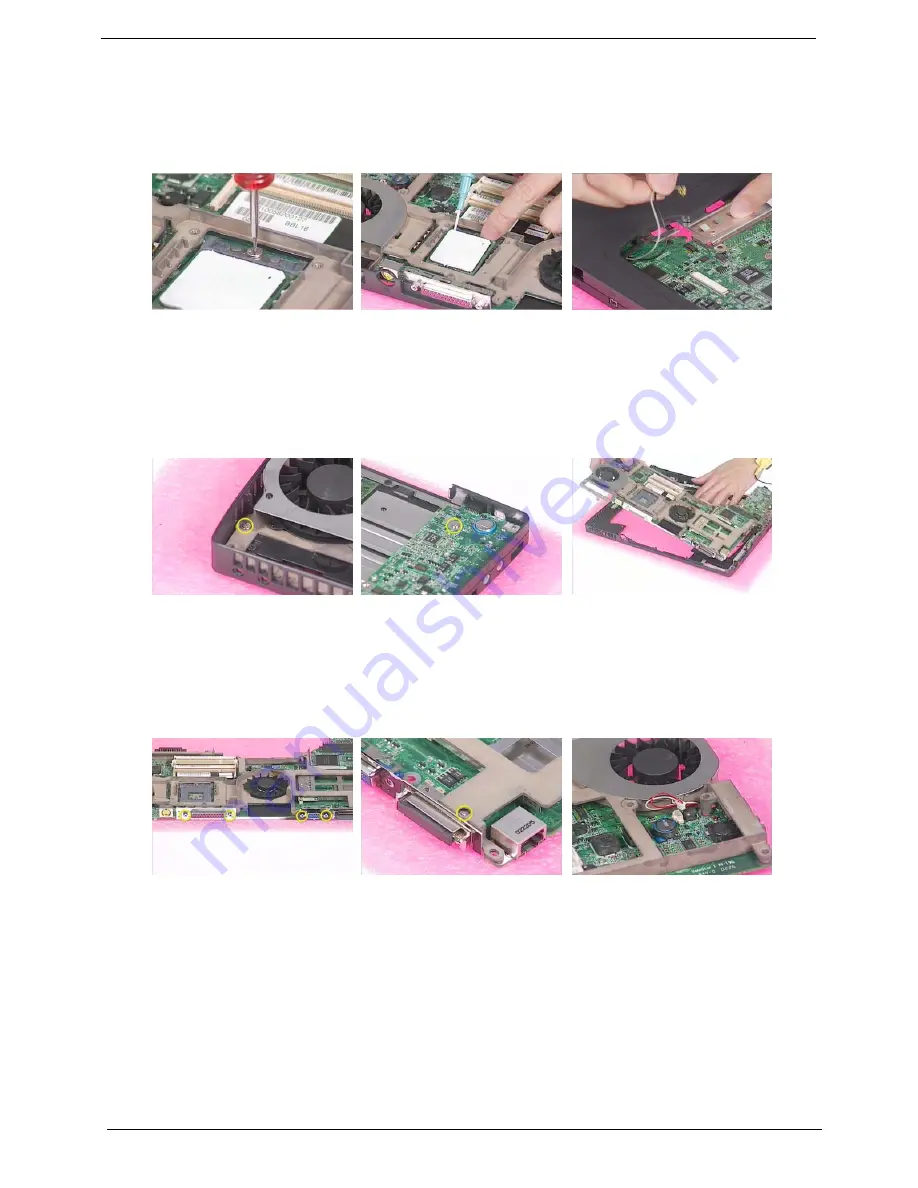
10. Release the CPU lock.
11. Remove the CPU from the main unit carefully.
12. Tear off the tape that fastens the antenna line to the main board. Then take the antenna line out from the
other side.
13. Remove the screw here.
14. Unscrew the screw as shown here.
15. Then remove the main board assembly from the lower case.
16. Unscrew the four screw nuts that secure the I/O bracket.
17. Remove the screw on the main frame.
18. Disconnect one fan connector.
19. Disconnect another fan connector.
20. Remove the four screws that fasten the I/O bracket to the main frame.
21. Detach the I/O bracket from the main board.
Summary of Contents for TravelMate 430
Page 6: ...VI ...
Page 66: ...58 Chapter 2 ...
Page 102: ...94 Chapter 4 ...
Page 106: ...98 Chapter 5 ...
Page 108: ...100 Chapter 6 Exploded Diagram THE SYSTEM ...
Page 109: ...Chapter 6 101 LOGIC UP ASSY ...
Page 110: ...102 Chapter 6 LOGIC UP ASSY Wireless ...
Page 111: ...Chapter 6 103 LCD 14 1 LCD 15 ...
Page 112: ...104 Chapter 6 DVD ASSY CD ROM ASSY ...
Page 113: ...Chapter 6 105 Combo ASSY ...
Page 125: ...Chapter 6 117 ...
Page 128: ...Appendix A 120 T Embedded numeric keypad T International language support ...
Page 138: ...130 Appendix C ...


