


6
7
Align the disassembly
button with the rod storage
case and then insert the
base connector into the
connecting holes on the
base.
Align the front grille in the
same direction as the
control panel, and insert
the head connecting rod
into connecting holes on
the base.
Press the disassembly
button on the height
adjustment rod and lift
the head connecting
rod to separate the
head and the height
adjustment rod.
Hold the height
adjustment rod and
flip the base up-side-
down, to find the base
disassembly button
(as shown in the figure
below)
Hold the adjust-
ment rod with one
hand & both sides
of base disassem-
bly button with the
other hand, then
press the disassem-
bly button & lift the
height adjustment
rod upwards to
complete the
disassembly.
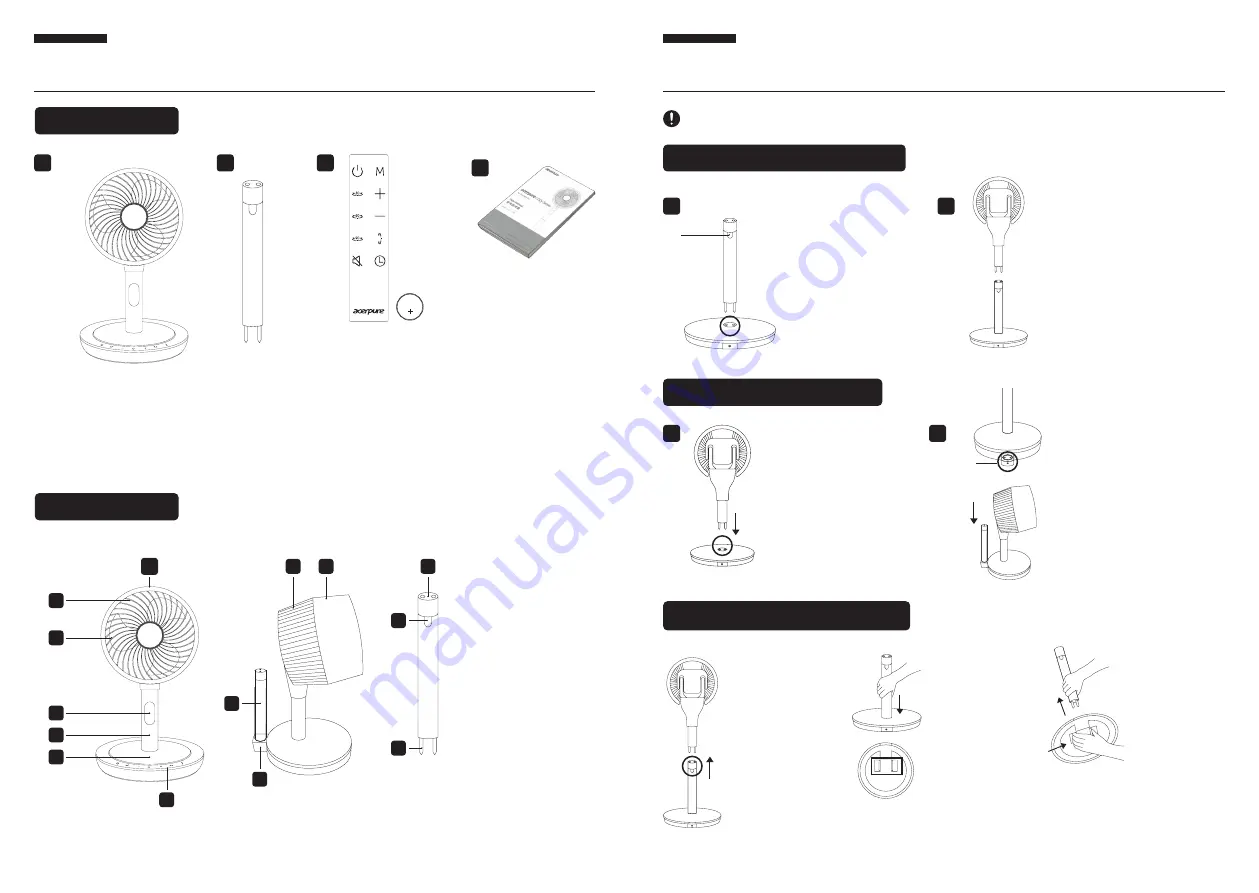
Product Configuration and Structure
Product Assembly and Disassembly
Host
Height Adjustment
Rod
Please unplug the product before installation, follow the instructions to
assemble & disassemble it, and keep the packages properly for the storage.
Remote Control
(Including CR2032
Lithium Battery in it)
Disassembly
button
Connecting
holes
Connecting
holes
Base disassembly
button
Storage
case
User
Warranty Card
1. Front Grille
2. Fan Blades
3. Display Screen
4. Head Connecting Rod
5. Base
6. Control Panel
7. Remote Control Magnet
8. Guard Support of the Air
Circulator
9. Rear Grille
10. Height Adjustment Rod
11. Rod Storage Case
12. Connecting Holes
13. Disassembly Button
14. Base Connector
1
1
1
2
2
1
13
14
10
7
9
8
12
6
11
2
3
4
5
2
3
4
Product assembly - Stand fan
Product disassembly (height adjustment)
Product assembly - Table fan
Product Structure
Product accessories
Align the front grille in the same
direction as the control panel, and
insert the head connecting rod into the
connecting holes on height adjustment
rod to complete the assembly.
a. Press the storage case and
pull it out.
b. Insert the height
adjustment rod into the
holes on storage case to
finish the assembly.
Summary of Contents for cozy Series
Page 9: ...Memo...


