4
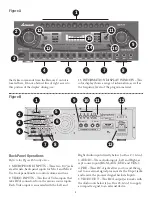
6. AUDIO OUT – RCA jacks for Audio out.
7. REC OUT AND LINE OUT – These RCA jacks
are for sending Audio to external recording units or
other devices.
8. SUB AND MIC OUTPUTS – The SUB RCA
jacks send Audio signals of appropriate frequency
to subwoofers. The MIC jacks send High and Low
signals to other audio devices.
9. SPEAKER CONNECTIONS – The Left and
Right pairs of posts connect to your speakers.
10. SOURCE INPUTS – The jacks in this location
accept inputs from BGM, AUX, DVD and CDG.
11. S-VIDEO OUT – This output jack sends an
S-Video signal for input to TVs and TV-connected
devices that use the format.
12. VOLTAGE SELECT – This switch selects be-
tween 115 and 230 volts for AC power.
13. AC INPUT – This is where the power cord con-
nects to the back of the AM-170.
Remote Control Operations
1. KEY CONTROL – The
b
and
#
keys adjust the
pitch up and down by semitones, while the center
selection (natural symbol) returns the program
material to its original key.
2. MIC VOLUME – The
+
and
-
buttons control the
Volume of the microphone(s) being used.
3. MUSIC VOLUME – Increase or decrease
the music master output Volume with the
+
and
-
buttons.
4. SOURCE SELECTIONS :
• The AUX button selects the external source con-
nected to the AUX INPUT on the back panel.
• The BGM button selects the external source
connected to the BGM INPUT on the back
panel.
• The DVD button selects the external source con-
nected to the DVD INPUT.
• The AUTO button enables the automatic input
detection on the AM-170 to select the source.
• The CDG button selects the external source con-
nected to the CDG INPUT on the back panel.
5. 3D SOUND – This button toggles the 3D Sound
enhanced audio between off and on.
6. MUTE – This button toggles Mute between off
and on.
7. MPX – This button selects the various Audio mix
settings, toggling among Stereo, Left and Right.
1
2
3
4
6
7
5
Care & Maintenance
Use only a slightly dampened cloth to clean the AM-
170, and dry off with a clean towel. Keep the unit in
an area free of excessive moisture, and always allow
sufficient room around the unit for airflow. This will
prevent the AM-170 from overheating.
As with all audio and electronics gear, do not use the
device except as described in these instructions.


