

A UX
B GM
KEY
0
+1
+2
+3
+1
+2
+3
+4
+5
+6
db
L
R
MUTE
BBE
L
S T E R E O
R
VO C A L
PAR T N E R
V O C AL
CANCE L
D VD
+4
+5
+6
DVD
AUX
USB
BGM
AUTO
INPUT SELECTOR
SOUND MODE
POWER
KEY C ONTROL
B A L A N C E
T R E B L E
B A S S
D E L A Y
E C H O
R E P E A T
TREBLE
B A S S
M I C 1 V O L
M I C 2 V O L
M I C 3 V O L
H E A D P H O N E
M I C 1
M I C 2
M I C 3
M U S I C V O L
M I C M A S T E R V O L
MUSIC
MIC
U SB
O F F
O N
AUX INPUT
L
R
VIDEO
AM-828 MIXING AMPLIFIER
Power
Mic 1
Mic 2
Mic 3
Mic 1
Mic 2
Mic 3
Mic Treble
Mic Bass
Mic Echo
Music Volume
10
10
10
10
10
+10
-10
+10
-10
3D Sound
On
Off
KM-110
Karaoke Mixer
On
Off
Mic Volume
Power amplifier
Mixer
Player
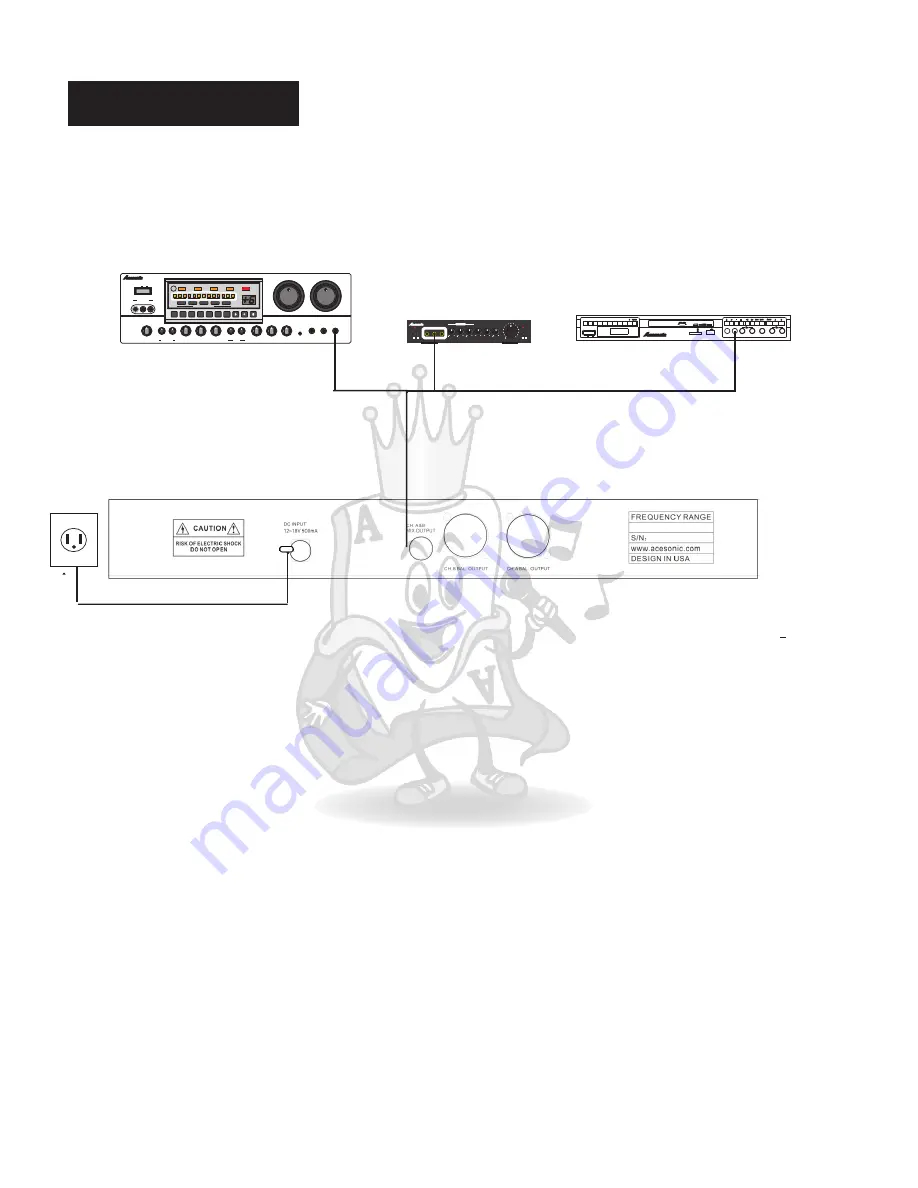
1) Connect the
AC POWER ADAPTER
to the UHF-1208X receiver’s
AC INPUT 110V,
then
plug the other end of
AC POWER ADAPTER
into the
WALL OUTLET
.
2)Connect one end of a
TO
CABLE
to the U
receiver’s
UNBALANCE
AUDIO OUTPUT(MIX)
and the other end to a karaoke mixer, karaoke player or karaoke
power amplifier
microphone input. If you are using the BALANCE AUDIO OUTPUT,
use a
XLR to XLR cable
or
XLR to
cable
3)Unscrew the microphones handle cover(counter-clockwise) to check to see if there are
batteries. If not, install batteries into the microphones with the negative and positive end
of the battery correspond the negative and positive end of the microphone. Screw the
microphone handle back on(clockwise).
¼"
¼"
HF
-
1208X
¼"
¼"
.
AC Power adapter cable
¼
" t
o
¼
" c
a
b
le
Mic. Input
Mic. Input
Mic. Input
Power Outlet
Installation
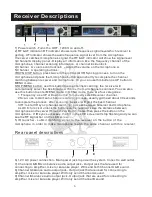
Quick IR SYNC
(Channel Matching
between receiver and microphone)
1. O
press MANUAL SCAN button twice in the roll to start auto channel
scanning process. The whole auto scanning process will be finished around 90 seconds.
However, you can stop auto scanning anytime by pressing STOP button. Receiver will
select the best/cleanest channel from the channels just went thought.
2. Power on the microphone handheld and use its button part to face the IR SYNC laugher
on the receiver front panel to prepare the next step(IR syncing).
3. On the receiver, press IR SYNC button twice in the roll to start IR syncing process. When
the receiver LCD screen shows IRING, press microphone button and release shortly. If IR
SYNC success, the LCD screen will show IR OK.
4. Please remain the 1st microphone power on before starting the 2nd microphone’s auto
channel scanning. otherwise receives might get the same(cleanest) channel for both #1
and #2 microphone while auto channel scanning.
n the receiver,
7
POWER
OFF
ON
1
2
3
4
5
6
7
8
9
0
MIC1
MIC2
VOL1
VOL2
EC HO
BA SS
TREBLE
DOLBY
D I G I T A L
CD+G
MPEG-4
Playback
DVD MPEG-4 KARAOKE PLAYER
DGX-106
SD/MMC
MINI SD
USB


