background image

Unit 

Specifications 

and Featur

es

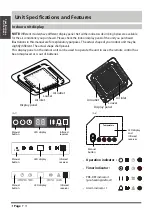
(A-3)

(B)

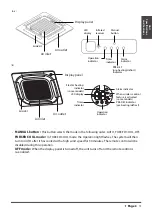
MANUAL button : 

This button selects the mode in the following order: AUTO, FORCED COOL, OFF.

FORCED COOL mode : 

In FORCED COOL mode, the Operation light flashes. The system will then

turn to AUTO after it has cooled with a high wind speed for 30 minutes. The remote control will be

disabled during this operation.

OFF mode : 

When the display panel is turned off, the unit turns off and the remote control is

re-enabled.

Operation 

indicator

Electric heating 

indicator

( some models)

Timer 

indicator

PRE-DEF indicator

(pre-heating/defrost)

Alarm indicator

Infrared 

receiver

Timer 

indicator

Alarm 

indicator

PRE-DEF 

(pre-heating/defrost) 

indicator  

Manual 

button

Operation 

indicator

LED 

display

Air inlet

Air inlet

Air outlet

Air outlet

Louver

Louver

Display panel

Display panel

When wireless control 

feature is activated

( some models)

LED display

Page 

8 

Summary of Contents for ACiQ-12CC-HH-MB

Page 1: ...C HH MB ACiQ 12CC HH MB ACiQ 18CC HH MB ACiQ 24CC HH MB ACiQ Ceiling Cassette Air Handler IMPORTANT NOTE Read this manual carefully before installing or operating your new air conditioning unit Make sure to save this manual for future reference ...

Page 2: ...cifications and Features 07 Owner s Manual Table of Contents Safety Precautions 04 Care and Maintenance 17 Troubleshooting 19 Indoor unit display 07 Operating Temperature 15 Other features 16 Remote Control 09 ...

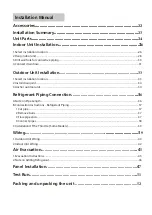
Page 3: ...nt 34 Wiring 39 1 Outdoor Unit Wiring 40 2 Indoor Uint Wiring 42 3 Anchor outdoor unit 34 Refrigerant Piping Connection 36 A Note on Pipe Length 36 B Connection Instructions Refrigerant Piping 37 1 Cut pipe 37 2 Remove burrs 37 3 Flare pipe ends 37 4 Connect pipes 38 Air Evacuation 45 1 Evacuation Instructions 45 2 Note on Adding Refrigerant 46 Panel Installation 47 Test Run 51 Packing and unpacki...

Page 4: ...ng smell immediately turn off the unit and disconnect the power Call your dealer for instructions to avoid electric shock fire or injury Do not insert fingers rods or other objects into the air inlet or outlet This may cause injury since the fan may be rotating at high speeds Do not use flammable sprays such as hair spray lacquer or paint near the unit This may cause fire or combustion Do not oper...

Page 5: ...er the unit Do not share the electrical outlet with other appliances Improper or insufficient power supply can cause fire or electrical shock If connecting power to fixed wiring an all pole disconnection device which has at least 3mm clearances in all poles and have a leakage current that may exceed 10mA the residual current device RCD having a rated residual operating current not exceeding 30mA a...

Page 6: ...l the appliance to its support please read the information for details in indoor unit installation and outdoor unit installation sections For units that have an auxiliary electric heater do not install the unit within 1 meter 3 feet of any combustible materials Do not install the unit in a location that may be exposed to combustible gas leaks If combustible gas accumulates around the unit it may c...

Page 7: ...ased Please check the indoor display panel of the unit you purchased This display panel on the indoor unit can be used to operate the unit in case the remote control has been misplaced or is out of batteries Air inlet Display panel Louver Air outlet LED display Infrared receiver Manual button FUNC LED display Infrared receiver Manual button LED display Infrared receiver Manual button Air inlet Dis...

Page 8: ...operation OFF mode When the display panel is turned off the unit turns off and the remote control is re enabled Operation indicator Electric heating indicator some models Timer indicator PRE DEF indicator pre heating defrost Alarm indicator Infrared receiver Timer indicator Alarm indicator PRE DEF pre heating defrost indicator Manual button Operation indicator LED display Air inlet Air inlet Air o...

Page 9: ... is O 86 F TEMP Decreases temperature in O 1 F 1 C increments Min temperature is O 62 F TIMER ON Sets timer to turn unit on TIMER OFF Sets timer to turn unit off SWING DIRECT Starts and stops up down airflow louver movement LED FOLLOW ME Temperature sensing and room temperature display button SELF CLEAN Starts and stops self clean feature ON OF F T E MP FP TIMER ON TIMER OFF MODE FAN SLC SLEEP TUR...

Page 10: ...display ECO display Displays when SLEEP function is activated FOLLOW ME display Indicates that the FOLLOW ME function is on FAN SPEED display Displays selected FAN SPEED HIGH MED or LOW This display is blank when set to AUTO speed or DRY mode Temperature Timer display Displays the set temperature by default or timer setting when using TIMER ON OFF functions o Temperature range 62 86 F Timer settin...

Page 11: ...ansmitting a command from the remote control to the unit be sure to point the control toward the right side of the unit The unit confirms receipt of a command by sounding an audible beep 1 Turn the unit on by pushing the ON OFF button 2 If there is a preference for C rather than F default press and hold the increase and decrease temperature set point buttons together for approximately 3 seconds 3 ...

Page 12: ...essing the FAN button NOTE When the unit is on the fan runs continuously in cooling or heating When in heating there might be situations where the fan will slow down or shut off to prevent cold blow Selecting the up down airflow Louver Position To optimize comfort the up down aiflow louver operates in a preset range as shown in the following figure COOLING HEATING Fig 10 Louver Position The up dow...

Page 13: ...e UNIT OFF a Set the TIMER off as described in the UNIT ON section The TIMER display on the unit illuminates and the unit remains off b Adjust the TIMER ON settings to 0 0 to cancel this option Timer ON and Timer OFF Use both functions to program the unit to turn on and shut off at specified times UNIT OFF a Set TIMER ON as previously described b Set TIMER OFF as previously described The unit star...

Page 14: ...ion the compressor operates at a low frequency and the indoor unit produces a faint breeze which reduces the noise to the lowest level Due to the low frequency operation of the compressor it may result in insufficient cooling and heating capacity LED Light Press LED to turn the display light on and off Resetting the Remote Control If the batteries in the remote control are removed the current sett...

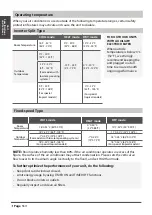
Page 15: ...TIMER OFF functions Do not block air inlets or outlets Regularly inspect and clean air filters NOTE Room relative humidity less than 80 If the air conditioner operates in excess of this figure the surface of the air conditioner may attract condensation Please sets the vertical air flow louver to its maximum angle vertically to the floor and set HIGH fan mode Room Temperature 16 C 32 C 60 F 90 F 0 ...

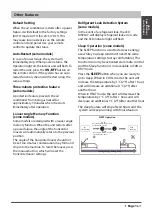
Page 16: ...ection System some models In the event of a refrigerant leak the LED DISPLAY will display refrigerant leak error code and the LED indicator light will flash Other features Three minute protection feature some models A protection feature prevents the air conditioner from being activated for approximately 3 minutes when it restarts immediately after operation The SLEEP function is used to decrease e...

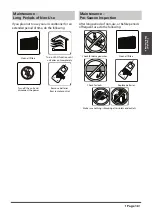
Page 17: ...OURSELF Removing and cleaning the filter can be dangerous Removal and maintenance must be performed by a certified technician If using a vacuum cleaner the inlet side should face the vacuum If using water the inlet side should face down and away from the water stream 3 Rinse the filter with clean water and allow it to air dry DO NOT let the filter dry in direct sunlight 4 Reinstall the filter 1 Re...

Page 18: ...N function until unit dries out completely Remove batteries from remote control Maintenance Pre Season Inspection After long periods of non use or before periods of frequent use do the following Check for damaged wires Clean all filters Check for leaks Replace batteries Make sure nothing is blocking all air inlets and outlets Turn off the unit and disconnect the power Page 18 ...

Page 19: ...tion of the unit s plastic parts Both the indoor unit and outdoor unit make noises Low hissing sound during operation This is normal and is caused by refrigerant gas flowing through both indoor and outdoor units Low hissing sound when the system starts has just stopped running or is defrosting This noise is normal and is caused by the refrigerant gas stopping or changing direction Squeaking sound ...

Page 20: ...d description of the unit malfunction as well as your model number Troubleshooting When troubles occur please check the following points before contacting a repair company Problem Possible Causes Solution Poor Cooling Performance Temperature setting may be higher than ambient room temperature Lower the temperature setting The heat exchanger on the indoor or outdoor unit is dirty Clean the affected...

Page 21: ...w Use auxiliary heating device Cold air is entering through doors and windows Make sure that all doors and windows are closed during use Low refrigerant due to leak or long term use Check for leaks re seal if necessary and top off refrigerant Indicator lamps continue flashing The unit may stop operation or continue to run safely If the indicator lamps continue to flash or error codes appear wait f...

Page 22: ...dproof insulation sheath some models Outlet pipe sheath some models Outlet pipe clasp some models Drain joint some models Seal ring some models Magnetic ring wrap the electric wires S1 S2 P Q E around the magnetic ring twice some models Magnetic ring Hitch it on the connective cable between indoor unit and outdoor unit after installation some models S1 S2 P Q E Copper nut 2 Accessories P QE Instal...

Page 23: ...outdoor unit Install the drainpipe 1 2 3 4 5 MC MC 6 Install the indoor unit Evacuate the refrigeration system Connect the wires Connect the refrigerant pipes Perform a test run 7 8 Install the front panel Installation Summary Page 23 ...

Page 24: ...al and national standards The installation may be slightly different in different areas Unit Parts A Display panel Drain pipe Front grille Connecting pipe Air inlet Air outlet Remote controller Air outlet Air inlet 1 2 4 3 6 7 8 8 9 5 1 2 3 4 5 6 7 8 9 Outdoor unit B Outdoor unit A 9 8 Page 24 ...

Page 25: ...ses The actual shape of your indoor unit may be slightly different The actual shape shall prevail 1 2 4 3 6 7 8 8 9 5 Display panel Drain pipe Front grille Connecting pipe Air inlet Air outlet Remote controller Air outlet Air inlet 1 2 3 4 5 6 7 8 9 Outdoor unit B Outdoor unit A 9 8 Page 25 ...

Page 26: ... for installation and maintenance Enough room exists for the connecting the pipe and drainpipe The ceiling is horizontal and its structure can sustain the weight of the indoor unit The air inlet and outlet are not blocked The airflow can fill the entire room There is no direct radiation from heaters DO NOT install unit in the following locations Areas with oil drilling or fracking Coastal areas wi...

Page 27: ...ngth of A mm inch Length of H mm inch 18 24 205 8 235 9 3 24 245 9 6 275 10 8 30 205 8 235 9 3 30 48 245 9 6 275 10 8 48 60 287 11 3 317 12 5 48 60 287 11 3 317 12 5 Length of B mm inch 880 34 5 940 37 0 Super Slim models 260 10 2 290 11 4 600 23 6 Distance from ceiling relative to height of indoor unit MODEL Length of A mm inch Length of H mm inch 18 24 205 8 03 230 9 06 30 42 245 9 65 271 10 7 4...

Page 28: ... Suspension bolt 900mm 35 4 Body 1020mm 40 2 Panel 940mm 37 0 Ceiling opening 18 48K Super Slim models ceiling hole size Refrigerant piping side Drain hose side 780mm 30 Suspension bolt 840mm 33 Body 950mm 37 4 Panel 880mm 34 7 Ceiling opening 680mm 26 Suspension bolt 840mm 33 Body 950mm 37 4 Panel 880mm 34 7 Ceiling opening Compact models ceiling hole size 545mm 21 5 Suspension bolt 570mm 22 4 Bo...

Page 29: ...lled holes Secure the bolt using the included washers and nuts 4 Install the four suspension bolts 5 Mount the indoor unit You will need two people to lift and secure it Insert suspension bolts into the unit s hanging holes Fasten them using the included washers and nuts CAUTION The unit body should align perfectly with the hole Ensure that the unit and the hole are the same size before moving on ...

Page 30: ...on paper template onto the unit with bolts to determine in advance the dimension and position of the opening on the ceiling Follow the instructions above for the remainder of the installation CAUTION Ensure that the unit is completely level Improper installation can cause the drain pipe to back up into the unit or water leakage Step 3 Drill wall hole for connective piping 1 Determine the location ...

Page 31: ...l piping to prevent condensation which could lead to water damage If the drainpipe is bent or installed incorrectly water may leak and cause a water level switch malfunction In HEAT mode the outdoor unit will discharge water Ensure that the drain hose is placed in an appropriate area to avoid water damage and slippage DO NOT pull the drainpipe forcefully This could disconnect it NOTE ON PURCHASING...

Page 32: ...lightly tiled up 75mm 3 some models A B 75cm 29 5 75cm 29 5 Ceiling 1 1 5m 39 59 1 1 5m 39 59 0 75mm 3 30cm 11 8 53cm 20 8 22cm 8 6 NOTE When connecting multiple drainpipes install the pipes as illustrated in the following Figure Pass the drain hose through the wall hole Make sure the water drains to a safe location where it will not cause water damage or a slipping hazard NOTE The drainpipe outle...

Page 33: ... unit is exposed to heavy wind Install unit so that air outlet fan is at a 90 angle to the direction of the wind If needed build a barrier in front of the unit to protect it from extremely heavy winds See Figures below Strong wind Strong wind Strong wind Wind Baffle DO NOT install unit in the following locations Near an obstacle that will block air inlets and outlets Near a public street crowded a...

Page 34: ...he following 1 Insert the drain joint into the hole in the base pan of the unit The drain joint will click in place 2 Connect a drain hose extension not included to the drain joint to redirect water from the unit during heating mode Seal Drain joint A B Base pan hole of outdoor unit Seal IN COLD CLIMATES In cold climates make sure that the drain hose is as vertical as possible to ensure swift wate...

Page 35: ...2x1333x415 37 5x52 5x16 34 634 24 96 404 15 9 845x702x363 33 27x27 6x14 3 540 21 26 350 13 8 938x1369x392 36 93x53 9x15 43 634 24 96 404 15 9 900x1170x350 35 4x46x13 8 590 23 2 378 14 88 800x554x333 31 5x21 8x13 1 514 20 24 340 13 39 890x673x342 35x26 5x13 46 663 26 1 354 13 94 Rows of series installation L H L 1 2H L A 25 cm 9 8 or more 1 2H L H 30 cm 11 8 or more L H Can not be installed The rel...

Page 36: ...iping Maximum drop height North America Australia and the EU Inverter Split Type 15K 25 82 10 32 8 15K 24K 30 98 4 20 65 6 24K 36K 50 164 25 82 36K 60K 75 246 30 98 4 Other Split Type 12K 15 49 8 26 18K 24K 25 82 15 49 30K 36K 30 98 4 20 65 6 42K 60K 50 164 30 98 4 Oil traps CAUTION If oil flows back into the outdoor unit s compressor this might cause liquid compression or deterioration of oil ret...

Page 37: ... Proper flaring is essential to achieve an airtight seal 1 After removing burrs from cut pipe seal the ends with PVC tape to prevent foreign materials from entering the pipe 2 Sheath the pipe with insulating material 3 Place flare nuts on both ends of pipe Make sure they are facing in the right direction because you can t put them on or change their direction after flaring Flare nut Copper pipe 4 ...

Page 38: ...vacuate the system refer to the Air Evacuation section of this manual PIPING EXTENSION BEYOND FLARE FORM 8 Remove the flaring tool and flare form then inspect the end of the pipe for cracks and even flaring Step 4 Connect pipes Connect the copper pipes to the indoor unit first then connect it to the outdoor unit You should first connect the low pressure pipe then the high pressure pipe 1 When conn...

Page 39: ...ectrical shock or fire 5 If connecting power to fixed wiring a surgeprotector and main power switch should be installed 6 If connecting power to fixed wiring a switch or circuit breaker that disconnects all poles and has a contact separation of at least 1 8in 3mm must be incorporated in the fixed wiring The qualified technician must use an approved circuit breaker or switch 7 Only connect the unit...

Page 40: ...ch Air switch purchased seperately Only for the North America purchased seperately purchased seperately Outdoor unit power wires Indoor Outdoor connective wires D Outdoor Unit Wiring WARNING Before performing any electrical or wiring work turn off the main power to the system 1 Prepare the cable for connection a You must first choose the right cable size Be sure to use H07RN F cables NOTE In North...

Page 41: ...panel of the unit Refer to this nameplate to choose the right cable fuse or switch NOTE In North America please choose the right cable size according to the Minimum Circuit Ampacity indicated on the nameplate of the unit Wiring 2 Remove the 2 screws fixed on the front panel and side panel then take it down to perform wire connection see the figure of outdoor unit A Unscrew the electrical wiring co...

Page 42: ...er remove the cover of the electric control box on your indoor unit 3 Thread the power cable and the signal cable through the wire outlet 4 Connect the u lugs to the terminals Match the wire colors labels with the labels on the terminal block Firmly screw the u lug of each wire to its corresponding terminal Refer to the Serial Number and Wiring Diagram located on the cover of the electric control ...

Page 43: ...L Btu h 36K 37K 60K 36K 37K 60K POWER PHASE 3 Phase 3 Phase 3 Phase 3 Phase 380 420V 380 420V 208 240V 208 240V CIRCUIT BREAKER FUSE A 25 20 32 25 32 25 45 35 MODEL Btu h 19K 24K 25K 36K 37K 48K 49K 60K POWER PHASE 1 Phase 1 Phase 1 Phase 1 Phase 1 Phase 208 240V 208 240V 208 240V 208 240V 208 240V CIRCUIT BREAKER FUSE A 25 20 32 25 50 40 70 55 70 60 MODEL Btu h 36K 37K 60K 36K 37K 60K POWER PHASE...

Page 44: ...0 15 10 15 10 POWER outdoor PHASE 1 Phase 1 Phase 1 Phase 1 Phase 1 Phase 208 240V 208 240V 208 240V 208 240V 208 240V CIRCUIT BREAKER FUSE A 25 20 25 20 40 30 50 40 50 40 MODEL Btu h 36K 37K 60K 36K 37K 60K POWER indoor PHASE 1 Phase 1 Phase 1 Phase 1 Phase 208 240V 208 240V 208 240V 208 240V CIRCUIT BREAKER FUSE A 15 10 15 10 15 10 15 10 POWER outdoor PHASE 3 Phase 3 Phase 3 Phase 3 Phase 380 42...

Page 45: ...inutes or until the Compound Meter reads 76cmHG 105 Pa 2 3 4 5 6 Close the Low Pressure side of the manifold gauge and turn off the vacuum pump 7 Wait for 5 minutes then check that there has been no change in system pressure 8 If there is a change in system pressure refer to Gas Leak Check section for information on how to check for leaks If there is no change in system pressure unscrew the cap fr...

Page 46: ...th x 40g 0 42oZ m ft φ6 35 1 4 φ9 52 3 8 φ12 7 1 2 R22 orifice tube in the indoor unit Total pipe length standard pipe length x 30g 0 32oZ m ft Total pipe length standard pipe length x 65g 0 69oZ m ft Total pipe length standard pipe length x 115g 1 23oZ m ft R22 orifice tube in the outdoor unit Total pipe length standard pipe length x15g 0 16oZ m ft Total pipe length standard pipe length x30 0 32o...

Page 47: ...thickness of the sponge between the main body and the panel reduces to 4 6mm 0 2 0 3 The edge of the panel should be in contact with the ceiling well Adjust the panel by turning it to the arrowed direction so that the ceiling opening is completely covered Piping side Drain side Latch Screwdriver 1 Connect the two louver motor connectors to the corresponding wires in the control box Connect the lou...

Page 48: ...he grille at a 45 angle lift it up slightly and detach it from the main body Step 2 Install the panel Align the indicate on the decoration panel to the indicate on the unit Attach the decoration panel to the unit with the supplied screws as shown in figure below After installing the decoration panel ensure that there is no space between the unit body and decoration panel Otherwise air may leak thr...

Page 49: ...ct with the ceiling well Adjust the panel by turning it to the arrowed direction so that the ceiling opening is completely covered B Remove the grid screws Grille switch Step 5 Fasten the control box lid with 2 screws Step 6 Close the intake grille and close the 2 grille hooks Step 1 Remove the front grille 1 Push both of the tabs towards the middle simultaneously to unlock the hook on the grille ...

Page 50: ...s four corners Make sure that the internal wiring and drainpipe are not affected by this adjustment NOTE After installation the butt plugs of display swing water pump and other wire bodies must be placed in the electric control box CAUTION Failure to tighten screws can cause water leakage CAUTION If the unit is not hung correctly and a gap exists the unit s height must be adjusted to ensure proper...

Page 51: ...tered correctly d Ensure the indicators on the remote control and the display panel on the indoor unit work properly e Ensure the manual buttons on the indoor unit works properly f Check to see that the drainage system is unimpeded and draining smoothly g Ensure there is no vibration or abnormal noise during operation 5 For the Outdoor Unit a Check to see if the refrigeration system is leaking b M...

Page 52: ...belt 2 Take the unit out of the package 3 Remove the foam from the unit 4 Remove the packing film from the unit Packing Indoor unit 1 Put the indoor unit into the packing film 2 Put the accessories in 3 Place the packing cushion and packing support 4 Put the indoor unit into the package 5 Close the package and seal it 6 Using the packing belt if necessary Outdoor unit 1 Put the outdoor unit into t...

Page 53: ... and specifications are subject to change without prior notice for product improvement Consult with the sales agency or manufacturer for details Any updates to the manual will be uploaded to the service website please check for the latest version ...

Reviews: