40
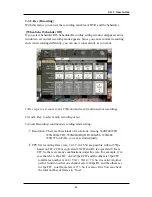
If you select the Camera Name using ‘Menu’ button, it appears the virtual keyboard
in screen. Use the arrow key to go to the wanted letter and push the ‘Enter’ key to
input the character. You can also use the hot key for shift, space and delete. After
inputting the name push the ‘Menu’ button to save and exit.
It will go to the A/V menu when pushing ENTER Button after setting all menus. If
you close by pushing EXIT Button without pushing ENTER, changed setting is not
saved.
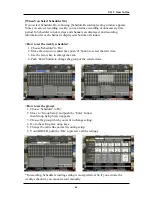
3) You can adjust images of camera by channels.
- Contrast: Adjust contrast of camera.
- Brightness: Adjust brightness of camera.
- Saturation: Adjust saturation of camera.
- Hue: Adjust color of camera.
You can see changing status of Contrast, Brightness, Saturation, Hue
with a progress bar. Adjust them with using Left/Right arrow button while
viewing screen. If you want all the camera simultaneously, use the ‘ALL’ button.
It will effects on every channel.
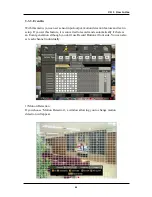
4) Monitor : You can choose the monitor between VGA and composite. The screen
size will be optimized with the selected monitor.
5) Deinterlacer: activates interlacing in playback.
This would solve the bad screen when pause or Slow playback in playback in
full screen of 720*480(720*576) if you click “ON”.
6) Spot mode : You can choose the spot output between full screen and quad.
7) Audio Output : You can hear the live sound on live quad viewing according to set
this menu. In full screen you can hear the chosen channel regardless of setting,
If you choose mute, there is no sound but still recording.
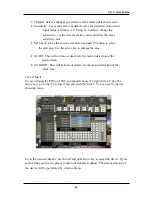
8) Main Dwelling : It defines the switching time of main output.
9) Spot Dwelling : It defines the switching time of spot output.
10)Spot Switch : You can set channel orders being switched. You remove
the video loss channel in here upon spot switching.
11) a-Blending : This adjusts the transparency of GUI. This operates with Left/Right
buttons and the transparency is adjusted while a bar is moving.
CH 3 How to Use
Summary of Contents for ACM-TPG08
Page 1: ......


