35.
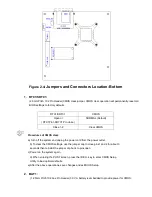
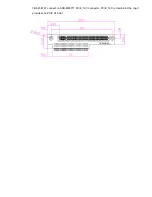
PCIE1X
(option)
:
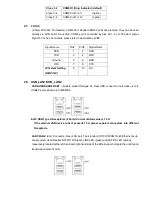
(4x10 Pin),Riser Card expansion connector.Can expand support two PCIe Signal.
ASB-M8671T
:
PCIE1X connector in the top.
ASB-M8671B
:
PCIE1X connector in the Bottom.
MODEL
PC1E16X / PCIE1X
ASB-M8671T
Top
ASB-M8671B
Bottom
36.
M-PCIE1
:
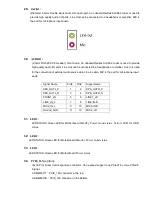
(Socket 52Pin),mini PCIe socket, it is located at the top, it supports mini PCIe devices with USB2.0,
SMBUS and PCIe signal. MPCIe card size is 30x30mm or 30x50.95mm.
37. H1/H2:
MPCIE1 SCREW HOLES, H1 for
mini PCIE card (30mmx30mm) assemble.
H2 for
mini PCIE card
(30mmx50.95mm) assemble.
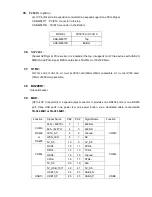
38. BUZZER1:
Onboard buzzer.
39. MIO1
:
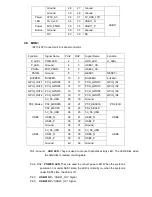
(DF13-40P Connector),For expand output connector, It provides two RS232 ports or one RS485
port, three USB ports, one power led, one power button, via a dedicated cable connected
to
TB-522 MIO1or TB-523 MIO1.
Function
Signal Name
Pin#
Pin#
Signal Name
Function
COM3
RS422
or
RS485
485+ / 422TX+
2
1
422RX+
COM3
485- / 422TX-
4
3
422RX-
3P3V_S0
6
5
Ground
WAN_LED
8
7
NC
5V_S5
10
9
5V_S5
COM4
RXD4
12
11
DCD4-
COM4
DTR4-
14
13
TXD4
DSR4-
16
15
Ground
CTS4-
18
17
RTS4-
5V_S5
20
19
RI4-
USB10
5V_USB_1011
22
21
5V_S5
USB9
USB10_N
24
23
USB9_N
USB10_P
26
25
USB9_P
Summary of Contents for PC8719
Page 8: ...1 2 Dimensions Figure 1 1 Dimensions of PC 8719...
Page 58: ...Step 5 Click Next Step 6 Click Continue Anyway...
Page 59: ...Step 7 Click Continue Anyway Step 8 Click Next...
Page 60: ...Step 9 Select Yes I want to restart this computer now Click Finish...
Page 64: ......
Page 68: ...Step 3 Click Exit to complete the installation...
Page 72: ...Step 6 Wait for installation Then click Next to continue Step 7 Click OK...
Page 73: ...Step 8 Click Finish to compete installation...
Page 78: ...Setting...
Page 79: ...About This panel displays information about the PenMount controller and driver version...
Page 81: ...Step 2 When the mapping screen message appears click OK...
Page 85: ...NOTE The Rotate function is disabled if you use Monitor Mapping...

