28
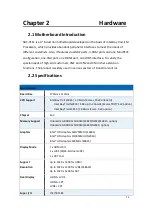
SBC-7111 is a 4" industrial motherboard developed on the basis of Intel Bay trail-I/M
Processors, which provides abundant peripheral interfaces to meet the needs of
different customers. Also, it features dual GbE ports, 3-COM ports and one Mini PCIE
configuration, one VGA port, one HDMI port, one LVDS interface. To satisfy the
special needs of high-end customers, CN1 and CN2 and CN3 richer extension
functions. The product is widely used in various sectors of industrial control.
Specifications
Board Size
170mm x 113mm
CPU Support
Intel Bay Trail E3845 / 1.91GHz (4cores, 10W, onboard)
Intel Bay Trail N2930 / 1.83 up to 2.16GHz (4cores,TDP/7.5W, option)
Intel Bay Trail E3815 / 1.46GHz (1core, 5W, option)
Chipset
SoC
Memory Support
Onboard 2GB DDR3L SDRAM (E3845/N2930/E3815, option)
Onboard 4GB DDR3L SDRAM (E3845/N2930, option)
Graphics
Intel® HD Graphics 542/792MHz (E3845)
Intel® HD Graphics 313/854MHz (N2930)
Intel® HD Graphics 400MHz (E3815)
Display Mode
1 x HDMI Port
1 x LVDS (18/24-bit dual LVDS)
1 x CRT Port
Support
Resolution
Up to 1920 x 1200 for HDMI
Up to 1920 x 1200 for LVDS (PS8625)
Up to 1920 x 1200 for CRT
Dual Display
HDMI + LVDS
HDMI + CRT
LVDS + CRT
Super I/O
ITE IT8518E
Summary of Contents for PC9 A Series
Page 12: ...11 1 3 Dimensions Figure 1 1 Dimensions of PC9070 Figure 1 2 Dimensions of PC9080...
Page 13: ...12 Figure 1 3 Dimensions of PC9101 Figure 1 4 Dimensions of PC9120...
Page 14: ...13 Figure 1 5 Dimensions of PC9150A Figure 1 6 Dimensions of PC9156A Resistive Touch...
Page 16: ...15 Figure 1 9 Dimensions of PC9185A Figure 1 10 Dimensions of PC9215A Resistive Touch...
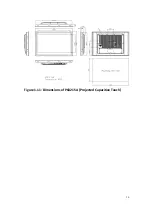
Page 17: ...16 Figure 1 11 Dimensions of PC8215A Projected Capacitive Touch...
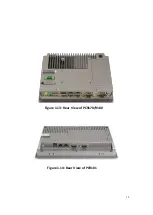
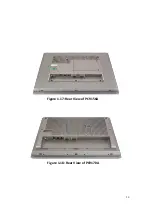
Page 19: ...18 Figure 1 13 Rear View of PC9170 9180 Figure 1 14 Rear View of PC9101...
Page 20: ...19 Figure 1 15 Rear View of PC9120 Figure 1 16 Rear View of PC9150A...
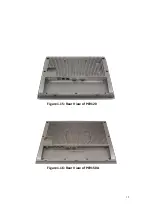
Page 21: ...20 Figure 1 17 Rear View of PC9156A Figure 1 18 Rear View of PC9170A...
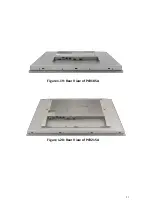
Page 22: ...21 Figure 1 19 Rear View of PC9185A Figure 1 20 Rear View of PC9215A...
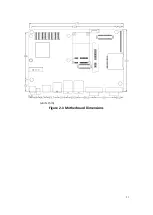
Page 32: ...31 units mm Figure 2 1 Motherboard Dimensions...
Page 83: ...82 Step 3 Read license agreement Click Yes Step 4 Click Next...
Page 84: ...83 Step 5 Click Install Step 6 Click Install...
Page 85: ...84 Step 7 Click Next Step 8 Click Yes I want to restart this computer now Then click Finish...
Page 88: ...87 Step 5 Click Install to begin the installation Step 6 Click Finish to exit the wizard...
Page 92: ...91 Step 3 Read the license agreement Then click Yes to continue Step 4 Click Next to continue...
Page 95: ...94 Step 2 Select Resistive Touch Step 3 Click Next to continue...
Page 97: ...96 Step 6 Wait for installation Then click Next to continue Step 7 Click Continue Anyway...
Page 99: ...98 Step 2 Select Projected Capacitive Step 3 Click Next to continue...
Page 102: ...101 Step 9 Go to C Program Files eGalaxTouch Click Next Step 10 Click Next...
Page 109: ...108 About This panel displays information about the PenMount controller and driver version...
Page 120: ...119 Hardware Saturn Hardware Configuration...
Page 121: ...120 About To display information about eGalaxTouch and its version...


