29
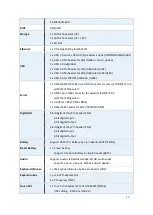
Fintek F81216AD
BIOS
AMI/UEFI
Storage
1 x SATAII Connector (7P)
1 x SATAII Connector (7P + 15P)
1 x SD Slot
Ethernet
2 x PCIe Gbe LAN by Intel 82574L
USB
1 x USB 2.0 and 1 x USB 3.0 (type A)stack ports (USBCON1/USB0,USB1)
1 x USB 2.0 Pin header for CN1 (USB3 or Touch, option)
1 x USB 2.0 Hub(USB2)
1 x USB 2.0 Pin header for CN2 (USB Hub /USB1)
2 x USB 2.0 Pin header for CN3 (USB Hub /USB2/USB3)
1 x USB 2.0 for MPCIE1 (USB Hub /USB4)
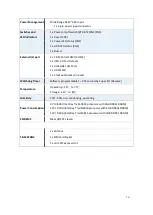
Serial
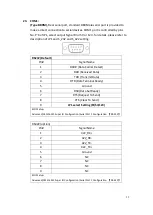
1 x RS232/RS422/RS485 port, DB9 connector for external (COM1) Pin 9
w/5V/12V/Ring select
1 x RS232 port, DB9 connector for external (COM2) Pin 9
w/5V/12V/Ring select
2 x UART for CN3 (COM3,COM4)
1 x RS422/485 header for CN2 (IT8518E/COM5)
Digital I/O
8-bit digital I/O by Pin header (CN2)
4-bit digital Input
4-bit digital Output
4-bit digital I/O by Pin header (CN3)
2-bit digital Input
2-bit digital Output
Battery
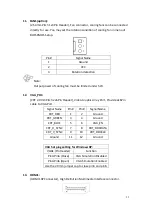
Support CR2477 Li battery by 2-pin header (BAT1/CMOS)
Smart Battery
1 x Smart battery
Support 3 Serial Li battery by 8-pin header (BAT2)
Audio
Support Audio via Realtek ALC662-VD HD audio codec
Support Line-in, Line-out, MIC by 2x6-pin header
Keyboard /Mouse
1 x PS2 keyboard/mouse by box pin header (CN3)
Expansion Bus
1 x mini-PCI-express slot
1 x PCI-express (CN3)
Touch Ctrl
1 x Touch ctrl header for TCH1 (ITE8518E/COM6)
(JP4 setting
:
RS232 or USB 2.0)
Summary of Contents for PC9 A Series
Page 12: ...11 1 3 Dimensions Figure 1 1 Dimensions of PC9070 Figure 1 2 Dimensions of PC9080...
Page 13: ...12 Figure 1 3 Dimensions of PC9101 Figure 1 4 Dimensions of PC9120...
Page 14: ...13 Figure 1 5 Dimensions of PC9150A Figure 1 6 Dimensions of PC9156A Resistive Touch...
Page 16: ...15 Figure 1 9 Dimensions of PC9185A Figure 1 10 Dimensions of PC9215A Resistive Touch...
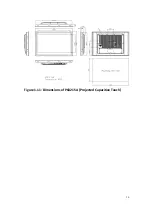
Page 17: ...16 Figure 1 11 Dimensions of PC8215A Projected Capacitive Touch...
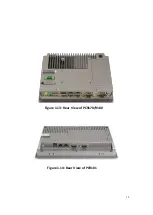
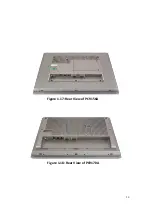
Page 19: ...18 Figure 1 13 Rear View of PC9170 9180 Figure 1 14 Rear View of PC9101...
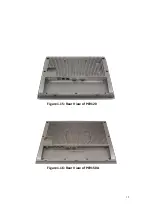
Page 20: ...19 Figure 1 15 Rear View of PC9120 Figure 1 16 Rear View of PC9150A...
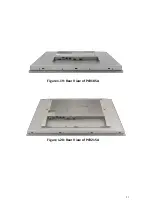
Page 21: ...20 Figure 1 17 Rear View of PC9156A Figure 1 18 Rear View of PC9170A...
Page 22: ...21 Figure 1 19 Rear View of PC9185A Figure 1 20 Rear View of PC9215A...
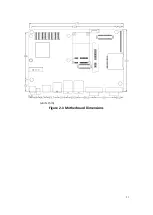
Page 32: ...31 units mm Figure 2 1 Motherboard Dimensions...
Page 83: ...82 Step 3 Read license agreement Click Yes Step 4 Click Next...
Page 84: ...83 Step 5 Click Install Step 6 Click Install...
Page 85: ...84 Step 7 Click Next Step 8 Click Yes I want to restart this computer now Then click Finish...
Page 88: ...87 Step 5 Click Install to begin the installation Step 6 Click Finish to exit the wizard...
Page 92: ...91 Step 3 Read the license agreement Then click Yes to continue Step 4 Click Next to continue...
Page 95: ...94 Step 2 Select Resistive Touch Step 3 Click Next to continue...
Page 97: ...96 Step 6 Wait for installation Then click Next to continue Step 7 Click Continue Anyway...
Page 99: ...98 Step 2 Select Projected Capacitive Step 3 Click Next to continue...
Page 102: ...101 Step 9 Go to C Program Files eGalaxTouch Click Next Step 10 Click Next...
Page 109: ...108 About This panel displays information about the PenMount controller and driver version...
Page 120: ...119 Hardware Saturn Hardware Configuration...
Page 121: ...120 About To display information about eGalaxTouch and its version...


