30
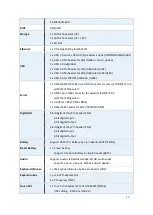
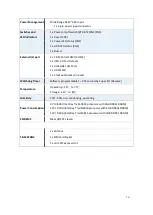
Power Management
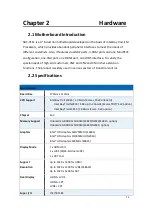
Wide Range DC9V~36V input
1 x 3-pin power input connector
Switches and
LED Indicators
1 x Power on/off switch (BT1/BT2/CN2/CN3)
1 x Reset (CN2)
1 x Power LED status (CN1)
1 x HDD LED status (CN2)
1 x Buzzer
External I/O port
2 x COM Ports (COM1/COM2)
2 x USB 2.0 Ports (stack)
2 x RJ45 GbE LAN Ports
1 x HDMI Port
1 x Stack audio Jack (Line out)
Watchdog Timer
Software programmable 1 – 255 second by Super I/O (Reserve)
Temperature
Operating: -20
℃
to 70
℃
Storage: -40
℃
to 85
℃
Humidity
10% - 90%, non-condensing, operating
Power Consumption
2V /0.80A (Intel Bay Trail E3845 processor with 4GB DDR3L DRAM)
12V /0.70A (Intel Bay Trail N2930 processor with 4GB DDR3L DRAM)
12V /0.60A (Intel Bay Trail E3815 processor with 2GB DDR3L DRAM)
EMI/EMS
Meet CE/FCC class A
TB-528CAN2
2 x CAN bus
1 x SIM Card Socket
1 x mini-PCI-express slot
Summary of Contents for PC9 A Series
Page 12: ...11 1 3 Dimensions Figure 1 1 Dimensions of PC9070 Figure 1 2 Dimensions of PC9080...
Page 13: ...12 Figure 1 3 Dimensions of PC9101 Figure 1 4 Dimensions of PC9120...
Page 14: ...13 Figure 1 5 Dimensions of PC9150A Figure 1 6 Dimensions of PC9156A Resistive Touch...
Page 16: ...15 Figure 1 9 Dimensions of PC9185A Figure 1 10 Dimensions of PC9215A Resistive Touch...
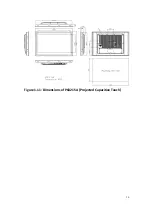
Page 17: ...16 Figure 1 11 Dimensions of PC8215A Projected Capacitive Touch...
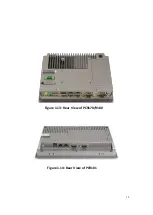
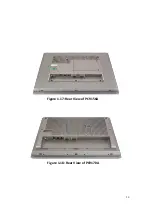
Page 19: ...18 Figure 1 13 Rear View of PC9170 9180 Figure 1 14 Rear View of PC9101...
Page 20: ...19 Figure 1 15 Rear View of PC9120 Figure 1 16 Rear View of PC9150A...
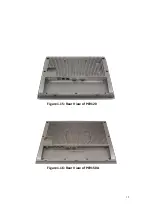
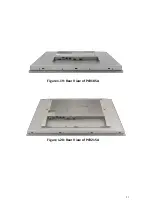
Page 21: ...20 Figure 1 17 Rear View of PC9156A Figure 1 18 Rear View of PC9170A...
Page 22: ...21 Figure 1 19 Rear View of PC9185A Figure 1 20 Rear View of PC9215A...
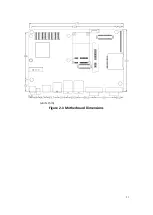
Page 32: ...31 units mm Figure 2 1 Motherboard Dimensions...
Page 83: ...82 Step 3 Read license agreement Click Yes Step 4 Click Next...
Page 84: ...83 Step 5 Click Install Step 6 Click Install...
Page 85: ...84 Step 7 Click Next Step 8 Click Yes I want to restart this computer now Then click Finish...
Page 88: ...87 Step 5 Click Install to begin the installation Step 6 Click Finish to exit the wizard...
Page 92: ...91 Step 3 Read the license agreement Then click Yes to continue Step 4 Click Next to continue...
Page 95: ...94 Step 2 Select Resistive Touch Step 3 Click Next to continue...
Page 97: ...96 Step 6 Wait for installation Then click Next to continue Step 7 Click Continue Anyway...
Page 99: ...98 Step 2 Select Projected Capacitive Step 3 Click Next to continue...
Page 102: ...101 Step 9 Go to C Program Files eGalaxTouch Click Next Step 10 Click Next...
Page 109: ...108 About This panel displays information about the PenMount controller and driver version...
Page 120: ...119 Hardware Saturn Hardware Configuration...
Page 121: ...120 About To display information about eGalaxTouch and its version...

