7
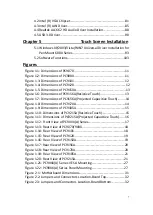
4.2 Intel (R) VGA Chipset……………………………………………….……......81
4.3 Intel (R) LAN Driver………..………………………………………..………...85
4.4 Realtek ALC662 HD Audio Driver Installation………………………88
4.5 USB 3.0 Driver…………………………………………………………………….90
5.1 Windows XP/2003/Vista/WIN7 Universal Driver Installation for
PenMount 6000 Series...……………….…………………………………...93
5.2 Software Functions…………………………………………………………..103
Figures
Figure 1.1: Dimensions of
PC9070 ............
.……………………..……………......11
Figure 1.2: Dimensions of
PC9080.............
.……………………..………………...11
Figure 1.3: Dimensions of
PC9101............
.……………………..…………………12
Figure 1.4: Dimensions of
PC9120.............
.……………………..…………………12
Figure 1.5: Dimensions of
PC9150A...........
.……………………..…………………13
Figure 1.6: Dimensions of
PC9156A
(Resistive Touch)..…
.......
…….…
.
……13
Figure 1.7: Dimensions of
PC9156A
(Projected Capacitive Touch)..
......
.14
Figure 1.8: Dimensions of
PC9170A..........
..……………………………………….14
Figure 1.9: Dimensions of
PC9185A..........
….……………………………………..15
Figure 1.10: Dimensions of
PC9215A
(Resistive Touch)…………
......
……….15
Figure 1.11: Dimensions of
PC9215A
(Projected Capacitive Touch).
.....
16
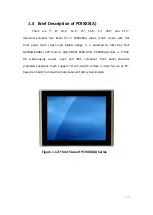
Figure 1.12: Front View of
PC9XXX(A)
Series……………………
...
……………..17
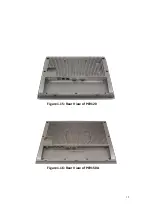
Figure 1.13: Rear View of
PC9070/9080....
……………………………………..…18
Figure 1.14: Rear View of
PC9101.......
………………………………………….….18
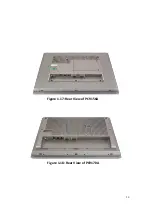
Figure 1.15: Rear View of
PC9120.......
………………………………………….….19
Figure 1.16: Rear View of
PC9150A.....
………………………………………….….19
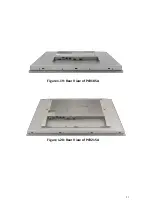
Figure 1.17: Rear View of
PC9156A.....
……………………………………….….….20
Figure 1.18: Rear View of
PC9170A.....
……………………………………….….….20
Figure 1.19: Rear View of
PC9185A.....
………………………………………….….21
Figure 1.20: Rear View of
PC9215A.....
………………………………………………21
Figure 1.21:
PC9XXX(A)
Series VESA Mounting…………………………………27
Figure 1.22:
PC9XXX(A)
Series Panel Mounting………………………………...27
Figure 2.1: Motherboard Dimensions………………………………………….…….31
Figure 2.2: Jumpers and Connectors Location-Board Top……………….….32
Figure 2.3: Jumpers and Connectors Location-Board Bottom…………..…32
Summary of Contents for PC9 A Series
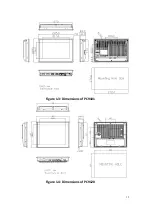
Page 12: ...11 1 3 Dimensions Figure 1 1 Dimensions of PC9070 Figure 1 2 Dimensions of PC9080...
Page 13: ...12 Figure 1 3 Dimensions of PC9101 Figure 1 4 Dimensions of PC9120...
Page 14: ...13 Figure 1 5 Dimensions of PC9150A Figure 1 6 Dimensions of PC9156A Resistive Touch...
Page 16: ...15 Figure 1 9 Dimensions of PC9185A Figure 1 10 Dimensions of PC9215A Resistive Touch...
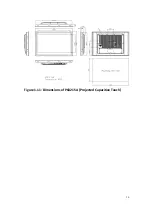
Page 17: ...16 Figure 1 11 Dimensions of PC8215A Projected Capacitive Touch...
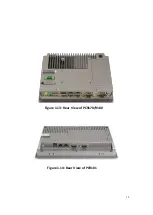
Page 19: ...18 Figure 1 13 Rear View of PC9170 9180 Figure 1 14 Rear View of PC9101...
Page 20: ...19 Figure 1 15 Rear View of PC9120 Figure 1 16 Rear View of PC9150A...
Page 21: ...20 Figure 1 17 Rear View of PC9156A Figure 1 18 Rear View of PC9170A...
Page 22: ...21 Figure 1 19 Rear View of PC9185A Figure 1 20 Rear View of PC9215A...
Page 32: ...31 units mm Figure 2 1 Motherboard Dimensions...
Page 83: ...82 Step 3 Read license agreement Click Yes Step 4 Click Next...
Page 84: ...83 Step 5 Click Install Step 6 Click Install...
Page 85: ...84 Step 7 Click Next Step 8 Click Yes I want to restart this computer now Then click Finish...
Page 88: ...87 Step 5 Click Install to begin the installation Step 6 Click Finish to exit the wizard...
Page 92: ...91 Step 3 Read the license agreement Then click Yes to continue Step 4 Click Next to continue...
Page 95: ...94 Step 2 Select Resistive Touch Step 3 Click Next to continue...
Page 97: ...96 Step 6 Wait for installation Then click Next to continue Step 7 Click Continue Anyway...
Page 99: ...98 Step 2 Select Projected Capacitive Step 3 Click Next to continue...
Page 102: ...101 Step 9 Go to C Program Files eGalaxTouch Click Next Step 10 Click Next...
Page 109: ...108 About This panel displays information about the PenMount controller and driver version...
Page 120: ...119 Hardware Saturn Hardware Configuration...
Page 121: ...120 About To display information about eGalaxTouch and its version...

