Chapter 3
BIOS Setup
3.1 Operations after POST Screen
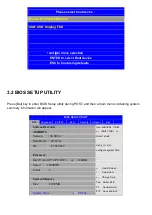
After CMOS discharge or BIOS flashing operation, the system will display the following screen for your
further operation. Press F2 key to continue or F1 key to enter CMOS Setup.
AMIBIOS©
2009 American Mega trends , Inc.
BIOS Date: 03/22/12 15:57:19 Ver: 08.00.16
CPU :
I
ntel
®
Atom™ CPU D525 @ 1.80GHz
Speed : 1.80 GHz
Press F11 for BBS POPUP
Initializing USB Controllers. . Done.
2038MB OK
Auto-Detecting Pri Master.. IDE Hard Disk
Pri Master : Hitachi HTS545016B9A300 PB0C64G
Ultra DMA
–
5, S.M.A.R.T. Capable and Status OK
Auto
–
detecting USB Mass Storage Devices ..
00 USB Mass storage devices found and configured
CMOS Settings Wrong
CMOS Data / Time Not Set
Press F1 to Run SETUP
Press F2 to load default values and continue
0085
After optimizing and exiting CMOS Setup, the POST screen displayed for the first time is as follows
and includes basic information on BIOS, CPU, memory, and storage devices.
AMIBIOS© 2009 American Mega trends , Inc.
BIOS Date: 03/22/12 15:57:19 Ver: 08.00.16
CPU :
I
ntel
®
Atom™ CPU D525 @ 1.80GHz
Speed : 1.80 GHz
Press DEL to Run Setup
Press F11 for BBS POPUP
Initializing USB Controllers. . Done.
2038MB OK
Auto-Detecting Pri Master.. IDE Hard Disk
Pri Master : Hitachi HTS545016B9A300 PB0C64G
Ultra DMA
–
5, S.M.A.R.T. Capable and Status OK
Auto
–
detecting USB Mass Storage Devices ..
00 USB Mass storage devices found and configured.
Checking NVRAM..
0085
Press
F11
key to enter Boot Menu during POST, as shown by the following figure.
Summary of Contents for PCH3582
Page 8: ...1 2 Dimensions Figure 1 1 Dimensions of PCH3582...
Page 9: ...Figure 1 2 Dimensions of PCH3782...
Page 10: ...Figure 1 3 Dimensions of PCH3982...
Page 33: ...1 4...
Page 64: ...Step 5 Click Next Step 6 Click Next to continue...
Page 68: ...Step 5 Click Install to begin the installation Step 6 Click Finish to compete the installation...
Page 70: ...Step 3 Click Yes to continue the installation Step 4 Wait for installation...
Page 71: ...Step 5 Select Yes I want to restart my computer now then click OK...
Page 75: ...Step 6 Wait for installation Then click Next to continue Step 7 Click OK...
Page 76: ...Step 8 Click Finish to compete installation...
Page 81: ...Setting...
Page 82: ...About This panel displays information about the PenMount controller and driver version...

