background image


www.ACOPower.com

KIT-HYS200MB

4120 Valley Blvd Walnut, CA 91789, USA

+1-626-737 1140

Power Your Green Life!

NOTE: Please connect the inverter or other load that it has the large start current 

to  the  battery  rather  than  to  the  controller,  if  the  inverter  or  other  load  is 

necessary. 

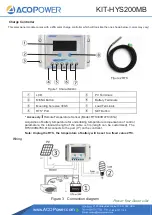
(1) Connect components to the charge controller in the sequence as shown above 

and pay much attention to the “+” and “-”. Please don’t insert the fuse or turn on the 

breaker during the installation. When disconnecting the system, the order will be 

reserved.

(2) After power on the controller,check the LCD on. Otherwise please refer to chapter  

6.Always connect the battery first, in order to allow the controller to recognize the 

system voltage.

(3) The battery fuse should be installed as close to battery as possible.The 

suggested distance is within 150mm.

(4) The VS-A series is a positive ground controller. Any positive connection of solar, 

load or battery can be earth grounded as required.

Button Function 

Button 

Function 

MENU 

button 

Browse interface 

Setting parameter 

SET 

button 

Load ON/OFF


Clear error 


E

nter into Set Mode 

  Save data 

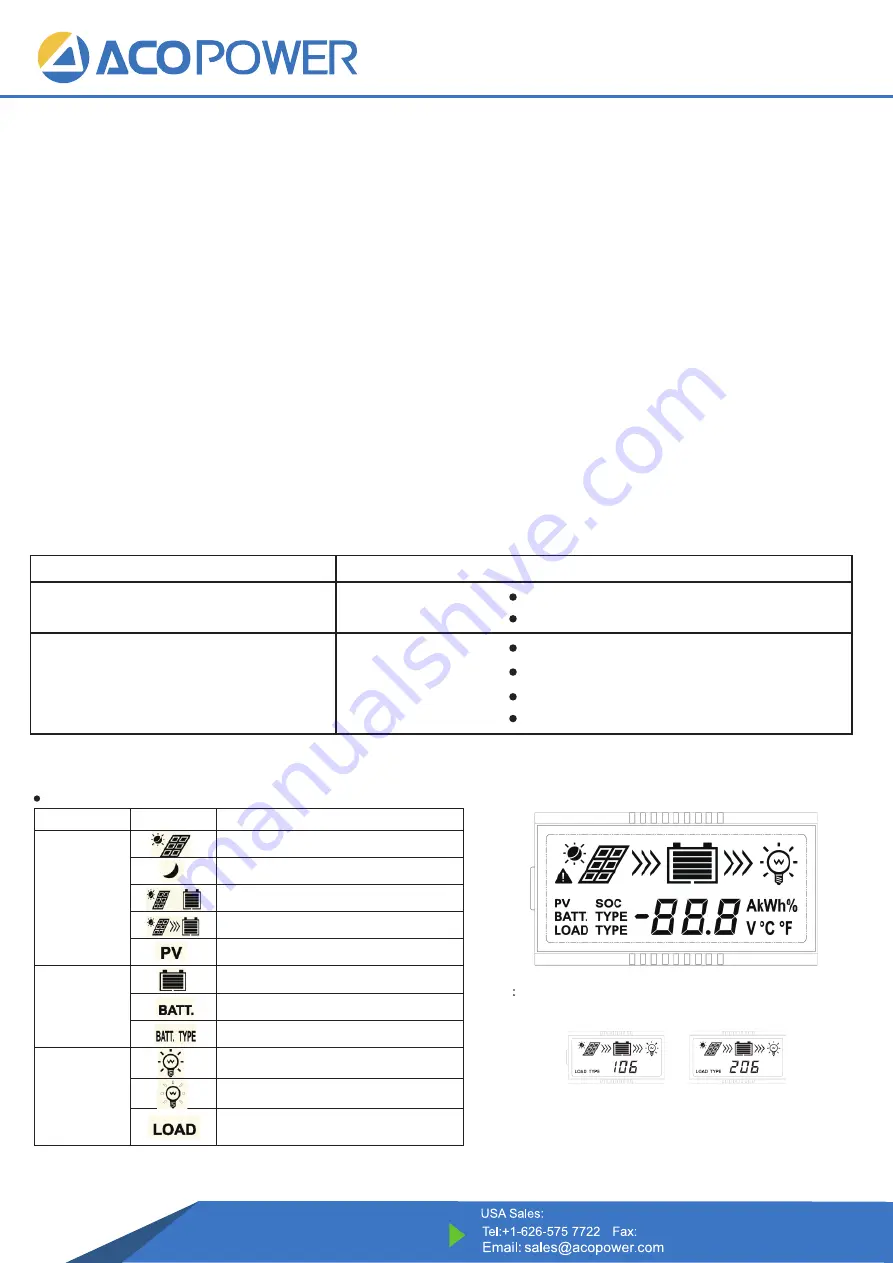
LCD Display

 Status Description 

Item 

Icon 

Status 

PV array 


Day 


Night   


No charging 


Charging 


PV Voltage, Current ,Power 

Battery 


Battery capacity, In Charging 


Battery voltage. current, temperature 


Battery type 

Load 


Load ON 


Load OFF 


Load Voltage, Current, Load mode 


NOTE


1)


When no operation, the interface will be automatic cycle, but the follow two 

interfaces not be display.


2

  Accumulative power zero clearing: Under PV power interface, press S

ET

 button 

and hold on 5s then the value blink, press 

SET

 button again to clear the value. 

3

  Setting temperature unit: Under battery temperature interface, press S

ET

 button 

and hold on 5s to switch.   

Summary of Contents for KIT-HYS200MB

Page 1: ...s 3 Aluminum frame 9a Red Positive Battery Clip 9b Black Negative Battery Clip 10 Anderson Plug 8 Cable 9 Battery Clips 14a Red Positive MC4 Cable 14b Black Negative MC4 Cable 11 Fuse 12 Handy carry b...

Page 2: ...ors After receiving the solar panel kit please check if all accessories are included in the package and prepare to test your kit 1 Locate a sunlit area clear from hanging branches or obstacles 2 Uncli...

Page 3: ...e a battery in working condition is used The charge controller will not power on with a bad battery A good thing to do is to test with your 12 V car battery Step 1 Clamp the red positive battery clip...

Page 4: ...Connect the MT 50 to the charge controller with the RS485 cable After an initial welcome screen and device info screen A similar screen will be shown with your own parameters 2 Press ESC to access the...

Page 5: ...oded GEL AGM Lithium lead acid battery and other deep cycle battery The batteries are used as car battery RV battery boat battery and emergency back up battery Step 1 understand your battery battery t...

Page 6: ...inals Mounting hole size 4 5 Load Terminals RTS Port SET Button Accessory Remote Temperature Sensor Model RTS300R47K3 81A Acquisition of battery temperature for undertaking temperature compensation of...

Page 7: ...attery as possible The suggested distance is within 150mm 4 The VS A series is a positive ground controller Any positive connection of solar load or battery can be earth grounded as required Button Fu...

Page 8: ...ON OFF Disabled Load will be on for 1 hour since sunset Load will be on for 1 hour before sunrise Load will be on for 2 hours since sunset Load will be on for 2 hours before sunrise Load will be on f...

Page 9: ...voltage 1 Please check the voltage of battery At least 9V voltage to activate the controller 2 Check the PV input voltage which should be higher than battery s Interface blink Battery over voltage Ch...

Page 10: ...s not waterproof Q Can I use an extension cables in the system A Yes any extension cable with MC4 connectors can be used before the solar charge controller ACOPOWER has 20ft 14AWG extension cables Q H...

Page 11: ...ke sure the battery is high enough then charge it by the solar panel Q Can I use the solar panel to avoid my battery drain A Yes Q My RV has a Zamp solar plug or other types of plugs how do I use this...

Page 12: ...18 months Items can be replaced refurbished due to quality issues buyer pays for all shipping Charge Controller The controller itself comes with a 1 year warranty Within 30 days of purchase Items can...

Reviews: