8
Low Setting
Turn Knob B clockwise to low setting (just before flame is extinguished). Check that the
setting pressure is in accordance with that given in the TECHNICAL INFORMATION
section (page 2). Adjust if necessary (Fig. 5).
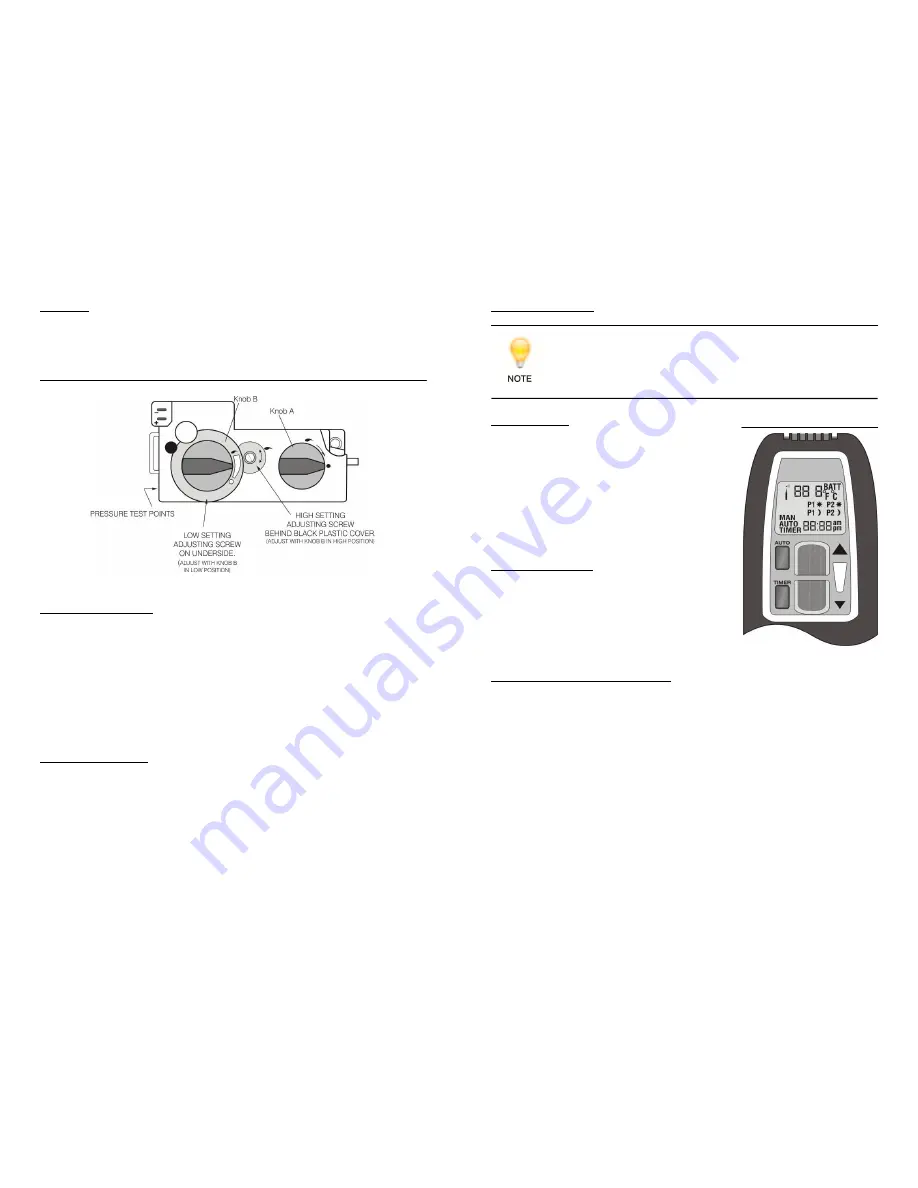
Fig. 5 - Remote Controlled Valve
Adjusting the Flame Height
•
To turn the fire on and/or to increase flame height, press ON
ON
ON
ON button of the remote
handset. Continue pressing until the desired flame height is obtained. Press and
hold the OFF
OFF
OFF
OFF button to reverse the procedure.
•
The receiver is equipped with a built-in delay, recognisable by the flickering light, to
facilitate fine adjustment of the flame.
•
The motorised valve is equipped with a slip clutch, allowing manual adjustment of
main gas by turning Knob B.
•
Set the desired programme and temperature on the handset as described in the
HANDSET OPERATION section (page 9)
To Turn OFF Gas to Stove
•
Turn Knob A clockwise until reaching stop. In this position only pilot gas flows. To
shut off the valve completely, press down slightly and continue to turn clockwise
from PILOT
PILOT
PILOT
PILOT position to the OFF
OFF
OFF
OFF position.
•
The safety interlock prevents re-ignition of the pilot flame until the thermocouple has
cooled down sufficiently (elapsed time will vary based on the thermocouple type).
Switching off the remote is not necessary. Disconnect the pressure gauge, tighten
the test point sealing screw and test for gas soundness.
9
HANDSET OPERATION
HANDSET OPERATION
HANDSET OPERATION
HANDSET OPERATION (refer to Fig. 6)
Programming the Desired Set Temperature
•
Press AUTO
AUTO
AUTO
AUTO until the display flashes.
•
Press (
) or (
) to set desired temperature.
•
Wait or press AUTO
AUTO
AUTO
AUTO to switch to automatic mode.
•
A sensor in the transmitter measures the room temperature. The controller compares
the room temperature with the set temperature and sends a signal to the receiver to
turn the gas valve motor, which adjusts the flame height accordingly.
Mains electrical power is not required as this system runs on batteries only.
Battery information:
Handset – 1 x 9V block
Receiver – 4 x 1.5V AA
Setting the Display
•
After connecting the battery or by simultaneously
pressing AUTO
AUTO
AUTO
AUTO and TIMER
TIMER
TIMER
TIMER, the display flashes.
You are in set mode.
•
From set mode, press AUTO
AUTO
AUTO
AUTO to switch from
°
F
(and 12-hour clock) to
°
C (and 24-hour clock) or
vice versa.
•
The display will automatically return to manual
after some time, but you may immediately return
to manual by re-pressing the TIMER
TIMER
TIMER
TIMER button.
Setting the Current Time
•
After connecting the battery or by simultaneously
pressing AUTO
AUTO
AUTO
AUTO and TIMER
TIMER
TIMER
TIMER, the display flashes.
You are in set mode.
•
From set mode, press (
) to set the hour and
(
) to set the minute.
•
Wait or press TIMER
TIMER
TIMER
TIMER to return to 'manual' mode.
Fig. 6 - Remote Transmitter


