Series 461A User's Manual Single/Dual Alarm
___________________________________________________________________________________________
- 6 -
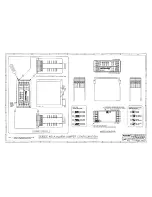
4. After programming the jumpers, install the alarm circuit boards
back into their case as described in the assembly procedure
below.
Assembly Procedure for the 461A Plastic Housing:
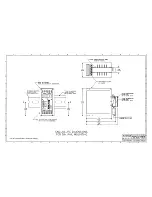
1. Refer to drawing 4501-545 and line up the left plastic side with
the board and terminal assembly. Carefully press the pieces
together.
2. Align the pins of the center section with the side and press the
pieces together.
3. Now line up the right side of the housing with the left side and
center assembly and carefully press the pieces together.
Alarm - Adjustment Procedure:
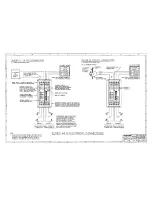
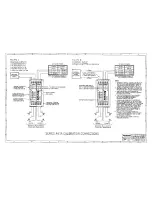
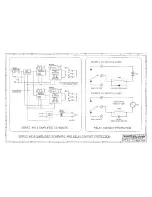
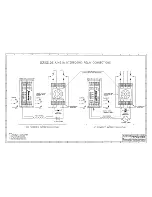
Connect the alarm as shown in Calibration Connection Drawing
4501-543. For best results, the input source must be adjustable
over the entire range of the unit and settable to an accuray of 0.1%
or better. The alarm status LED's can be used to indicate relay
action. The RED LED will turn ON when the relay changes state
from a non-alarm to an alarm condition, at the same time the
GREEN LED will turn OFF.
The setpoint and deadband potentiometers are accessible from
the front panel of the alarm (refer to Drawing 4501-543). The
screwdriver blade used to adjust the potentiometers should not be
more than 0.1 inch (2.54mm) wide.
Alarm - Calibration Example:
MODEL: 461A-V1-SMRN-1-DIN-NCR (Single Alarm)
Input:
4 to 20mA - Install a jumper between the Input (+)
and Input (L) terminals for current input.
Setpoint:
12mA
Alarm Action:
High (HI) Alarm
Alarm Type:
Failsafe
Output:
DPDT Relay Contacts
A. Adjustment Procedure (High and Low Alarms):
Notes (Adjustment Procedure):
1. The adjustment procedure is similar for other inputs.
2. The adjustment procedure is the the same for both Failsafe and
Non-Failsafe operation.
3. When the RED LED is ON, it indicates an alarm condition for
both the Failsafe and Non-Failsafe mode of operation. The
GREEN LED is ON when the signal is in the Normal operating
range.
4. If unit is a dual alarm (-DMRN models), repeat this procedure for
the second channel using the SP2 and DB2 adjustments
(SetPoint 2 and DeadBand 2).
5. Noise and/or jitter on the input signal has the effect of reducing
(narrowing) the instrument's deadband and may produce
contact chatter. To reduce this undesired effect, increase the
deadband setting.
HIGH ALARMS:
1. Set the deadband adjustment pot DB1 fully counter-clockwise for
minimum deadband (approximately 0.5% for a pure DC signal).
2. Adjust the input source for 12.000mA DC (value desired for
alarm setting in this example).
3. For High Alarms, turn the setpoint potentiometer (SP1)
clockwise, just until the relay changes states and the RED LED
turns OFF. If the RED LED is already off, proceed to step 4.
4. Now, turn the setpoint potentiometer (SP1) counter-clockwise
very slowly, just until the relay changes states and the alarm
RED LED turns ON. The setpoint is now calibrated. Check
your calibration as noted in step 5 below.
5. For High Alarms, check the setpoint by reducing the input
current until the relay changes states and the alarm RED LED
turns OFF. Then slowly increase the input current until the
alarm just trips (RED LED turns ON). The input current should
be within
±
0.1% (
±
0.016mA) of the desired trip point. If not,
perform steps 1 through 4 again.
6. If increased deadband is required, turn DB1 control clockwise.
Vary the input signal near the trip point and determine the input
values for pull-in and drop-out of the relay. The difference
between these values is the amount of deadband. Note that
readjusting the deadband potentiometer does not affect the
setpoint adjustment.
LOW ALARMS:
1. Set the deadband adjustment pot DB1 fully counter-clockwise for
minimum deadband (approximately 0.5% for a pure DC signal).
2. Adjust the input source for 12.000mA DC (value desired for
alarm setting in this example).
3. For LOW Alarms, turn the setpoint pot (SP1) counter-clockwise
until the relay changes state and the RED LED turns OFF.
4. Now, turn the setpoint potentiometer (SP1) clockwise very
slowly, just until the relay changes states and the RED LED
turns ON. The setpoint is now calibrated. Check your
calibration as noted in step 5 below.
5. For LOW Alarms, check the setpoint by raising the input current
until the relay changes states and the RED alarm LED turns
OFF. Then slowly decrease the input current until the alarm just
trips (RED LED turns ON). The input current should be within
±
0.1% (
±
0.016mA) of the desired trip point. If not, perform
steps 1 through 4 again.
6. If increased deadband is required, turn DB1 control clockwise.
Vary the input signal near the trip point and determine the input
values for the pull-in and drop-out of the relay. The difference
between these values is the amount of deadband. Note that
readjusting the deadband potentiometer does not affect the
setpoint adjustment.
NOTE: Optionally, the setpoint may be adjusted by connecting
a DVM to the setpoint voltage testpoints on the front of the
alarm. The voltage measured here is 0 to 5V, corresponding to
0 to 100% of input voltage span. For current inputs, a setpoint
voltage of 1 to 5V corresponds to 4 to 20mA of input current.
This setpoint voltage represents the true setpoint to within 1% of
input span and is a more convenient method of setpoint
adjustment where high precision is not required. These test
points will accept up to an 0.080 inch diameter probe tip (do not
insert probe tip more than 0.4 inches deep).
GENERAL MAINTENANCE:
This alarm contains solid-state components and requires no
maintenance except for periodic cleaning and calibration verification.
When a failure is suspected, a convenient method for identifying a
faulty alarm is to exchange it with a known good unit. It is highly
recommended that a non-functioning alarm be returned to Acromag
for repair, since Acromag uses tested and burned-in parts, and in
some cases, parts that have been selected for characteristics
beyond that specified by the manufacturer. Further, Acromag has
automated test equipment that thoroughly checks the performance
of each alarm.


