Model DT233-0600
Dual Two-Wire mV/TC Input Transmitters
Acromag, Inc. Tel: 248-295-0880
- 19 -
http://www.acromag.com
- 19 -
https://www.acromag.com
Quick Overview
–
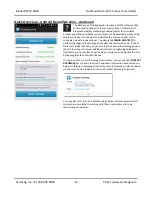
Windows
Click
“Open”
to connect to the DT233-0600
and your screen will look like:
For detailed configuration and calibration
procedures, see the Operation Step-By-Step
section of the Technical Reference on page 22 of
this manual.
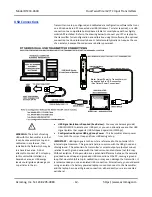
In addition to the Android Agility mobile app, this transmitter can
be optionally configured and calibrated via its USB Configuration
Software and a USB connection to a Windows PC or laptop. The
configuration software can be downloaded free of charge from our
web site at
. This software is also
included on a CDROM bundled with the Configuration Kit TTC-SIP
(see Accessories section). For the DT233 model, look for program
DT233Config.exe. This software is compatible with Windows 7 or
later versions of the Windows operating system.
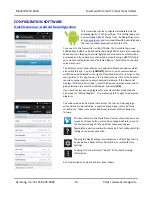
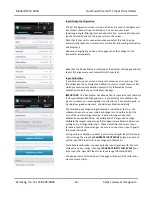
The initial configuration software screen for the DT233 model is
shown at left after clicking [Open] to open communication with a
connected module. The Configuration screen is divided into three
pages as follows: Communication Set up, I/O Config/Test, and
Calibration. A short description of each of these pages follows.
Communication Setup
–
First Select/Connect to Unit Here
•
Select from connected transmitters using the Device scroll field
and Open/Close communications with them.
•
Display the Model, Serial Number, and Manufacturer of the
connected transmitter, and report connection Status, or reset
a connected unit.
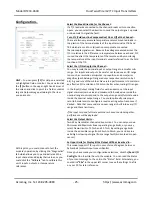
I/O Config/Test
–
Reconfigure and/or Test the Unit Here
•
You can click the
[Get I/O Config]
button to retrieve the I/O
configuration of the currently connected transmitter.
•
Select the Input Range for the model. For an DT233, you can
select current ranges ±20mA, 0-20mA, 4-20mA, 0-11.17mA, or
±1mA for inputs at TB1, or voltage ranges of ±0.5V and 0-
500mV for inputs at TB2.
•
Set the level of digital filtering to High, Medium, Low, or None.
Note that the corresponding I/O response time varies with
filter selection (see Specifications).
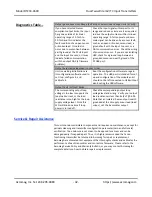
•
View the unit’s
communication status in the Status field.
•
Use the I/O Scaling fields to specify the specific input range
endpoints that are to correspond to the 4mA and 20mA output
endpoints of each output. You can scale the input differently
for each output.
•
You may set your own output range limits or enable
Namur limits that differentiate fault levels from over and
under range detents.
•
Last, after making I/O changes, send your settings to the unit
by clicking the
[Send I/O Config]
button and following the on-
screen prompts.


