Model DT233-0600
Dual Two-Wire mV/TC Input Transmitters
Acromag, Inc. Tel: 248-295-0880
- 20 -
http://www.acromag.com
- 20 -
https://www.acromag.com
Quick Overview - Windows..
HELP
–
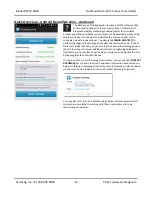
You can press F1 for Help on a selected or
highlighted field or control. You can also click the
[?] button in the upper-right hand corner of the
screen and then click to point to a field or control
to get a Help message pertaining to the item you
pointed to.
TEST I/O - Optionally, Verify Unit Operation Here
After making CONFIGURE I/O changes, I/O Scaling, setting Output
limits, and Sending your configuration to the unit, you can TEST I/O
and Start/Stop Polling the input channel, as required to check your
input readings.
•
Click
[Start Polling]
to periodically read your input channel and
validate its operation. Click
[Stop Polling]
to stop polling the
input channel. Note the simulated red lamp left of the button
flashes slowly when the software is polling the input channel.
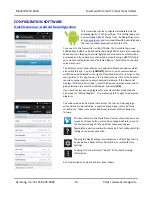
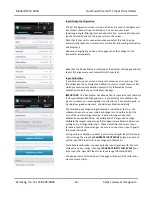
CALIBRATION - Calibrate the Input and/or Output if Needed
The unit has already been factory calibrated, but if you encounter
excessive error, you can click the Calibration tab to display the
Calibration control page shown in the screen at left. To calibrate the
Input or Output stage of this model, simply click the respective Input
or Output
“
Instructions
”
button to get started and follow the on-
screen prompts.
Input…
Set the Input Range to calibrate on the I/O Config/Test page and
click
[Send I/O Config]
before attempting calibration. On the
Calibration page, click the
[Input Cal Instructions]
button to begin
input calibration.
When you click the
[Zero]
or
[Full Scale]
buttons of CALIBRATION -
Input, you will be prompted to apply a current at TB1, or voltage
level at TB2. Once you have applied the signal to the correct input
terminals, click
[OK]
of the prompt to calibrate it and follow the on-
screen instructions.
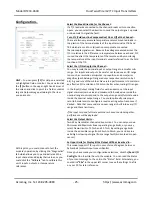
Output…
Click
[Output Cal Instructions]
to begin output calibration. You will
be prompted to adjust the input as required to drive the output to
precisely 4.000mA (Zero), or 20.000mA (Full-Scale). Once the
output is set to zero or full-scale, you simply click the corresponding
[Zero]
or
[Full-Scale]
button of CALIBRATION
–
Output to set the
output zero or full-scale endpoint.
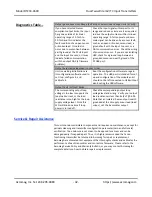
Factory Settings (In Case of Trouble or for Sanitation Purposes)
•
Restores a transmitter to its original factory calibration.
•
Restores a transmitter to its initial factory configuration.
You can click
[Restore ...]
buttons if you misconfigure or improperly
calibrate a transmitter such that its operation appears erratic.
Calibration Status (Bottom of Screen)
•
Displays communication status messages for the calibration
process.
The CALIBRATION STATUS field at the bottom of the screen will
display status messages relative to calibration.


