background image

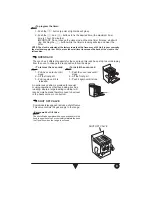
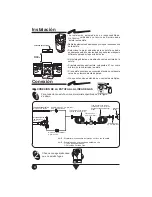
TORNILLO DE AJUSTE

DE PILOTO HORNO

• Los modelos con termostato tienen piloto en el horno,

   para ajustarlo:

1.- Con el frente de perillas retirado, localice el tornillo de ajuste

     de la flama del piloto, en el termostato. (Ver figura).

2.- Retire la charola del horno (ver Pag. 11 ), gire el control

                          aproximadamente 30° hasta sentir un tope,

                          (esta es la posición de piloto) y encienda el

                          piloto con un cerillo.

3.- Con un desarmador plano y delgado gire el tornillo de

     ajuste del piloto hasta obtener una flama de

     aproximadamente 1 cm.

4.- Coloque el frente de perillas, los tornillos y las perillas

     nuevamente en su lugar.

Posición de Piloto.

• 

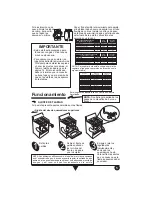
Para encender el horno con termocontrol de

encendido manual:

1.- Encienda un cerillo y colóquelo cerca del

     agujero de  la charola del horno, al mismo

     tiempo presione y gire 1/4 de vuelta la perilla

     del horno.

2.- Verifique que el quemador del horno se haya

     encendido.

• 

Para encender el horno con termocontrol de

  4 pasos y encendido manual:

1.- Encienda un cerillo y colóquelo cerca del

     agujero de  la charola del horno, al mismo

     tiempo presione y gire 1/4 de vuelta la perilla

     del horno.

2.- Verifique que el quemador del horno se haya

     encendido.

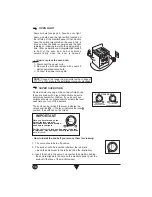
ENCENDIDO MANUAL DE QUEMADORES

APAGADO

FLAMA

MÍNIMA

FLAMA

MÁXIMA

APAGADO

FLAMA

MÍNIMA

FLAMA

MÁXIMA

66

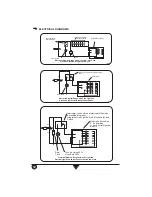
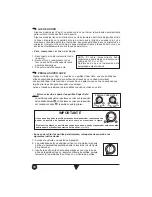
 • Ajuste del aire del quemador del horno:

Retire la

parrilla del

horno (Ver

Pag.9)

Retire la charola

del horno. (Ver

Pag. 11)

1

2

3

A

 - Afloje el tornillo del

     regulador.

B

 - Gire el regulador un

     poco.

C

 - Encienda el horno.

D

 - Verifique que las

     flamas sean azules.

E

 - Si las flamas no son

     azules repita desde

     el paso 

B

, al finalizar

     apriete nuevamente

     el tornillo.

F

 - Coloque la charola

     del horno y la parrilla

     nuevamente en su

     lugar.

STM00396 R.0

Summary of Contents for AF30200

Page 1: ...ev B THIS MANUAL CONTAINS IMPORTANT INFORMATION READ IT BEFORE FIRST USE OF YOUR RANGE INSTALLATION USE AND CARE MANUAL Covers the following models RANGES AF30212 AF30200 AF30314 AF30434 AF30437 AF30550 AF30439 AF30500 AF30600 AF30547 AF30700 AF30548 AF30850 ...

Page 2: ...op Grates Aluminium Super Burner Aluminium Burner 2 Positions Aluminium Burner Stamp Burner Thermostato Thermocontrol Thermocontrol 4 steps Oven Grates Broiler Safe Knob Clock Overput Griddle Panoramic Door Light Fifth Stamp Burner Model Characteristics AF30439 Safe Valve Metalic Door 2 AF30212 Upper Burners Ignition Knobs Oven Ignition 2 2 3 3 3 3 4 6 6 5 2 2 2 2 2 2 2 2 1 Manual Manual Elect Man...

Page 3: ...e range surroundings free of flammable material gasoline and other vapors or flammable liquids Do not get too close to the flame produced by the burners or wear loose clothing your clothes may ignite if contact by open flames Do not use your range to warm rooms because this is dangerous Failure to do so can result in death fire or explosion WARNING Griddle Aluminium Super Burner Aluminium Burner 2...

Page 4: ... adapter 4 Gas Supply Connection GAS SUPPLY CONNECTION 2 Check with soap solution for leaks To connect the range use the material shown in the bottom figure 1 Installation EXHAUST DEVICE 61 cm min Proper installation is your responsibility A qualified technician or Service technician must install this range Remove all packing material and put the range accessories in their places Select the best l...

Page 5: ...until you get a blue flame that will not cause the flame to lift or blow off the burner HowtoUseYourRange NOTE Do not obstruct the gas exhaust of the oven or broiler NOTE To operate this range with natural gas is required a kit according to the chart This kit is available at your nearest Authorized Service Center Range Model Model AF30850 98014567 Model AF30548 98014567 Model AF30700 98014567 Mode...

Page 6: ...en tray while you push in and turn the oven knob 1 4 of the way the burner will light immediately 2 Verify that the oven burner has been ignited How to light the oven burner with 4 steps thermocontrol manually 1 Open the oven door light a match and place the flame at the igniter hole in the front of the oven tray while you push in and turn the oven knob 1 4 of the way the burner will light immedia...

Page 7: ...er will light immediatly OFF MINIMUM FLAME MAXIMUM FLAME Some models have the multiposition burners on the center of the range or on the sides To turn on the surface burners with electronic ignition Some models see page 2 have electronic ignition to operate it push the button located on the left side of the manifold panel while you push and turn the desired knob Release the ignition button when th...

Page 8: ...1 4 of the way to ignite the oven burner this position is minimum flame 3 Verify that the oven burner has been ignited OVEN WITH THERMOSTAT AND PILOT Knob on the mark of ignition OFF pilot 8 To adjust the digital clock 1 Push the button 2 Push the button until the hour is adjusted 3 Push the button until the minutes are adjusted Some models see page 2 have broiler in the bottom of the range To use...

Page 9: ...ven to change the rack position follow the steps To remove the oven rack 1 Pull the oven rack until it stops 2 Lift the front part 3 Pull it again until it is released To install the oven rack 1 Push the oven rack until it stops 2 Lift the front part 3 Push it again until it stops An extra rack position is provided for special cooking operations other than baking such as roasting where a large roa...

Page 10: ...ight Some models have the light switch located on the left side of the manifold panel Other models have the switch integrated on the oven knob it turns on when the knob is operated and the light remains on allowing to watch the baking at any time Other models have an integrated light switch in front of the oven door and is activated automatically when the door is opened How to replace the oven bul...

Page 11: ...ay by the side holes and lift the rear side 2 Push the tray towards the top and back of the oven 3 Pull the tray out the oven Do not use caustic soda or cleaning agents which contain it to clean the range Failure on following the above will permanently damage the surfaces where it is applied IMPORTANT For your safety Do not store gasoline orotherflamableliquids near to your range Make sure that th...

Page 12: ...gram Range with Oven Light and Electronic Ignition with Independent Switch and Clock Electrical Diagram Range with Oven Light and Electronic Ignition with Independent Switch Oven Bulb 40 W Ignition Module Integrated Oven Light Switch Electronic Ignition Switch N L1 Oven Bulb 40 W Ignition Module 6 outlets Clock L N Oven Light Switch on Manifold Panel Clock Electronic Ignition Switch on Knobs Elect...

Page 13: ...URE AND STAMP AUTHORIZED REPRESENTATIVE Indicate precise steet col state and zip code IMPORTANT NOTE WARRANTY WHIRLPOOL MEXICO S A DE C V Antigua Carretera a Roma km 9 Col Milagro Apodaca N L Mexico C P 66600 phone 81 83 29 21 00 in the terms of this policy we warranty to the buyer and the consumer of this range identified in this following policy COVERED CONCEPTS Manufacturing defects that hinder...

Page 14: ...s and addresses can change without previous notice Follow are listed our exclusive service centers if you need assistance or spare parts call the nearest service center where you will be assisted by qualified technicians ...

Page 15: ...NEJO LEA CUIDADOSAMENTE ESTE INSTRUCTIVO ANTES DE USAR POR PRIMERA VEZ SU ESTUFA Ampara los siguientes Modelos AF30212 AF30200 AF30314 AF30434 AF30437 AF30550 AF30439 AF30500 AF30600 AF30547 AF30700 AF30548 AF30850 Impreso en México 2004 STM00838 Rev B ESTUFAS ...

Page 16: ...AF30434 AF30314 Parrillas superiores Super quemador Aluminio Quemador Aluminio Quemadores Aluminio 2 Posiciones Quemador Estampado Termostato Termocontrol Termocontrol 4 pasos Parrilla de horno Asador Perilla de seguridad Reloj Comal de sobreponer Puerta Panorámica Luz Quinto quemador Estampado Modelo Características AF30439 Valvula de Seguridad Puerta metálica con ventana 2 AF30212 Encendido Quem...

Page 17: ...ustibles gasolina y otros vapores o líquidos flamables No se acerque demasiado a las flamas de los quemadores ni use ropa suelta ya que se puede encender y causar quemaduras No use su estufa para calentar habitaciones ya que esto es peligroso No seguir estas instrucciones puede ocasionar incendio quemaduras o la muerte ADVERTENCIA Características eléctricas nominales Parrillas Superiores Parrilla ...

Page 18: ... Para conectar su estufa utilice el material especificado en la figura de abajo 1 2 Cheque con agua jabonosa que no existan fugas Instalación CAMPANA EXTRACTORA La instalación apropiada es su responsabilidad Un técnico calificado o un técnico de Servicio debe instalar esta estufa Retire los elementos de empaque y coloque los accesorios de la estufa Seleccione la mejor ubicación para su estufa no d...

Page 19: ...lo sujetan Empuje o jale los reguladores individualmente y encienda los quemadores hasta obtener flamas azules que no causen que la flama se desprenda del quemador Funcionamiento NOTA No obstruya la salida de los gases de combustión de horno o asador NOTA Para operar esta estufa con gas natural se requiere el juego de conversión de acuerdo con la siguiente tabla Este juego está disponible con su C...

Page 20: ...rola del horno al mismo tiempo presione y gire 1 4 de vuelta la perilla del horno 2 Verifique que el quemador del horno se haya encendido Para encender el horno con termocontrol de 4 pasos y encendido manual 1 Encienda un cerillo y colóquelo cerca del agujero de la charola del horno al mismo tiempo presione y gire 1 4 de vuelta la perilla del horno 2 Verifique que el quemador del horno se haya enc...

Page 21: ... FLAMA MÁXIMA Algunos modelos ver Pag 2 cuentan con quemadores multiposición estos quemadores se cambian de posición permitiendo concentrar más calor para ollas grandes Algunos modelos tienen los quemadores multiposición en el lado izquierdo de la estufa DUO FLAMA QUEMADORES MULTIPOSICIÓN Algunos modelos tienen los quemadores multiposición al centro de la estufa o en los extremos Para encender los...

Page 22: ...en la perforación del quemador QUEMADORES SIN ROTAR QUEMADORES ROTADOS Perilla en posición de encendido APAGADO piloto 8 Como funciona su reloj digital 1 Oprima la tecla donde aparece 2 Oprima las teclas o hasta fijar la hora correcta En P M se enciende un punto en el lado izquierdo del reloj Algunos modelos ver Pag 2 cuentan con reloj timer digital Algunos modelos ver Pag 2 cuentan con asador en ...

Page 23: ...amente para liberarla Para instalarla en la estufa 1 Empuje la parrilla hasta el tope 2 Levante la parrilla de la parte frontal 3 Empújela nuevamente para que llegue hasta el fondo del horno PARRILLA DEL HORNO Para hornear alimentos muy grandes puede usarse el soporte extra de la parte inferior El horno tiene 4 diferentes soportes para la parrilla la parrilla tiene un tope que evita que se salga c...

Page 24: ...oca en la posición del candado cerrado la perilla no podrá girarse Forma correcta de operar las perillas Super Safe El colocar la palanca en posición de candado cerrado cuando el quemador está encendido podría dañar o dificultar la operación de la perilla Super Safe LUZ DE HORNO Algunos modelos ver Pag 2 cuentan con luz en el horno la iluminación es importante para revisar el horneado sin abrir la...

Page 25: ... misma Como retirar la charola del horno 1 Tome la charola de las ranuras laterales y levántela de la parte trasera 2 Empuje la charola hacia adentro del horno para destrabarla 3 Jale la charola para sacarla Para su seguridad Si huele a gas Abra las ventanas No toque interruptores eléctricos Apague todas las flamas cerrando la válvulageneraldepaso Llame inmediatamente a la central de fugas o a su ...

Page 26: ...o Electrónico con Interruptor Independiente y Reloj Foco de Horno 40 W Diagrama Eléctrico Estufa con Luz en el Horno y Encendido Electrónico con Interruptor Independiente Módulo de Encendido 4 6 u 8 salidas Interruptor Luz de Horno e Interruptor Módulo de Encendido Integrados N L1 Foco de Horno 40 W Módulo de Encendido Reloj L N Interruptor Luz de Horno en Frente Perillas Reloj Diagrama Eléctrico ...

Page 27: ...Col Milagro Apodaca N L México C P 66600 Tel 81 83 29 21 00 en los términos de esta póliza garantiza al comprador de la estufa identificada en la presente póliza exclusivamente lo siguiente CONCEPTOS CUBIERTOS POR LA GARANTÍA Defectos de fabricación que impidan total o parcialmente el correcto funcionamiento de la estufa que se presenten dentro del término de vigencia de esta garantía Reparación c...

Page 28: ...ar sin previo aviso A continuación se enlistan nuestros centros de servicio exclusivos si requiere de asistencia partes o refacciones llame al centro de servicio mas cercano a su domicilio en donde será atendido por personal altamente calificado ...

Reviews: