background image

 Video quick setup screen

 Press SETUP button to go to quick setup

 Select recording options

 Use SETUP/MODE button to choose option

 Press ON/OFF to confirm setting option

 Video quick setup screen

 Press SETUP button to go to quick setup

 Select video resolution and recording speed

 Use SETUP/MODE button to choose option

 Press ON/OFF to confirm setting option

 Video quick setup screen

 Press SETUP button to go to quick setup

 Select image quality

 Use SETUP/MODE button to choose option

 Press ON/OFF to confirm setting option

 Video quick setup screen

 Press SETUP button to go to quick setup


Select WiFi connectivity

 Use SETUP/MODE  utton to choose option

 Press ON/OFF to confirm setting option

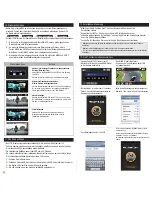
8. Quick setup

1.


Press SETUP button to select quick setup options on bottom of the screen.

2.


Quick setup mode changes as 

     (  

recording option


resolution


 image quality  


wifi on/off


→ 

exit 

 ) in turn.

3.


Select the quick setup option and press ON/OFF


button to adjust setting option.

4.


In setting option, press SETUP and MODE button to choose setting option.

5.


 Press ON/OFF button to confirm setting option.

Quick setup screen

Operation

 Photo quick setup screen

 Press SETUP button to go to quick setup


Select photo shooting option

 Use SETUP/MODE button to choose option

 Press ON/OFF to confirm setting option

 Photo quick setup screen

 Press SETUP button to go to quick setup


Select image size

 Use SETUP/MODE button to choose option

 Press ON/OFF to confirm setting option

 Without entering user setting menu, user can adjust various quick setups in live screen.

●  

User can select basic settings and detailed setting options through user setup menu.


9. User setup menu

Resolution

Recording

option

Image quality

Auto rec

1080p 60fps, 30fps
1200p 60fps, 30fps
720p 120fps, 60fps, 30fps
480p 240fps
Manual

Super Fine / Fine / Normal

off / 0 / 5 / 10 sec.  (starts recording automatically 
0, 5 or 10 seconds after switching on camera)

Timer 1min, 5min, 10min, 30min
Multi file REC. 1min, 5min, 10min, 30min

(record consecutive video files of setup time)

Time lapse 1sec, 3sec, 5sec, 10sec, 30sec

(captures each image of setup time and save as video file)

1080p 50fps, 25fps
1200p 50fps, 25fps
720p 100fps, 50fps, 25fps
480p 200fps

Function

Sub menu

Description

Recording

option

Manual

Burst 11 photo images in one second
Timer 5sec, 10sec

Time lapse 0.5sec, 1sec, 3sec, 5sec, 10sec, 30sec

(captures each image of setup time and save as photo)

On / Off . Shows current time in recorded file

On / Off . 
When the camera is shooting underwater, select 
'aqua scene on' to give more vivid color images in the scene

Resolution

12M (4000 x 3000) 4:3
8.5M (3648 x 2432) 3:2
7.2M (3648 x 2052) 16:9

FOV

AE Metering

Mic. Volume

Buzzer

LED

WiFi

TV Out

Time

Format

Default Setting

Auto LCD Off

Auto Power Off

Info

Aqua scene

Time stamp

Wide (standard) / Medium / Narrow  Field of View
Center (standard) / Average / Spot

Image
quality

Super Fine 

Normal

Fine

Video

Photo

Effect

Settings

Off, 30%, 60%, 100%
Buzzer On / Off

Shows current firmware version

LED On / Off
WiFi On / Off
NTSC / PAL
Set current time (YYMMDD:HHMM)
Yes / No.  

Memory card format
Yes / No

Turn back all settings to default
Yes / No

LCD will automatically turn off in 30sec when there is 

no operation                    
Yes / No

The camera will automatically turn off in 3min when there 

is no operation.

1.


Press SETUP button and hold for 2 seconds to enter user setup menu.

2.


User setup menu is divided into four categories (video, photo, effect, settings)

3.


Press  SETUP button to move category.

4.


Press MODE button to enter the sub-menu.

5.


Press ON/OFF button to select and confirm setting option within sub-menu.

NTSC

PAL

13

Auto rec: Off

Auto rec: Off

AE Metering: Center

AE Metering: Center

Summary of Contents for X7

Page 1: ...www actionpro de User Manual Bedienungsanleitung ...

Page 2: ...ON OFF button to confirm setting menu Function Button Description If Auto Power off is set the camera will automatically shut down in 3 minutes when there is no operation 1 Open the battery cover and insert ACTIONPRO Li ion battery 2 Open the battery cover and insert Micro SD card Please use high quality Micro SD Cards Class10 we recommend to use original Intenso or Samsung Class10 memory cards 3 ...

Page 3: ...scription ALL VIDEO In high speed recording audio recording will be disabled WVGA 848x480 240 200 fps high speed video recording High speed recording file is played with 1 8 speed slow motion video In high speed recording audio recording will be disabled 1 After the camera is turned on press ON OFF button to start video recording 2 When the camera starts to record LED light blinks and shows record...

Page 4: ...0fps 30fps 1200p 60fps 30fps 720p 120fps 60fps 30fps 480p 240fps Manual Super Fine Fine Normal off 0 5 10 sec starts recording automatically 0 5 or 10 seconds after switching on camera Timer 1min 5min 10min 30min Multi file REC 1min 5min 10min 30min record consecutive video files of setup time Time lapse 1sec 3sec 5sec 10sec 30sec captures each image of setup time and save as video file 1080p 50fp...

Page 5: ...e control panel and select the file by pressing ON OFF button 3 While the file is playing you can press SETUP MODE button to use control panel and select the file by pressing ON OFF button Press MODE button and hold for two seconds to change to playback mode Mode changes as video mode photo mode playback mode video mode in turn User can view recorded video or photo through LCD screen of the camera...

Page 6: ... waterproof housing 12M Pixel high precision digital Image CMOS sensor 152 wide angle field of view FOV Built in 2 0 LCD Built in WiFi antenna Versatile recording resolution 1080p 1200p 720p 480p High speed slow motion recording 720p 120fps 480p 240fps Maximum 11 burst photo shots in one second H 264 codec saved as MP4 format Rechargeable Li ion battery Battery running time max 100 minutes of cont...

Page 7: ...MSQ X7 ...

Page 8: ...lung aufzurufen Halten Sie die Taste SETUP 2 Sekunden lang gedrückt um das Einstellungsmenü aufzurufen oder zu verlassen Benutzereinstellung Einstellungskategorie ändern Anwählen einer Einstellung Bestätigen einer Einstellung Drücken Sie die Taste EIN AUS um eine zuvor angewählte Einstellung aufzurufen Mit den Tasten SETUP oder MODE können Sie danach den gewünschten Wert auswählen und diesen mit E...

Page 9: ...ann der Benutzer vor der Aufnahme die SCHNELLEINRICHTUNG für Foto über die Taste SETUP auswählen 4 LCD Bildschirm Videobildschirm Fotobildschirm Zeigt den aktuellen Aufnahmemodus Video oder Foto Zeigt den Status der WLAN Verbindung Zeigt die verbleibende Speicherkapazität in Prozent Zeigt den Ladezustand des Akkus Zeigt die aktuelle Aufnahmeoption während der Aufnahme von Videos oder Fotos Zeigt d...

Page 10: ...ie Einstellungsoption zu bestätigen Ohne das Einstellungsmenü aufzurufen kann der Benutzer zahlreiche Schnelleinstellungen im Live Bildschirm vornehmen Bildschirm Schnelleinrichtung Video Drücken Sie die Taste SETUP um zum Schnellen Einrichten zu gelangen Wählen Sie die Aufnahmeoptionen Verwenden Sie die Tasten MODE und SETUP um die gewünschte Option zu wählen Drücken Sie die Taste EIN AUS um die ...

Page 11: ...nden Sie können einen Netzstecker optionales Zubehörteil verwenden um schneller zu laden Ein vollständiges Aufladen dauert damit etwa 2 5 Stunden 11 Den Akku aufladen 1 Schalten Sie die Kamera aus 2 Verbinden Sie den USB Anschluss der Kamera über ein USB Kabel mit Ihrem Computer 3 Die Status LEDs leuchten und der Akku wird geladen 4 Die LEDs gehen aus wenn der Akku vollständig aufgeladen ist 10 Wi...

Page 12: ...ahme für Zeitlupe 720p 100 120fps 480p 200 240fps Maximal 11 Burst Fotoaufnahmen in einer Sekunde H 264 Codec gespeichert im MP4 Format Wiederaufladbarer Lithium Ionen Akku Akkulaufzeit Ungefähr 100 Minuten durchgehende Aufnahme 1080p 30fps die Aufnahmedauer variiert je nach Aufnahmemodus und Umgebungsbedingungen Aufladedauer 3 5 Stunden über USB 2 5 Stunden über den Netzstecker optionales Zubehör...

Page 13: ...MSQ X7 ...

Page 14: ......

Reviews: