ENGLISH
4. Preparing the camera
1) Open the battery compartment and insert the original
ACTIONPRO battery.
2) Open the side cover and insert a micro SD card
(Class10, up to 32GB, not included).
3) Connect the camera with the USB cable to a PC or to an
appropriate USB charger to charge the battery. The red LED
lights up to indicate charging. The battery is full when the red
LED turns off. The camera must be turned off during charging!
5. First video recording
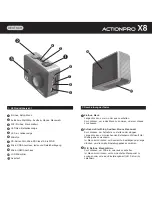
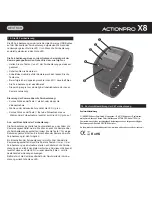
1) Press and hold button
➊
for about 3 seconds to switch the
camera on.
2) Short press button
➋
, to start video recording. The blue LED
➍
starts flashing.
3) Short press button
➋
, to stop video recording. The blue LED
➍
is lit continuously.
4) Press and hold button
➊
for about 2 seconds to switch the
camera off.
6. First photo recording
1) Press and hold button
➊
for about 3 seconds to switch the
camera on.
2) Press and hold button
➋
for about 2 seconds to switch to
photo mode. The symbol at the upper left corner of the LCD
display will switch from a video camera symbol to a camera
symbol.
3) Short press button
➋
, to take a photo.
4) Press and hold button
➋
to switch to playback mode.
Press and hold button
➋
again to switch back to video mode.
5) Press and hold button
➊
for about 2 seconds to switch the
camera off.
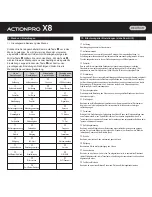
3. WARNINGS BEFORE USE
1) The waterproof housing has to be checked for damage and
contamination in the seal area before each dive. Seals are
wearing parts which needs to be maintained by greasing
with silicone grease and, if necessary, needs to be replaced.
2) Before use, please check mounting parts and accessories
on predamages.
3) Always attach the camera in a way that it cannot get lost
in case of a broken mounting part, because it could
endanger you and others.
4) Please only use the original ACTIONPRO X8 batteries
5) Please only use high quality chargers and cables with
the neccessary approval signs.
6) Do not use damaged or wet batteries, cables and chargers
7) We do not accept any liability for direct or indirect damages
caused by non-compliance with these instructions or other
improper operation.
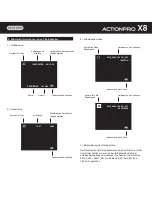
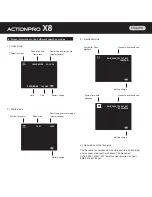
Video mode
Photo mode
Playback mode
Video mode
Photo mode
Playback mode
7. Playback mode
You can playback your recordings on a PC, on the built in LCD
screen and on a TV, using the HDMI port of the camera.
1) Switch on the camera. Press and hold button
➋
to witch to
playback mode. Depending on which mode you are currently in
you may have to repeat this step.
2) The playback mode will be shown by this symbol in the
upper left corner of the LCD screen and you will see your
latest recording.
Using button
➌
allows you to scroll through your recordings.
If a recording is a video, you can use button
➋
to start and
stop video playback.
3) You also can use the menu to delete individual or all recordings
or provide protection against deletion. Please see section 9 of
the instructions to learn how to operate the menu.
Summary of Contents for X8
Page 1: ...www actionpro de Ver 101 BEDIENUNGSANLEITUNG USER MANUAL ...
Page 20: ......


