Vll
21
Configuring File and Print Sharing
Vll
20
Configuring File and Print Sharing
9.
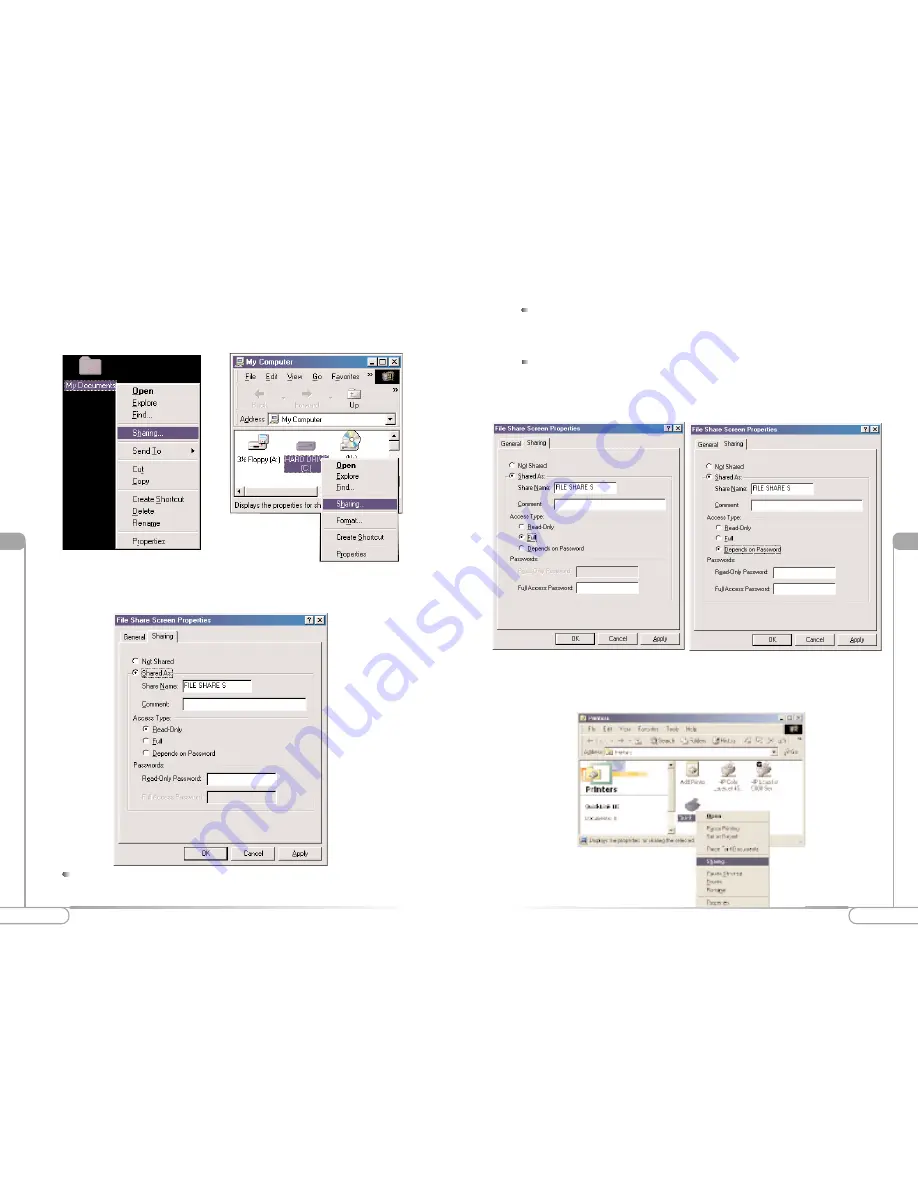
After your computer has restarted and you entered a password and user name, you
must enable a file or drive for sharing. Locate the file or drive you wish to share.
(The easiest way to achieve this is through your Windows Explorer, located in the
start menu.) Right click on the
File
or
Drive
you wish to share. In the given menu
select
Sharing
.
10.
The following screen will appear. Please select
Shared As
. This will enable other
users on your network to see the file or drive you selected. Then you can chose the
Access Type:
Read Only:
This will allow other users on your network to view and read the file
or drive you selected. They will not be able to modify it in any way. You can fur-
ther restrict their privlidges by entering a password in the appropriate field.
Full:
This will allow other users on your network to read, modify, move and
delete any information in the shared drive or file. You can further restrict their
privlidges by entering a user name and password.
Depends on Password:
This will allow you to set both Read Only and Full access
on the shared file or drive. The level of access will depend on the passwords you
enter in the appropriate field.
When you are finished click
Apply
and then
OK
.
11.
Next you need to share your printer. On your desktop, click
Start
, click
Settings
,
and then select
Printers
.
12.
Right click on the printer you want to share. Select “Sharing” from the given list.
Summary of Contents for USB Wireless Adapter 802UI3(b)
Page 13: ...24 Notes ...


