background image

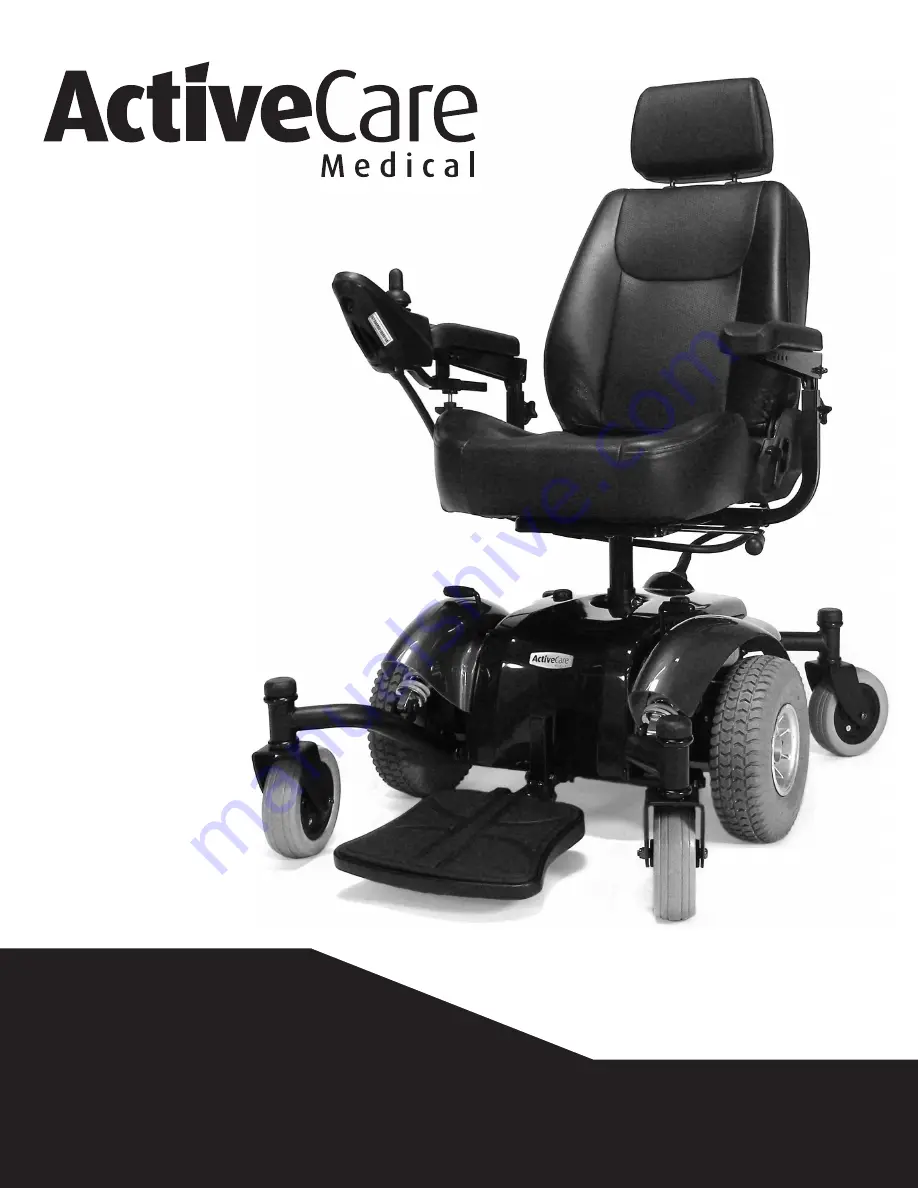
Intrepid/P22  

Power Wheelchair

Owner's Manual


Summary of Contents for Intrepid P22

Page 1: ...Intrepid P22 Power Wheelchair Owner s Manual...

Page 2: ...Assembly 7 6 Operation 12 General Information 12 Controller 12 Freewheel Mode 12 Security Functions 13 Transporting Your Chair 13 Positioning Belts 14 Use on Inclines 14 7 Batteries Charging 16 Charg...

Page 3: ...are Provider Failure to follow the instructions in this manual and those located on your power chair can lead to personal injury and or damage to the power chair and may void the warranty The symbols...

Page 4: ...ion best at temperatures between 32 122o Fahrenheit 12 Disassembling of controller motor or charger by end user is prohibited the dealer will not take any responsibility on these kinds of situations 1...

Page 5: ...ng EM energy can be measured in volts per meter V m Each power wheelchair can resist EMI up to a certain intensity level The higher the immunity level the greater the protection At this time current t...

Page 6: ...aking Therefore the warnings listed below are recommended to prevent possible interference with the control system of a power wheelchair Warning Electromagnetic interference EMI from sources such as r...

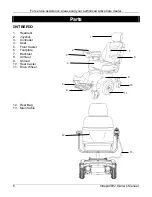
Page 7: ...d ActiveCare dealer 6 Intrepid P22 Owner s Manual Parts INTREPID 1 Headrest 2 Joystick 3 Controller 4 Seat 5 Front Caster 6 Footplate 7 Backrest 8 Armrest 9 Shroud 10 Rear Caster 11 Drive Wheel 12 Rea...

Page 8: ...all pieces before beginning assembly 1 ActiveCare Power Wheelchair 1 Seat 2 Armrests 1 Headrest 1 Controller with Arm 1 Battery Charger 1 Tool Packet 2 Batteries 2 Star Knobs 1 Owners Manual 1NOTE The...

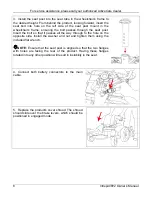
Page 9: ...the seat post Insert the bolt so that it passes all the way through to the hole on the opposite side Install the washer and nut and tighten them using the included flat wrench 1NOTE Ensure that the s...

Page 10: ...Get help when placing the seat onto the post to avoid scratching the cover shroud 6B If your Intrepid is a P22 model with a pan seat install the seat as in Step 6A above and place the cushion purchase...

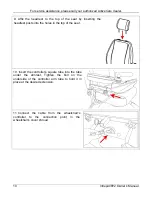
Page 11: ...rting the headrest posts into the holes in the top of the seat 10 Insert the controller s square tube into the tube under the armrest Tighten the bolt on the underside of the controller arm tube to ho...

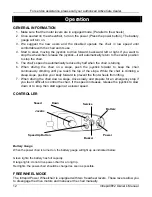
Page 12: ...6 8 hours but can take as many as 10 hours depending on the batteries charge level when starting and the ambient temperature 12 Ensure that the 115V 230V switch on the product s battery charger is set...

Page 13: ...ush the joystick forward to keep the chair continuously climbing until you reach the top of the slope While the chair is climbing a steep slope position your body forward to prevent the front wheels f...

Page 14: ...tion 5 The power chair will not operate while charging the batteries TRANSPORTING YOUR CHAIR If you will be traveling with your power chair you may find it necessary to use a lift elevation product or...

Page 15: ...E ON INCLINES Many buildings have wheelchair accessible ramps with specified degrees of incline designed for easy and safe access Some ramps may have turning switchbacks 180 degree turns that require...

Page 16: ...an attendant is present to help stabilize the chair Failure to heed could result in the power chair tipping over Warning Never travel down an incline backward Doing so may cause the power chair to ti...

Page 17: ...y leave your power mobility product plugged into the charger for longer than 8 10 hours without causing damage to the batteries In some instances ActiveCare Medical s battery charger may show two gree...

Page 18: ...ld begin to run When LED turns to red yellow it means the charger has been under normal charging condition 6 When LED turns to red green it means the battery has been fully charged The charging proced...

Page 19: ...CTRICAL BRAKES Testing of the electrical brakes should be carried out on a level floor with at least three feet of clearance space around the power chair Power on the controller and push the joystick...

Page 20: ...tick to neutral and try again 2 Battery Try charging the batteries Batteries need replacing Check the battery cables and connections 3 Left Motor Check left motor cables and connections 4 Right Motor...

Page 21: ...o Seat 7 Power Motor Two 24V x 320W x 4600rpm Controller Dynamic A50A Batteries Two DC12V x 35AH Battery Charger 5 Amp Offboard Brakes Electromagnetic Freewheel Mode Yes Tires Flat free Front Rear Cas...

Page 22: ...emoved from the box Exclusions also include components with damage caused by Contamination Abuse misuse accident or negligence Excessive wear Battery fluid spillage or leakage Commercial use or use ot...

Page 23: ...ity ease To validate your product s warranty you must complete this form and return it to ActiveCare Medical immediately Please print or type Your Name Your Address City State Zip Phone Number E mail...

Page 24: ...de Place Stamp Here _____________________________ _____________________________ _____________________________ ActiveCare Medical Product Registration 2 Harbison Way Columbia SC 29212 Fold Here Fold He...

Reviews: