Installation
4
Installation
Please read through this chapter carefully before you attempt to attach the Pioneer 2 TCM2 Module to
your Pioneer 2 Mobile Robot.
The P2 TCM2 Module requires P2OS version 1.6 or later.
Contact pioneer-support@ActivMedia.com if you need to update P2OS.
Step 1: Remove Power
Switch the Main power to the Pioneer 2 Mobile Robot off.
Step 2a: Locate Auxiliary Extension Cable
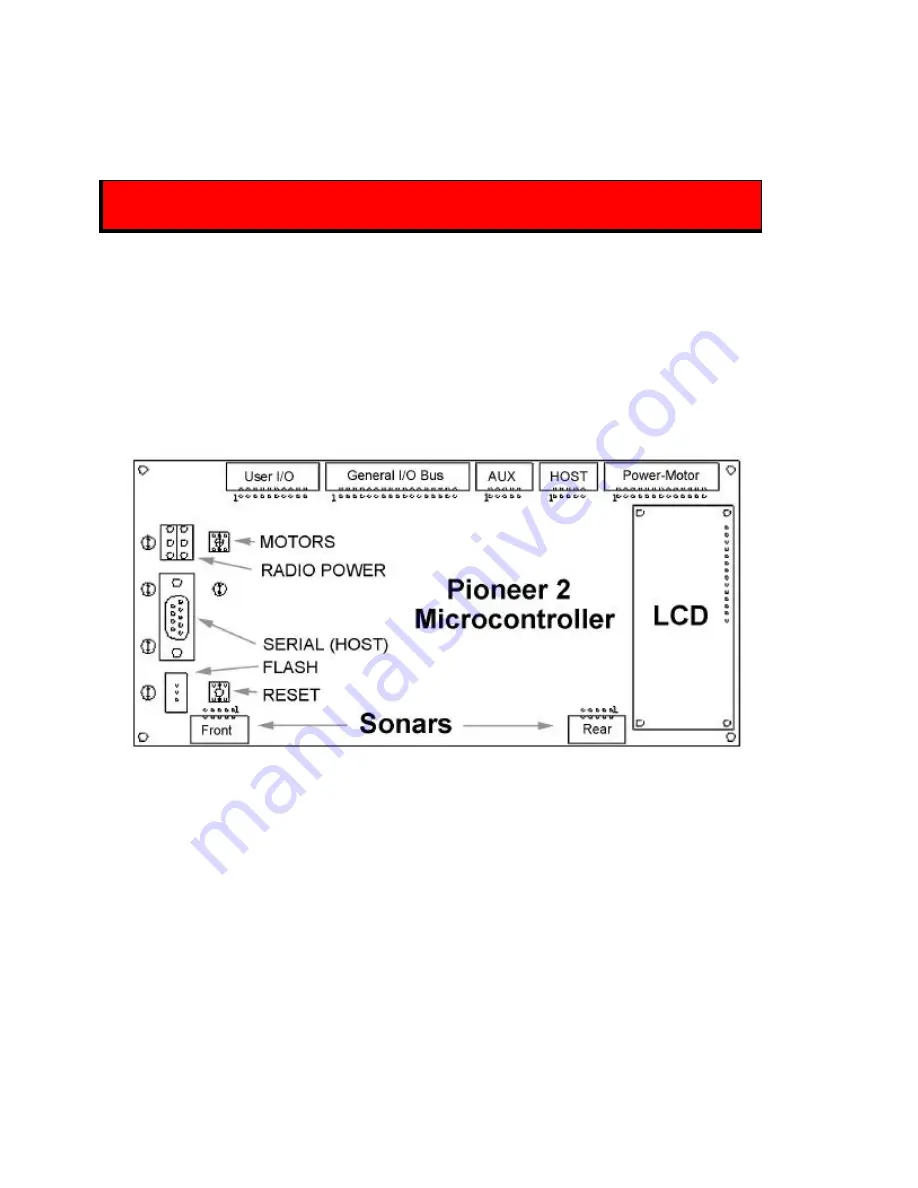
The TCM2 Module attaches to your Pioneer 2’s microcontroller's AUX serial port (Figure 2-1). Some
robots, including those with radio Ethernet and/or the Sony robotic camera, come with an extension cable
already attached to the auxiliary serial port on the microcontroller to which you may plug in the TCM2
Module.
Figure 2-1. Pioneer 2 Microcontroller
Locate the Auxiliary extension cable by removing the Access plug from the Top Plate. Inside, you may
find the extension cable. If one exists and has an open connector, simply insert the 10-pin IDC plug at the
end of the TCM2 Module's cable into that 10-pin socket. That's all there is to it; skip to Step 3.
Step 2b: Install AUX Extension Cable
If your robot does not have an AUX extension cable, or if the one installed does not have an open
socket, install the AUX extension cable that comes with your TCM2 Module. Deft fingers can locate the
port through the Access plug (locking tab on top of the connector) and plug in the AUX extension cable.
Summary of Contents for Pioneer 2 TCM2
Page 4: ...iv ...


