background image

Owner's Manual

Wall Hung Split System

Owner's Manual - Wall Hung Split System

Doc. No.9590-4011  

Ver. 2  210622


11

Cleaning the Condenser Coils

Clean the coils at least once a year or more frequently if unit is located in a dusty and dirty environment, in order to 
maintain your system’s proper operating performance. High discharge pressures are good indication that the coils need 
cleaning. When using detergent or solvents to clean the coils, follow the manufacturer’s instructions to avoid potential 
damage to the coils and to the unit.  

To clean the refrigerant coils, use a soft brush and water spray, such as garden hose or pressure washer with low pressure 
nozzle. 

 WARNING

Do Not Use High Alkaline Detergent!

When using detergent for coil cleaning, ensure that the alkaline level is no higher than 8.5, which can cause corrosion damage 
to the coils. 

No Water into the  Electrical Compartments! 

Ensure consideration is given to the possibility of water entering the electrical compartments during cleaning of the 
condenser coil. 


Coil Cleaning Procedures


Disconnect power to the unit.


Remove the louvred panels from the unit to gain access to the air inlet side of the coils.


Use a soft brush to remove loose dirt and debris from both sides of the coils.


Straighten bent coil fins with fin comb.


Prepare the detergent solutions according to the manufacturer’s instructions.


Spray solution at a 90

o

 angle to the coils, keeping a minimum nozzle spray angle of 15°, with at least a 1800mm distance 

from the coils and 600 psi pressure.


Spray leaving air side of the coils first then the air inlet side. Allow the solution to stand on the coils for five minutes.


Rinse both sides of the coils with cool clean water.


Inspect the coils, if they are still dirty, repeat the cleaning procedure.


Clean and wipe dry the outer and inner sides of the unit, the refrigerating parts and other components.


Ensure that the condensate drain lines are not blocked. 


Reinstall all unit panels, covers and guards.


Restore electrical power to the unit after ensuring all electrical components are dry.

Summary of Contents for Serene 2

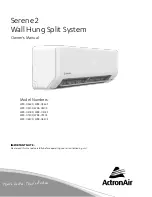
Page 1: ...anual Model Numbers WRC 026CS WRE 026CS WRC 035CS WRE 035CS WRC 050CS WRE 050CS WRC 072CS WRE 072CS WRC 085CS WRE 085CS IMPORTANT NOTE Please read this manual carefully before operating your air condi...

Page 2: ...l Information 3 02 Safety Instructions 3 03 Unit Specification and Features 5 03 01 Unit Parts 5 03 02 Achieving Optimal Performance 6 03 03 Features 6 03 04 Setting Vertical Angle of Air Flow 7 03 05...

Page 3: ...ctions contained on this manual Safe work practices and environment must be the paramount importance in the performance of all the service procedures This appliance is not intended for use by young ch...

Page 4: ...airconditionerisusedtogetherwithotherheatingdevices thoroughlyventilatetheroomtoavoidoxygendeficiency DONOTclimbontoorplaceobjectsontopoftheoutdoorunit DONOToperatetheairconditionerwhenusingfumigantin...

Page 5: ...N is set IONISER SWING TURBO ECO BREEZE AWAY INTUITIVE PROXIMITY SENSOR or QUIET feature is turned on Displayed for three seconds when TIMER OFF is set IONISER SWING TURBO ECO BREEZE AWAY INTUITIVE PR...

Page 6: ...as been restored Anti mildew When the unit is turned off after COOL AUTO or DRY mode the unit will continue to operate a low power to dry up condensed water to prevent mildew growth Easyconnect Contro...

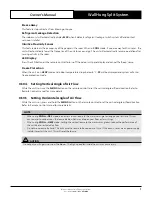
Page 7: ...em will enter freeze protection mode 03 04 Setting Vertical Angle of Air Flow While the unit is on use the SWING button on the remote control to set the vertical angle airflow direction Refer to Remot...

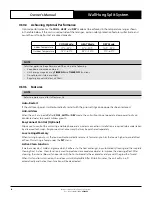
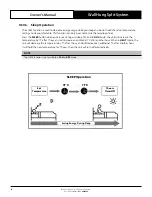
Page 8: ...s not available in FAN or DRY mode Page 10 The SLEEP function is used to decrease energy use while you sleep and don t need the same temperature settings to stay comfortable This function can only be...

Page 9: ...ext page 2 Press the MANUAL CONTROL button one time to activate FORCED AUTO mode The display will show 24 0c 3 Press the MANUAL CONTROL button again to activate FORCED COOLING mode The display will sh...

Page 10: ...ng Fan Blades Always make sure that all power supply to the Outdoor Fans are turn Off and isolated Observe WH S safety procedures do not wear loose clothing and any jewellery when working near the fan...

Page 11: ...sibility of water entering the electrical compartments during cleaning of the condenser coil Coil Cleaning Procedures Disconnect power to the unit Remove the louvred panels from the unit to gain acces...

Page 12: ...back into place and clip it into the indoor unit PULL HOLD BOTH SIDES OF THE FILTER AS SHOWN IN THE IMAGE AND PULL UPWARDS Filter is held in place by mag pull magnets which helps in easily re fitting...

Page 13: ...off the unit and disconnect the power Remove batteries from remote control Maintenance Pre Season Inspection After long periods of non use or before periods of frequent use do the following Check for...

Page 14: ...generated from the defrosting process The indoor unit makes noises A rushing air sound may occur when the louvre resets its position A squeaking sound may occur when running the unit due to expansion...

Page 15: ...lace batteries The Unit s 3 minute protection has been activated Wait three minutes after restarting the unit Timer is activated Turn timer off The unit starts and stops frequently There s too much or...

Page 16: ...d Trade Marks of Actron Engineering Pty Limited ActronAir is constantly seeking ways to improve the design of its products Therefore specifications are subject to change without notice Document 9590 4...

Reviews: