200S
33
I - 3 Milling Specific Oper
ations
Arc Milling
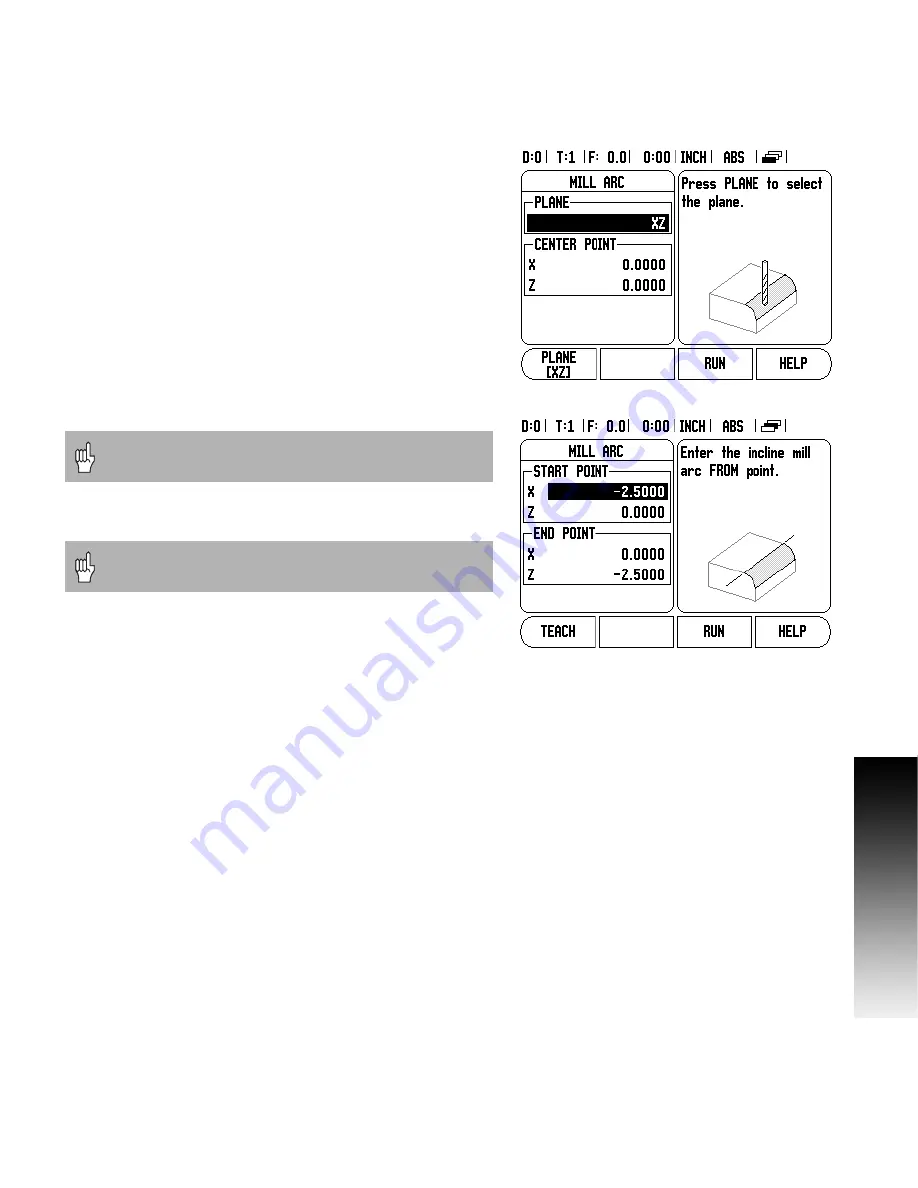
The Arc Milling form is used to specify the curved surface to be milled.
The data is entered through this form, and will allow this feature to be
defined. The following listed fields require data input.
Plane Selection:
Select the plane by pressing the PLANE soft key.
The current selection is shown on the soft key, and in the plane field.
The graphic in the message box aids in selecting the correct plane.
Center Point:
Enter the coordinates of the arc’s center point, or
press TEACH to set the coordinate to the current position.
Start Point:
Enter the coordinates of the start point, or press
TEACH to set the coordinate to current position.
End Point:
Enter the coordinates of the end point, or press TEACH
to set the coordinate to current position.
Step:
Enter the step size. When milling, this is the distance along
the circumference of the arc between each pass, or step along the
arc’s contour.
Press the ENTER, or RUN soft key to execute the surface milling
operation. Press C hard key to exit the feature, saving it for future use.
The Step size is optional. If the value is zero, the operator
decides at run-time how far to move between each step.
The forms will be cleared from memory when ever there
is a power cycle.
Summary of Contents for 200S READOUTS
Page 1: ...200S READOUTS REFERENCE MANUAL ...
Page 2: ......
Page 6: ...iv ...
Page 8: ...vi ...
Page 10: ...viii ...
Page 15: ...1 Operating Instructions ...
Page 58: ...44 I I 4 Turning Specific Operations ...
Page 59: ...45 Technical Information ...
Page 78: ...64 I II 6 Dimensions ...
Page 81: ......


